35
4.8 Measuring on stored images
(
ProX / Pro)
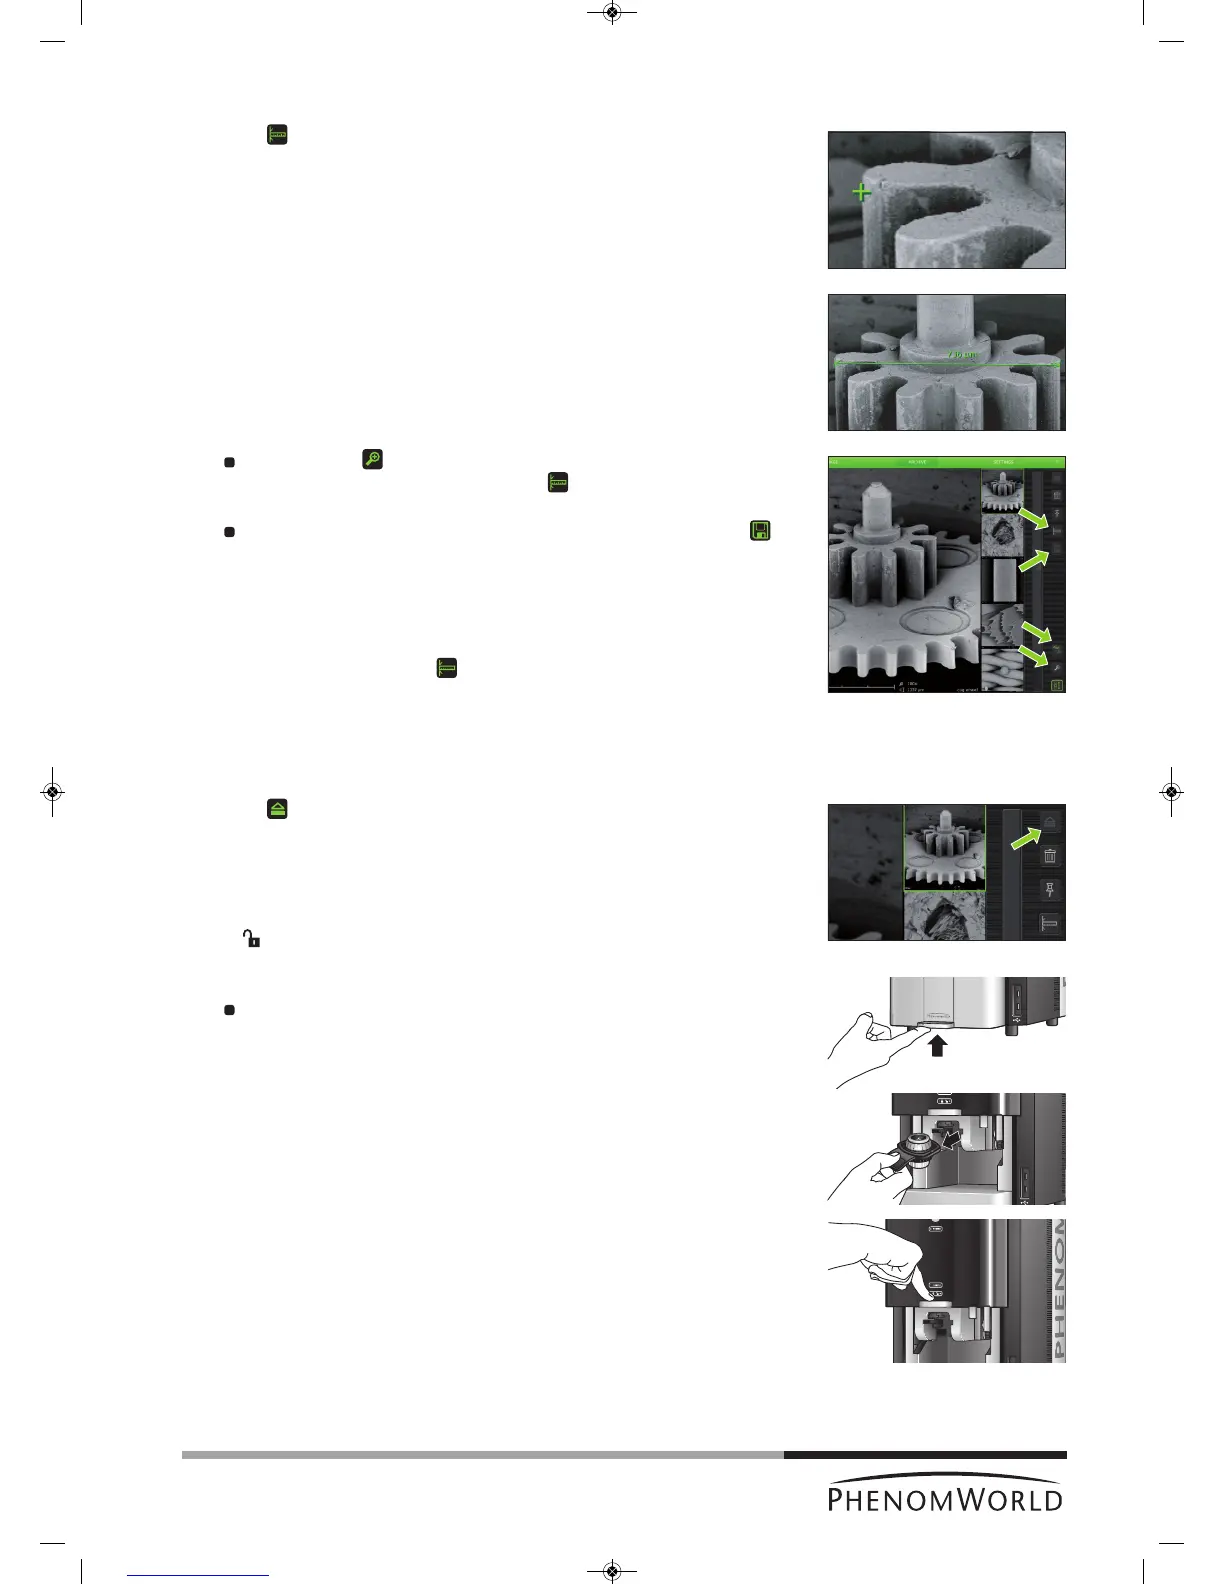
1 Touch (fig. 4,5) to activate the measurement function.
2 Touch the desired starting point at the displayed image.
> The starting point is indicated with a ‘+’.
3 Touch the desired ending point at the displayed image.
> The distance between starting point and ending point is displayed in microns (µm).
If desired, touch (fig. 4,5) to digitally magnify the image (digital zoom) so you
can fine-tune starting and ending point. Use (fig. 4,5) to toggle between
starting and ending point.
If you wish to store a copy of the image with the measurement data, touch
(fig. 4,5) to store the image.
> A copy of the image with the measurement data 'burned in' will be stored at the
selected (storage) location.
> The copy contains colour information so the file size will be bigger than the
original.
>
If the measurement button cannot be selected the image is not suited for
measurement, for example because it was stored as BMP or not made on the
Phenom.
4.9 Unloading the sample
1 Touch (fig. 4,5) to eject the sample and allow the door to be opened.
> ‘Unload: are you sure?’ appears on the screen.
2 Touch ‘4’ to confirm or ‘8’ to cancel.
> After confirmation the sample holder will be brought to the unload position.
> ‘ ’ (3) lights up green, indicating that the door (4) can be opened.
3 Open the door (fig. 1,4) by pushing the handle upward.
Hold the handle and raise the door to its fullest extent.
4 Remove the sample holder and close the door (fig. 1,4) by sliding it down (some initial
force is required).