27
Operation
Note!
4.4 Using the touch screen
All Phenom operation is done via the touch screen buttons (fig. 1,13) and the rotary knob
(fig. 1,9). In general all buttons function in the same way.
1 Touch a button (icon) to activate its function.
2 Move the rotary knob to use the function.
If desired, press ? in the screen selection bar. An information balloon will then
appear when a button is touched.
4.5 Optical imaging
> After the Phenom door (fig. 1,4) is closed, the sample is transferred automatically to
the optical imaging position.
> The optical camera is activated and the image is displayed in the main viewing
window (fig. 3,1) of the Image screen.
> The part of the sample that is magnified in the main viewing window is displayed in
the optical overview window (fig. 3,10).
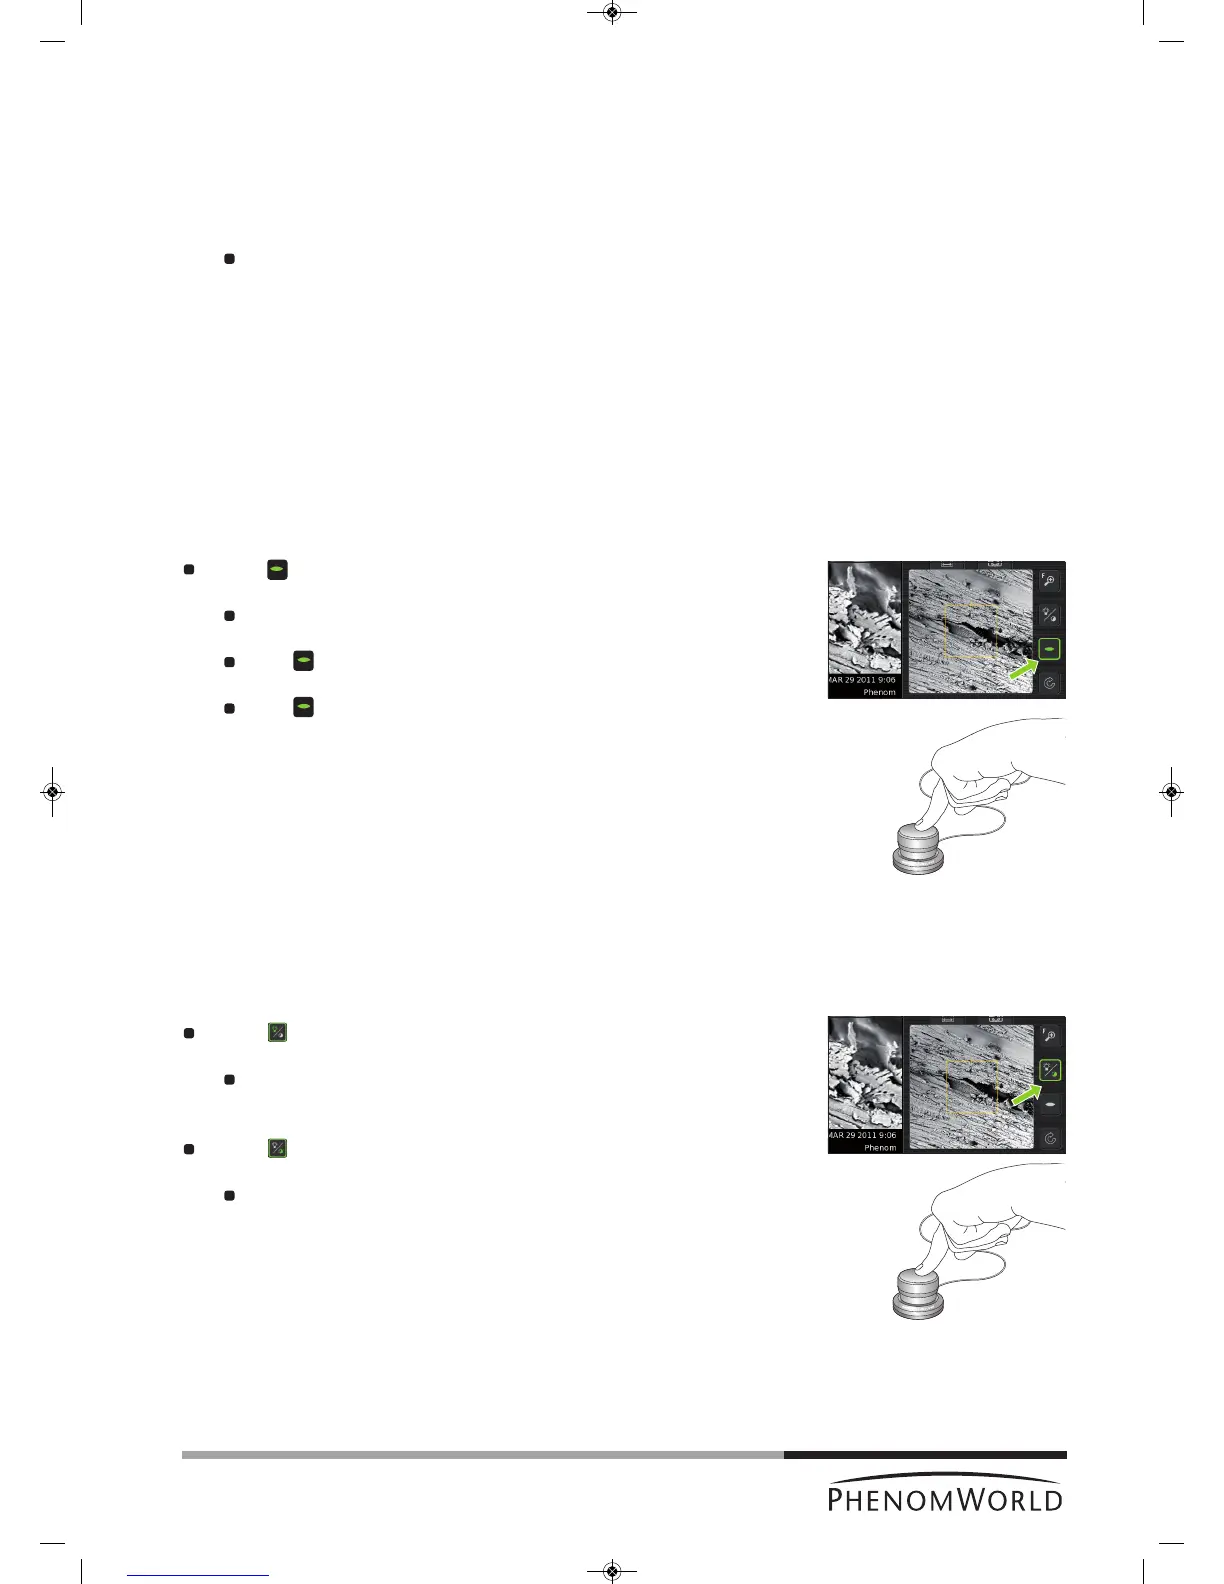
4.5.1 Adjusting focus
Touch (fig. 3,4) to activate focus adjustment.
> A focus slider appears, showing the current focus setting.
Rotate the rotary knob (fig. 1,8) to adjust the focus of the optical image.
> Adjustment is made visible by the slider.
Press (fig. 3,4) or the rotary knob (fig. 1,9) to select fine focus.
> An ‘F’ appears on the button and focus adjustment now takes place in small steps.
Press (fig. 3,4) or the rotary knob (fig. 1,9) again to return to normal (coarse)
focus.
The focus setting at the Navcam position is used to set the initial focus for the SEM
position. A good focus at the Navcam will give a better starting focus and improve the result
of the Auto focus in SEM position.
4.5.2 Adjusting brightness and contrast
Touch (fig. 3,4) to activate brightness adjustment.
> A brightness slider appears, showing the current brightness setting.
Rotate the rotary knob (fig. 1,9) to adjust the brightness of the optical image.
> Adjustment is made visible by the slider.
Touch (fig. 3,4) again to activate contrast adjustment.
> A contrast slider appears, showing the current contrast setting.
Rotate the rotary knob (fig. 1,9) to adjust the overall contrast of the optical image.
> Adjustment is made visible by the slider.
> This adjustment allows the optical image contrast to be changed from direct to
indirect lighting