40
5.2.5 Storing user settings
As for live viewing settings, two sets of user settings can be stored for acquired image
s
ettings.
Touch user 1 and select the desired quality and resolution settings (refer to 5.1.2
‘Quality’ and to 5.1.3 ‘Resolution’).
> The settings will be stored under the user1 button.
If desired, a second set of settings can be stored in the same way under user 2.
When in acquired image mode, press user 1 or user 2 to select the settings stored
under the button.
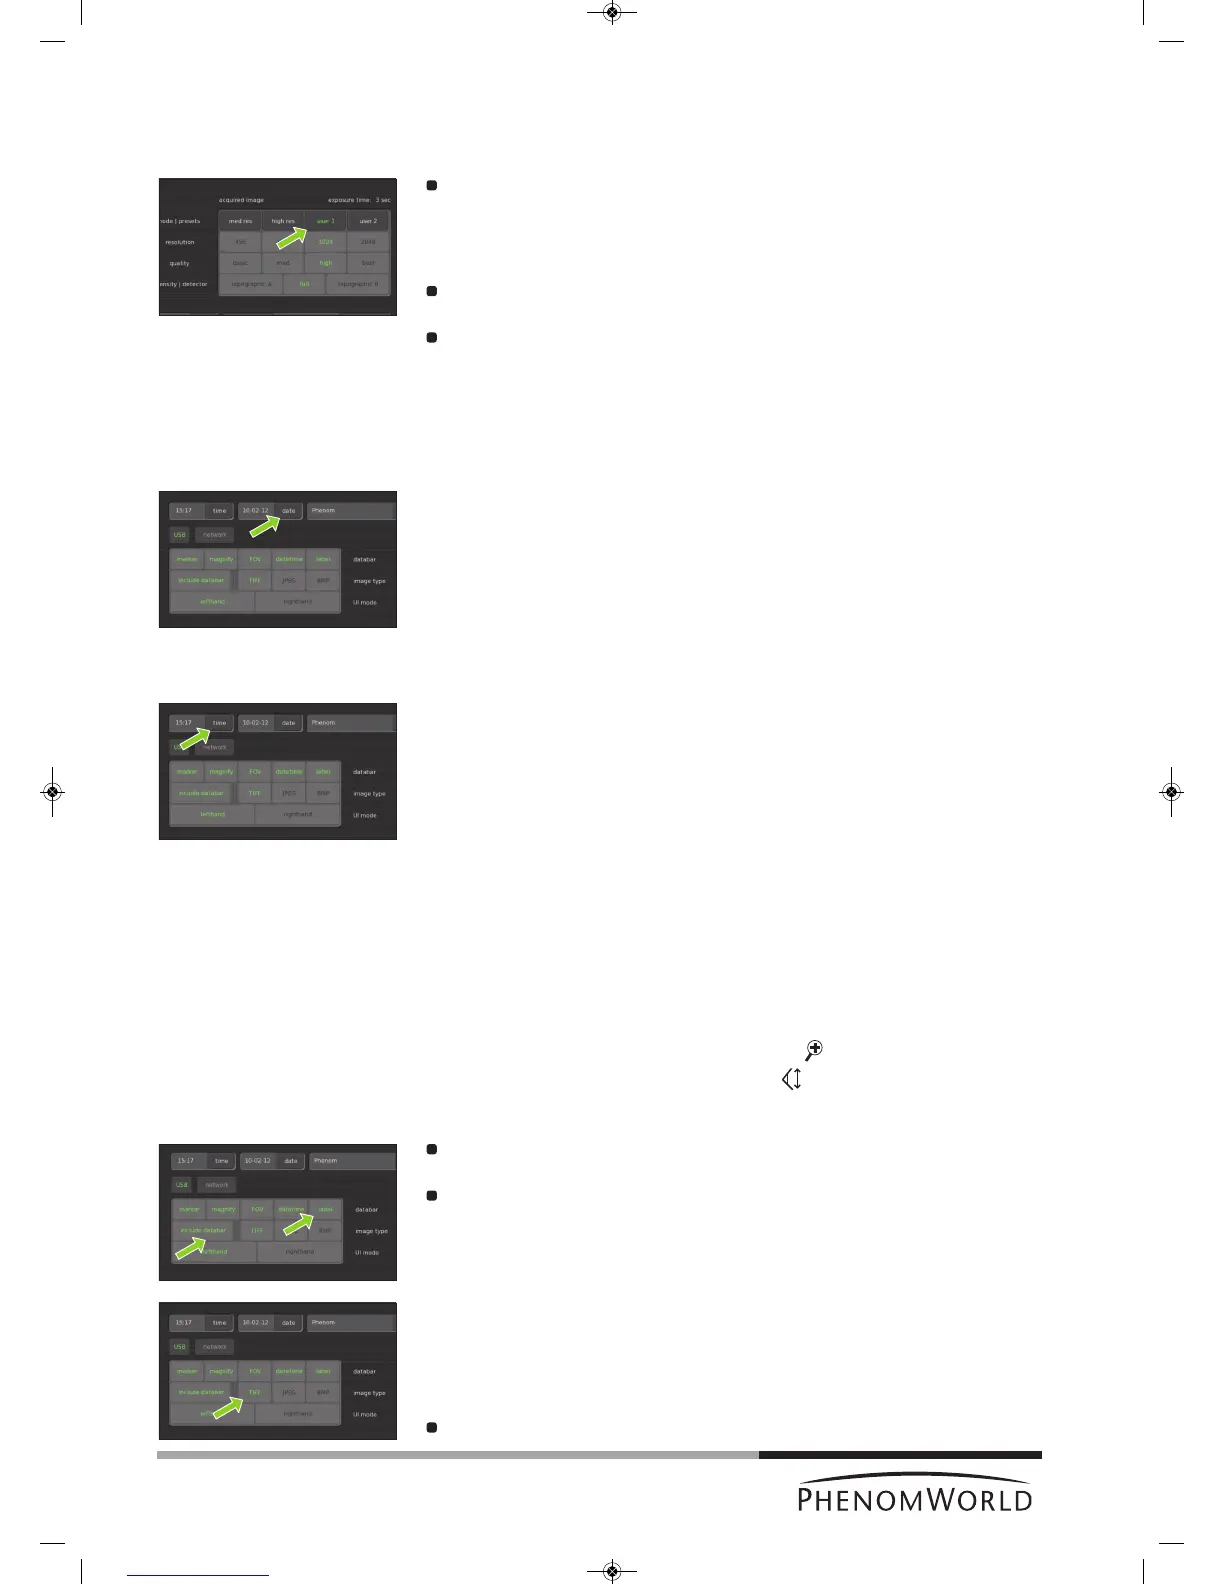
5.3 Date and time
Here you can adjust date (dd-mm-yy format) and time (24 hours format).
5.3.1 Adjusting the date
1 Touch the date button.
>
A keyboard appears on the screen.
2 Enter the correct date.
> The date will be displayed on the screen and on the databar if the datetime function
is enabled. For this refer 5.4.1 ‘Databar’.
3 Touch OK to store the date or CANCEL to quit date adjustment.
5.3.2 Adjusting the time
1 Touch the time button.
> A keyboard appears on the screen.
2 Enter the correct time.
> The time will be displayed on the screen and on the databar if the datetime function
is enabled. For this refer 5.4.1 ‘Databar’.
3 Touch OK to store the time or CANCEL to quit time adjustment.
5.4 Databar / Image type / UI mode
5.4.1 Databar
Here you can select the items that will be displayed on the databar when operating the
Phenom. You can also set the databar to be included in your stored images. The following
items can be displayed on the databar:
marker - µm marker. Shows current active ruler size. E.g. 10 µm.
magnify - shows magnification factor. E.g. 1000 x.
FOV (Field Of View) - shows total picture size. E.g. 10 µm.
datetime - shows date and time.
label - shows sample name
Select the items to be shown on the databar by touching the appropriate buttons
(marker, magnify, FOV, datetime, label).
Touch include databar if you wish the databar to be included in your stored images.
5.4.2 Image type
Here you can select the format you wish to store your images in.
TIFF - Lossless compression, larger file sizes.
JPEG - Lossy compression but smaller file sizes.
BMP - Windows bitmap format; no compression; large files and no measurement data
included.
Select the desired file format by touching the appropriate button (TIFF, JPEG or BMP).