About the ST Measurement Points 7ECG, Arrhythmia, ST and QT Monitoring
125
3
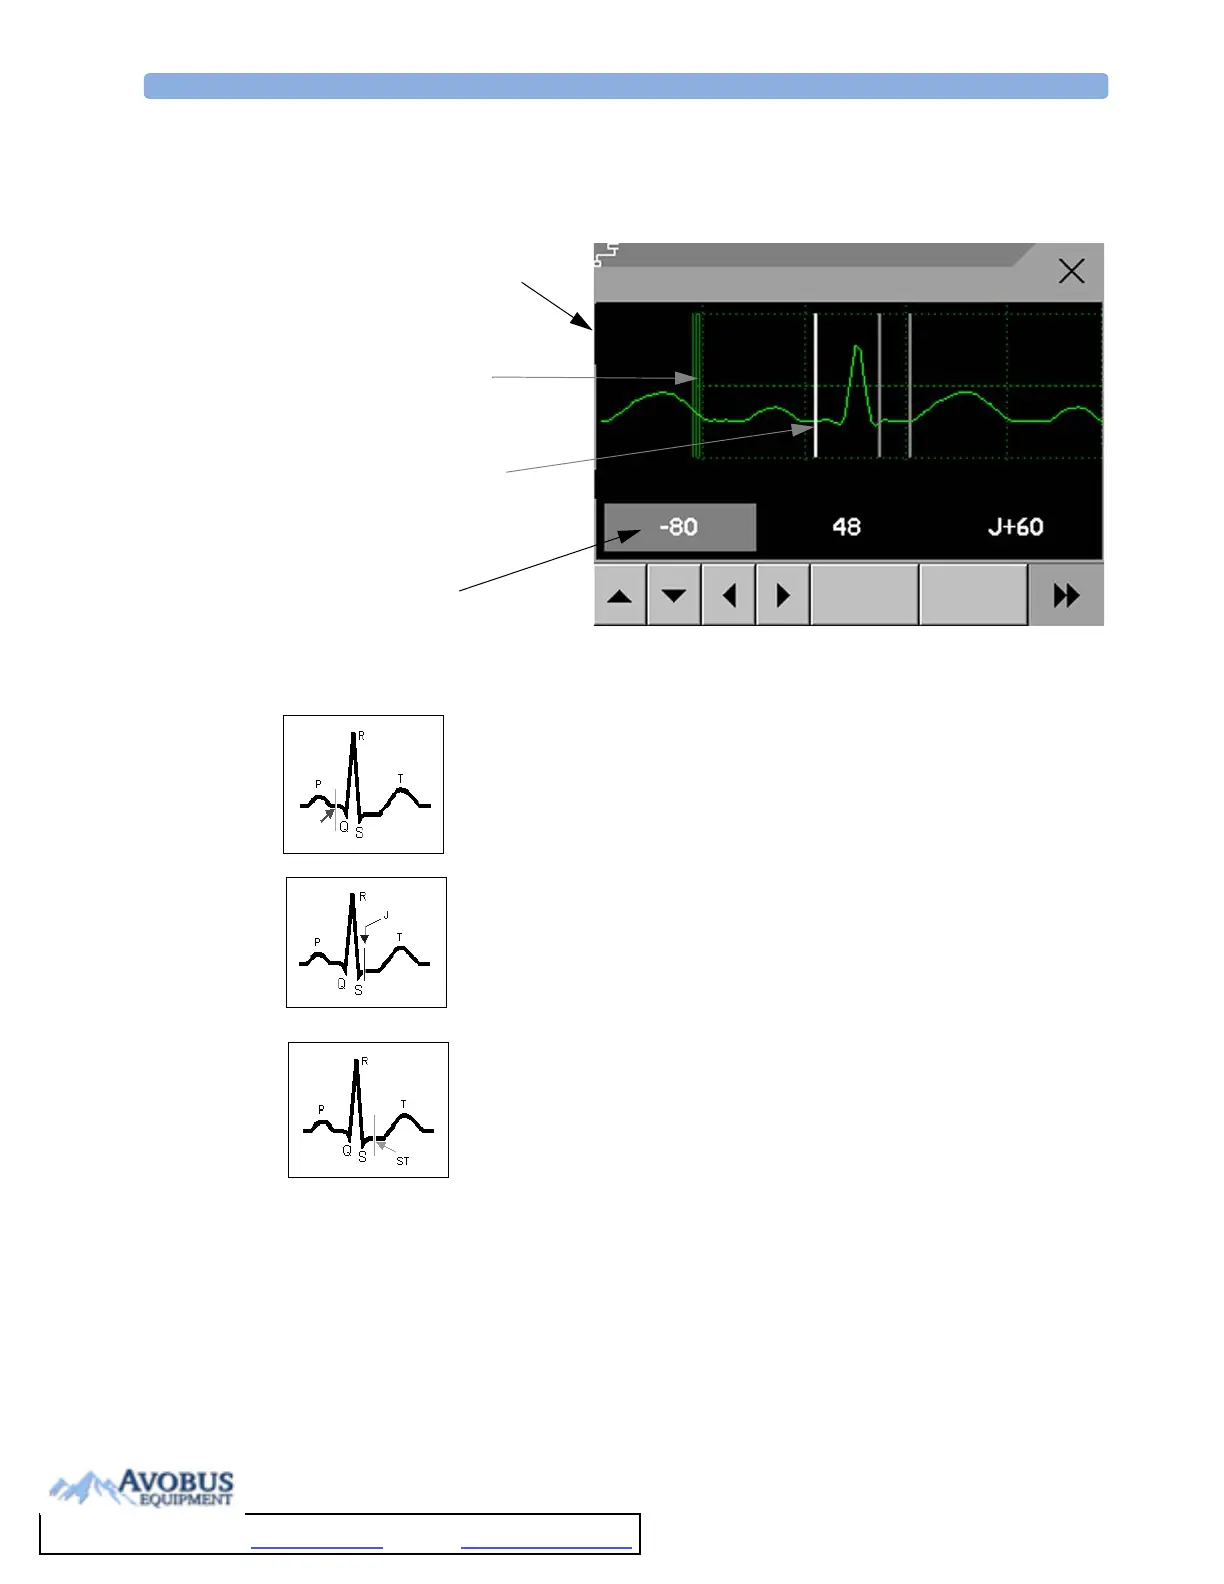
Select the ST point you need to adjust by touching the appropriate point on the screen. The
current choice is highlighted (ISO point -80 in the screen example).
The ISO-point cursor positions the isoelectric point relative to the R-wave
peak. The relation is shown beside the ISO-point in milliseconds. Position the
ISO-point in the middle of the flattest part of the baseline (between the P and
Q waves or in front of the P wave).
The J-point cursor positions the J-point relative to the R-wave peak. It helps
you to correctly position the ST-point. Position the J-point at the end of the
QRS complex and the beginning of the ST segment.
The J-point cursor is not available if your monitor is configured to let you set
the ST point directly.
To p o s i ti on t he S T- p o i n t re l a t i v e t o th e J -po in t:
select either J+60 or J+80. Select JPoint and use the arrow keys
to move the J-Point and position the ST-point at the midpoint of the ST
segment.
To position the ST-point directly:
select ST Point and use the left and right arrow keys to position the ST
point at the midpoint of the ST segment.
4 Select the Apply Changes pop-up key to activate the new ST measurement points and
recalculate all ST values.
The most recent ST Points adjustment time is displayed in the Adjust ST Points window.
This information is cleared when a patient is discharged or when a new Profile is loaded into the
monitor.
1mV calibration bar
ighlighted ST point
ST label and the ST numeric
that would apply using the
current points
Cursors for adjusting ST
points
Adjust ST Points
ST-I
0.1
Update Apply
Changes
1mv 1sec
ST Points adjusted at 04 Apr 07 11:38
ISO
To Purchase, Visit Avobus.com or call 1-800-674-3655

 Loading...