19
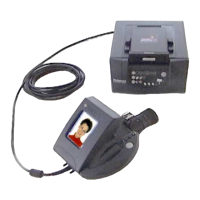
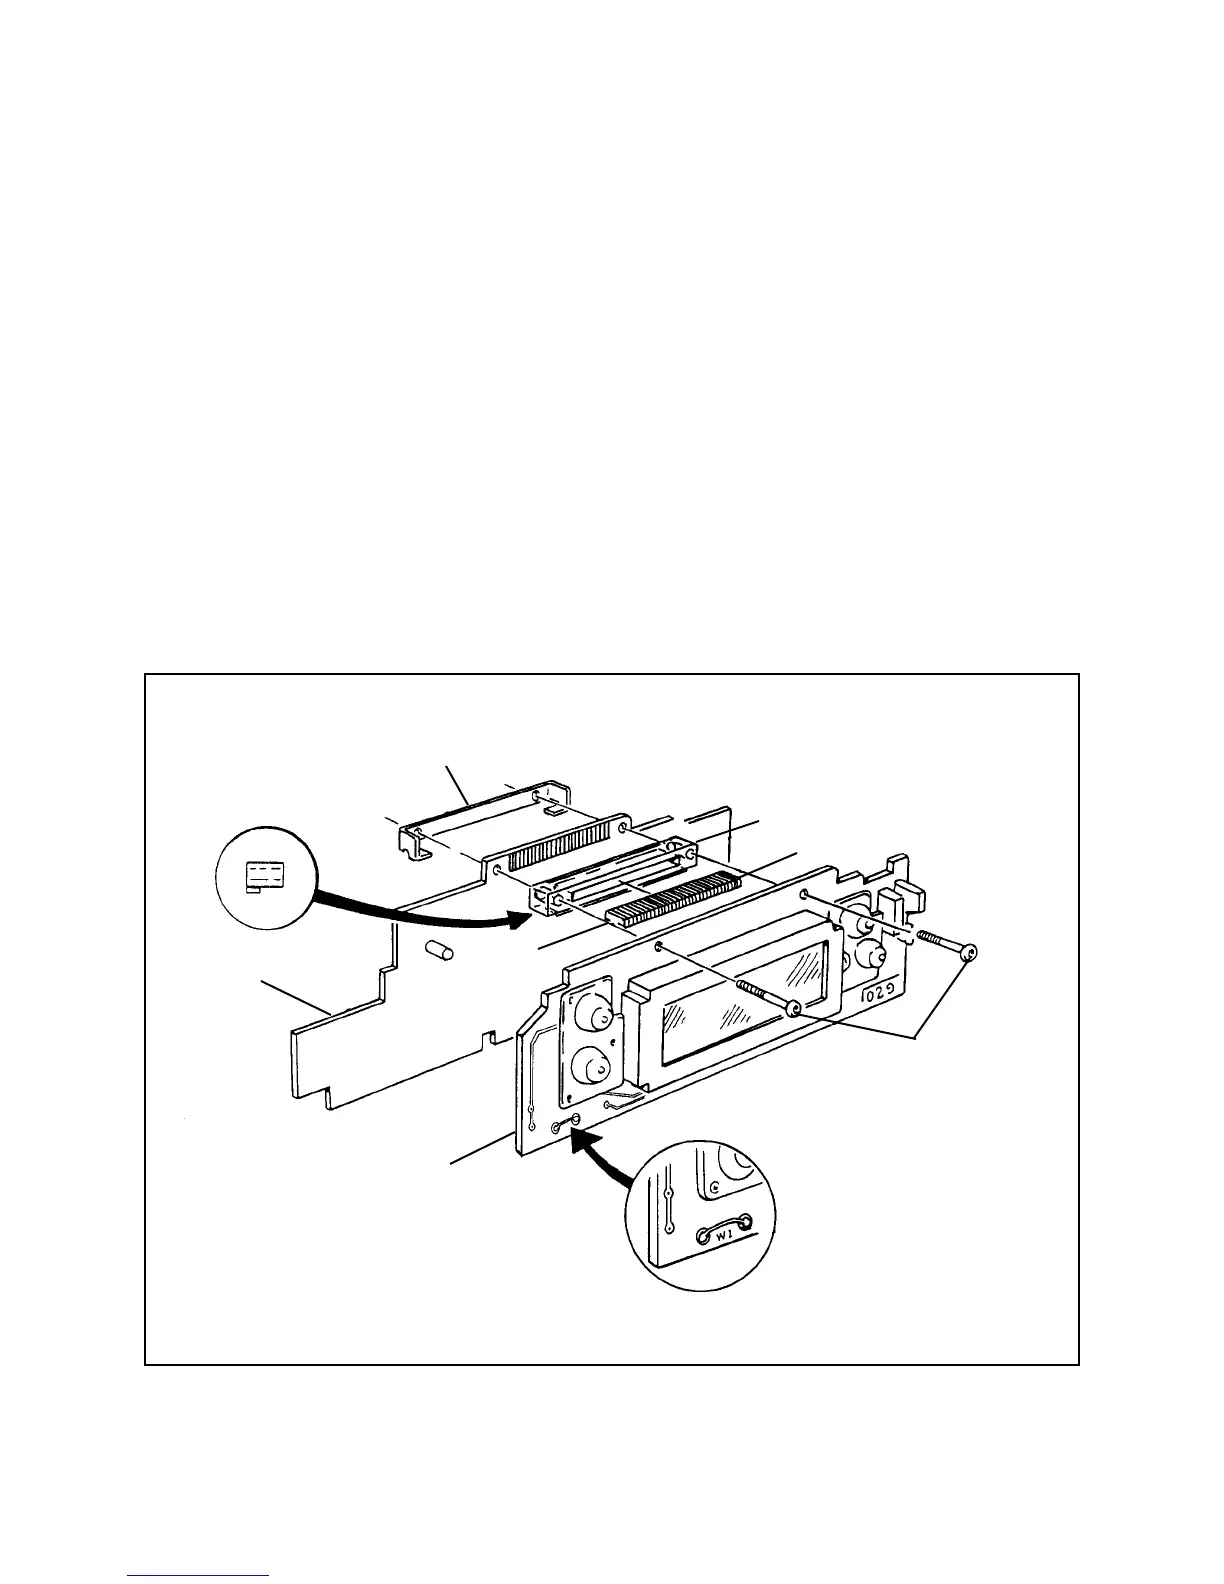
Reconnecting LCD Board to Ranging Board
1. Using your finger, hold the metal retainer (D in Figure 2-10) in place behind the
ranging board.
2. Place the zebra connector (B in Figure 2-10) in the slot in the plastic spacer block
(C), concave side down.
3. Align the holes in spacer block (C) with the holes in the ranging board. Orient the
block as show, with the end notches facing down and the projecting shoulder in the
position shown.
4. Using Torque Limiting Screwdriver, P/N CR 13397, (factory-set for 8 oz-in.) with
Square Bit, P/N CR 13398, install the two mounting screws. Alternatively tighten
each one a small amount until you reach the se torque (screwdriver clutch slips).
Figure 2-10. Replacing LCD board
Ranging Board
D
C
B
A
Warning: Install only with
Torque Limiting screwdriver
(P/N CR 13397) and Square Bit
(P/N CR 13398.
LCD Board
To display distance in metric units,
cut jumper w1.
Concave
Side
 Loading...