THE ART OF WELDING
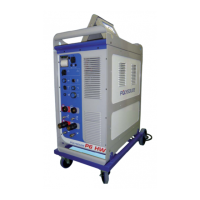
P6
48-92 PN-0509076 Rev. 16
Functions of elements of remote control unit4. 5. 4. 2.
Item Designation
AF 1 2 line 16 character backlight display.
V 1 Red indicator illuminated: Simulation without
arc.
V 2 Green indicator illuminated: Weld mode with
arc.
V 3 Green indicator illuminated: Increment ac-
tions on low level.
V 4 Green indicator illuminated: Increment ac-
tions on high level.
V 3+
V 4
Green and red indicator illuminated: Incre-
ment actions on low and high level.
V 5 Red indicator illuminated: fi ller wire operation
during weld cycle controlled by BT 10.
V 6 Green indicator illuminated: automatic fi ller
wire operation according to programmed
parameters.
BT 1 Push button for line toggling on the display.
BT 2 Push button to move down in the WP or
program list or to decrease a numeric value.
After 1 s of continued pushing, the automatic
mode is applied.
BT 3 Push button to move up in the WP or pro-
gram list or to increase a numeric value.
After 1 s of continued pushing, the automatic
mode is applied.
BT 4 Out of cycle: push button to toggle between
simulation without arc and weld mode with
arc (associated with V 1 & V 2).
BT 5 Push button to toggle between increment ac-
tions on low level, increment actions on high
level or increment actions on both levels (as-
sociated with V 3 & V 4).
BT 6 Out cycle : Press the button BT 6 “I-” of
the remote control pendant during several
seconds. On the display of the remote control
pendant appears:
>IPAdress
Tacho
Select “IP Adress” with the button BT 1.
Confi rm the selection with the button BT 3
“N+”.
Modifi cation of the IP address. The IP address
is in the form of four numeric blocks that can be
modifi ed by BT 2 and BT 3. Moving from one
block to another is effected by a pulse on BT 1.
Once you have reached the last block, press-
ing once more on BT 1 stores the new entry in
memory and terminates the IP address modifi -
cation procedure
During a weld cycle: Decrementation of the weld
current level selected with BT 5.
BT 7 For a weld cycle: Incrementation of the
weld current level selected with BT 5.
Item Designation
BT 8 Push button operating in two modes:
Out of cycle: Manual rotation rearwards at
low speed for 1 s, at medium speed for 2 s,
afterwards at full speed.
For a weld cycle: Decrementation of the
rotation speed level selected with BT 5.
BT 9 Push button operating in two modes:
Out of cycle: Manual rotation forwards at
low speed for 1 s, at medium speed for 2 s,
afterwards at full speed.
For a weld cycle: Incrementation of the
rotation speed level selected with BT 5.
BT 10 Push button operating in two modes:
Out of cycle in automatic mode (V 6 il-
luminated): Manual wire feeding forwards at
low speed for 1 s, at medium speed for 2 s,
afterwards at full speed.
Out of cycle in manual mode (V 5 illumi-
nated): The fi rst press starts wire feeding at
high speed, the second press stops it.
For a weld cycle: Incrementation of the
wire feeding speed level selected with BT 5.
BT 11 Push button operating in two modes:
Out of cycle: Manual wire feeding rearwards
at low speed for 1 s, at medium speed for 2
s, afterwards at full speed.
For a weld cycle: Decrement the wire feed-
ing speed level selected with BT 5.
BT 12 Push button to toggle between the automatic
wire feeding mode (indicator V 6 illuminated)
or the manual wire feeding mode (indicator
V 5 illuminated).
BT 13 Push button operating in two modes:
Out of cycle: coolant pump, gas 1 and gas 2
commands.
For a weld cycle: Manual cycle stop with
downslope.
BT 14 Push button «Start cycle with restart».
BT 15 Push button "Start cycle".
BT 16 Push button "Stop cycle immediately".
BT 18 Push button operating in two modes:
Out of cycle: Raise torch.
For a weld cycle : Increment torch height.
BT 19 Push button operating in two modes:
Out of cycle : Lower torch.
For a weld cycle : decrement torch height.
BT 20
Push button to choose function in loop.
Suspension of the AVC (V 10 illuminated). -
Running of the AVC (V 9 illuminated). -
Function not available
BT 21
Push button to choose delta corrections.
In amplitude "A" ( - V 7 illuminated).
In time "T" ( - V 8 illuminated).
BT 22
Push button operating in two modes:
Out of cycle: torch oscillation with self-center-
ing.
For a weld cycle: Decrease of the oscillation in
amplitude or in time according to BT 21 position.
BT 23
Push button operating in two modes:
Out of cycle: no action.
For a weld cycle: Increase of the oscillation in
amplitude or in time according to BT 21 position.
BT 24
Push button to off-set torch to the left.
BT 25
Push button to off-set torch to the right.