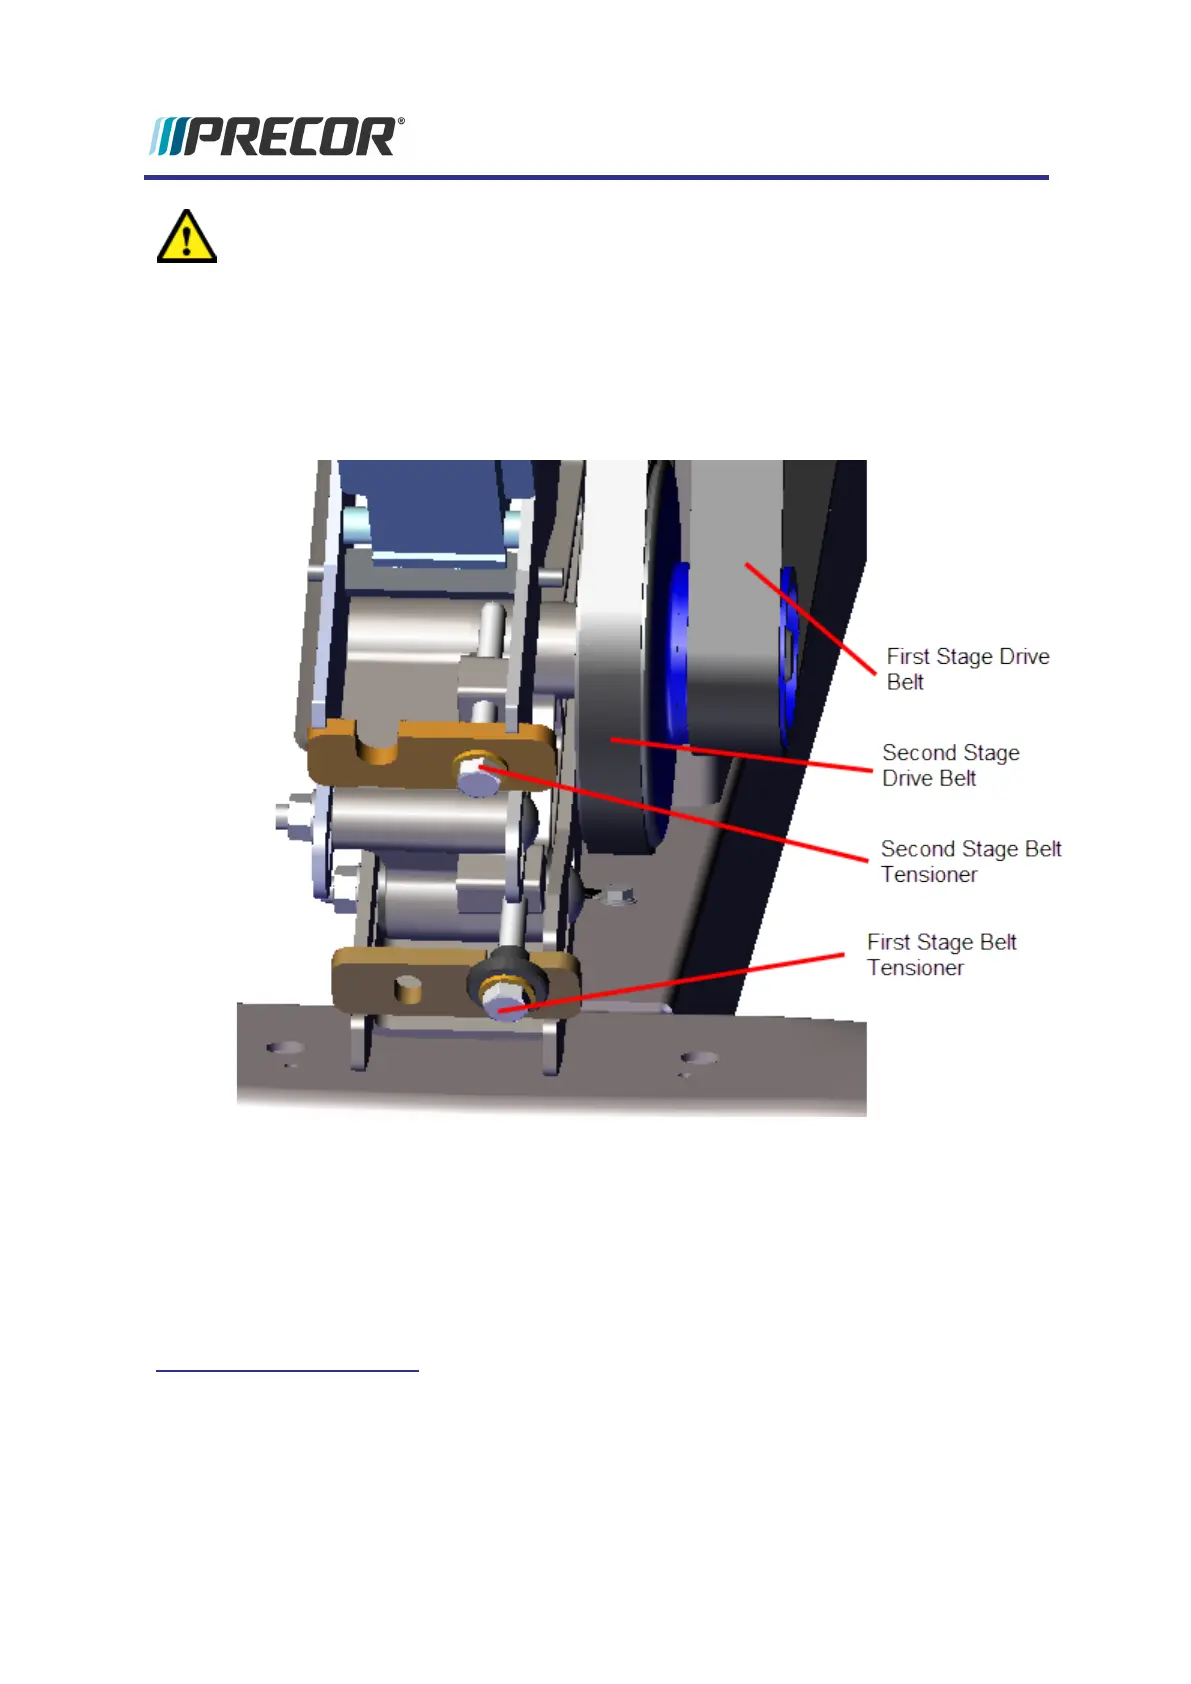
CAUTION:Make sure to that the two Drive Components Assembly fastener nuts
are loosened before adjusting the tensioner. The tensioner hardware can be dam-
aged by over tightening the adjustment bolt.
7. Use the crankarm to move the belt a couple of rotations. Place the belt tension gauge
onto the first stage drive belt midway between the two pulleys and measure the tension.
Verify that the belt tension is within [[[Undefined variable EFX800-16Base.spec-
BeltTensionFirstStage-12]]]. If the tension is not within specification repeat the tension
adjustment procedure.
8. Use a 1/2" socket to tighten the two Drive Components Assembly fasteners (left side),
torque fasteners to [[[Undefined variable EFX800-16Base.spec-DriveAssyBolts]]].
9. Reinstall the left drive disk cover, see "Drive Disk Covers Replacement" on page57.
10. Reinstall the Drive Access Cover, see "Drive Access Cover Replacement" on page56.
11. Verify machine operation and return to service.
See Also
"Second Stage Drive Tension Adjustment" on the next page
Experience Series 800 Line EFX
35
4 Adjustment Procedures
First Stage Drive Belt Tension Adjustment
 Loading...