7. Use a 1/2" socket to loosen the first stage belt tensioner and walk the first stage drive
belt off the pulleys. Retain belt for installation.
8. Use a 1/2" socket to remove the first stage tensioner hardware (adjustment bolt,
washer, isolator bushing, and tensioner tug plate). Retain fastener hardware for install-
ation.
9. Use a 1/2" socket to remove the two Drive Components Assembly carriage bolt fasten-
ers. Remove the rear (lower) bolt first and then slide the Drive Components Assembly
downward to create room to remove the forward (upper) bolt. Remove the Drive Com-
ponents Assembly. Retain fastener hardware for installation.
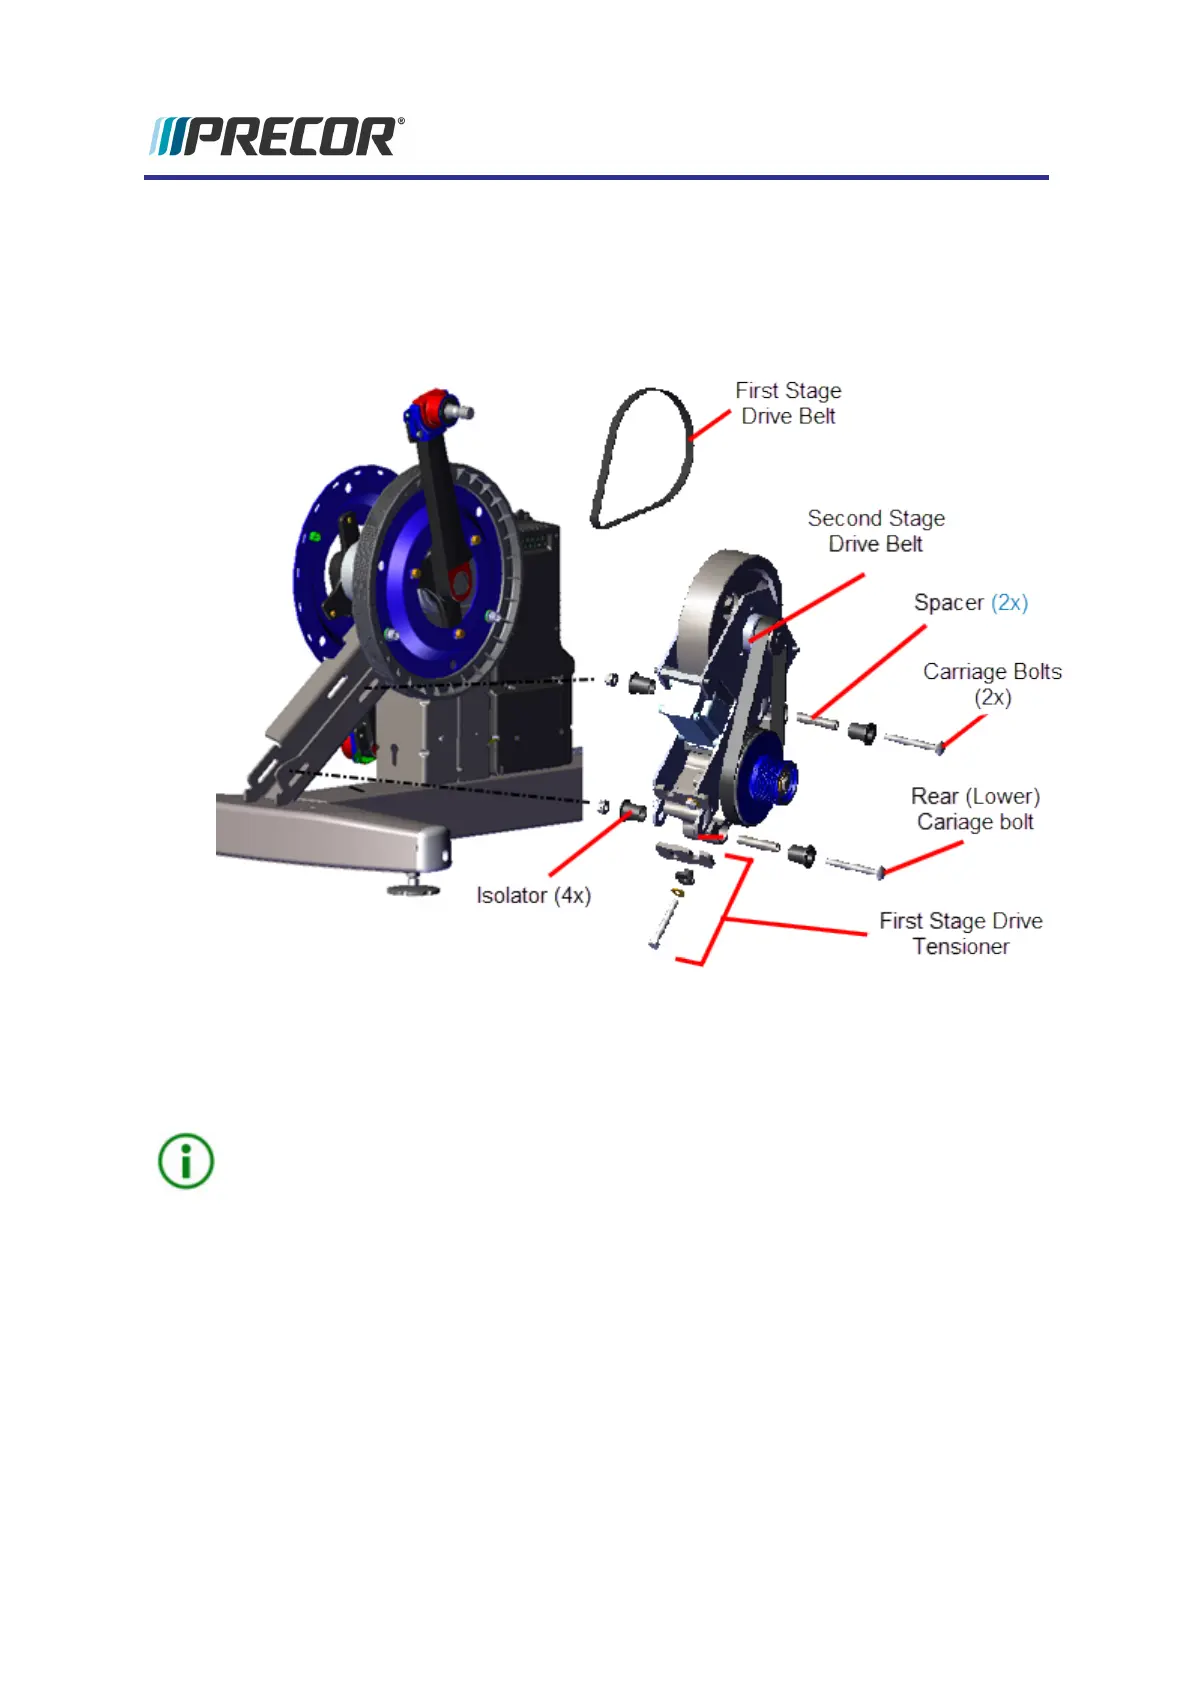
TIP: The Step-up Pulley and Tensioner mounting hardware (spacers and isolators)
can easily fall out of the mounting holes. Take care to keep track of these components
for installation, see "Step-upPulley and Tensioner Assembly Exploded View" on
page83.
Installation Instructions
1. Prepare the Drive Components Assembly for installation:
a. If the Drive Components Assembly is disassembled, install the Generator and
Eddy Brake Assembly onto the Step-up Pulley andTensioner Assembly using
the two Carriage bolt fasteners.
b. Tighten the carriage bolts enough to keep the carriage bolt heads inserted into
the mounting slot but do not fully tighten.
Experience Series 800 Line EFX
89
5 Replacement Procedures
Drive Components Assembly Replacement
 Loading...