c. Walk the second stage drive belt onto the second stage pulleys. Tighten the ten-
sioner enough to hold the tensioner hardware and belt in position. The belt will be
properly tensioned after the Drive Components Assembly is installed.
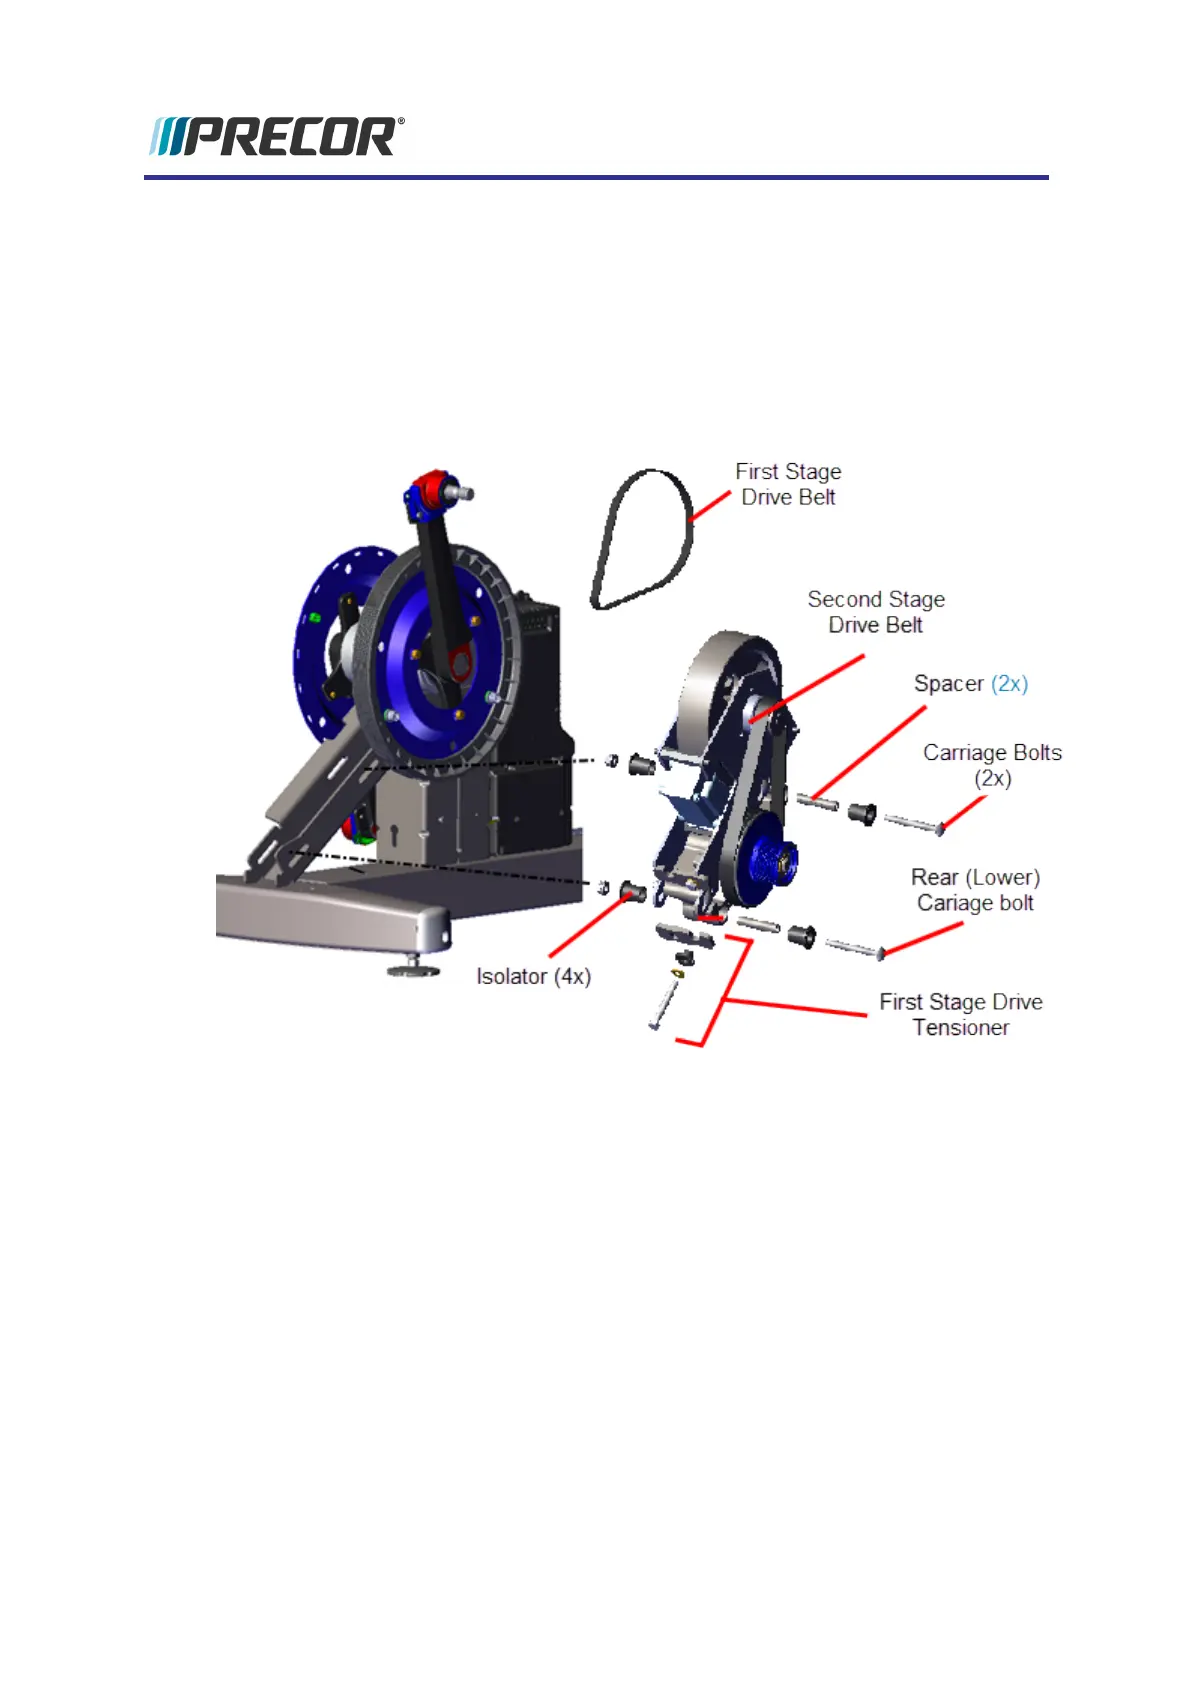
2. Reinstall the Drive Components Assembly onto the drive weldment mounting bracket.
Make sure that the Step-up Pulley and Tensioner Assembly mounting hardware is cor-
rectly installed, see the exploded view above. Install the upper (forward) carriage bolt
first and then the lower (rear) carriage bolt. Tighten the bolts enough to keep the car-
riage bolt heads inserted into the mounting slot but do not fully tighten.
3. Install the first stage tensioner hardware (adjustment bolt, washer, isolator bushing, and
tensioner tug plate). Tighten the tensioner bolt enough to hold the hardware in place.
4. Adjust the tensioner as necessary to walk the first stage drive belt onto the first stage pul-
leys. Rotate the crank and make sure that both the first and second stage drive belts are
properly aligned and seated in the pulley grooves. Tighten both tensioner adjustment
bolts enough to hold the tensioner hardware and belts in position.
Experience Series 800 Line EFX
90
5 Replacement Procedures
Drive Components Assembly Replacement
 Loading...