Prontonet User’s Manual v410 9
Installation Guide
This chapter describes the ProntoNet hardware and user installation.
The installation and servicing instructions in this manual are for use by qualified personal.
II.1 Initial checks
Before unpacking unit check its packaging for any signs of damage or
mishandling during transportation, report any damage to the shipping company
immediately. Unpack the unit carefully, if you find any damage or the unit does
not work correctly, you should contact Prodys or its distributor as soon as
possible.
II.2 Installation
The ProntoNet is designed to be housed in a standard 19” rack. The unit is
44.45mm high (1U, or 1.75 inches). When choosing a suitable place for
installation, please bear the following in mind:
The position must allow for easy connection of cables to the back of
the unit.
The front panel must also be accessible, both for connections and to
be able to see the Display, keyboard and LED indicators.
The air vents must not be obstructed
We do not recommended that the unit is mounted directly above
other equipment, especially ones that generate a lot of heat.
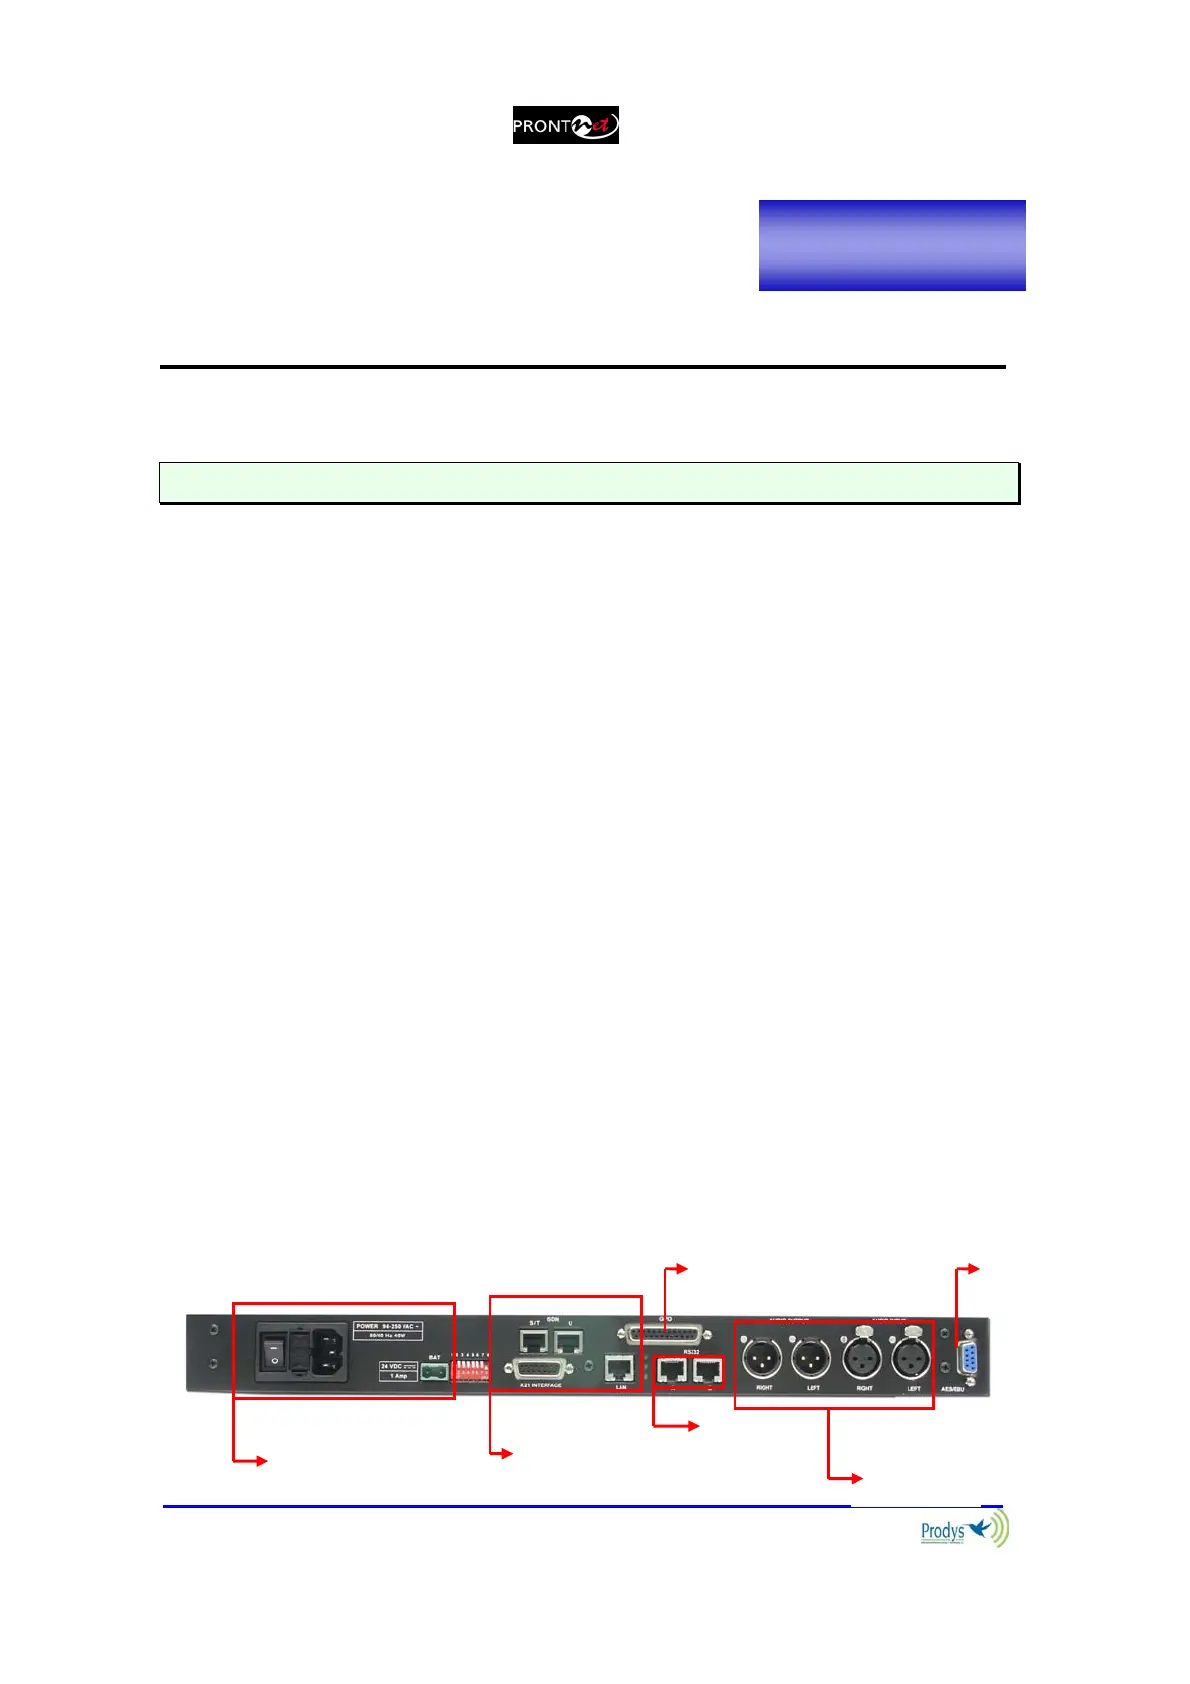
II.3 The rear panel
The majority of the connections of the ProntoNet are found on the back panel.
They are grouped together according to their function, as below:
11
AES/
EBU
Power
communication
interfaces
GPIO Port
RS232
Port
Audio
(analog)
Chapter II