12.4 Fishnder display modes
Selecting a shnder display mode
When a shnder preset is selected, its softkey label changes to
ADJUST. Pressing this softkey allows you to congure the display
mode settings to suit your requirements. (Changes to the display
mode are saved with the preset at power-off.)
From the shnder main screen:
1. Use the softkeys to select an appropriate preset.
The softkey name changes to ADJUST...
2. Select the ADJUST... softkey.
3. With dual frequency screens select FREQ1 or FREQ2 to select
which frequency display you wish to change.
4. Select the SELECT VIEW softkey.
5. Select the required display mode:
• None,
• Zoom,
• Bottom Lock or
• A-Scope.
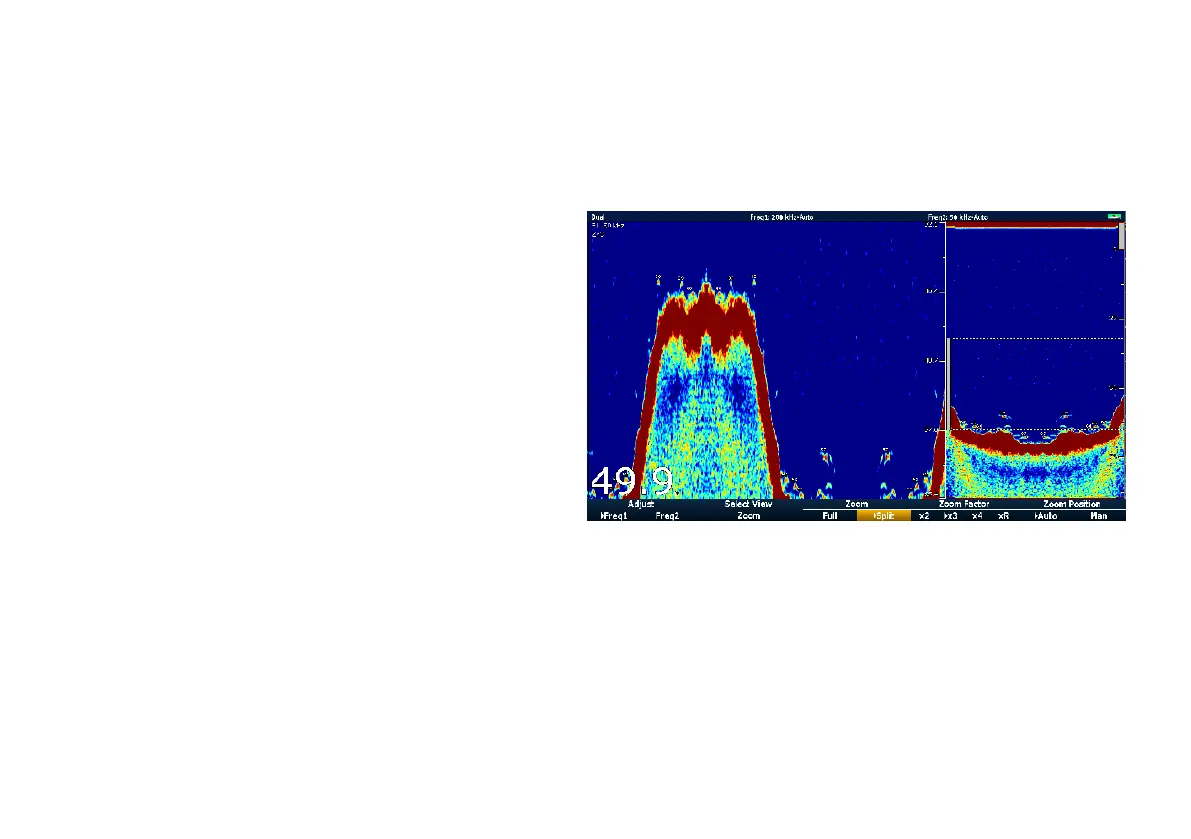
Fishnder zoom mode
The zoom display mode magnies a region of the shnder screen
to display more detail.
This zoom option enables you to:
• Replace the standard shnder image with the zoomed image,
or display the zoomed image alongside the standard shnder
image.
• Set the zoom factor to a predened level, or adjust it manually.
• Reposition the zoomed portion of the image to a different point
in the display.
When the range increases, the area shown in the zoom window
also increases.
Zoom split
With the zoom display mode you can split the screen and display
the zoomed image alongside the standard shnder image (ZOOM
SPLIT). The zoomed section is indicated on the standard shnder
screen by a zoom box.
Enabling shnder zoom mode
From the shnder main screen:
1. Use the softkeys to select an appropriate preset.
The softkey name changes to ADJUST...
2. Select the ADJUST... softkey.
3. With dual frequency screens select FREQ1 or FREQ2 to select
which frequency display you wish to change.
4. Select the SELECT VIEW softkey.
5. Select the ZOOM option.
174
E-Series Widescreen User reference
 Loading...