10A-146
ENGINE AND CYLINDER BLOCK ASSEMBLY
Engine/gearbox assembly: Removal - Refitting
F4R
10A
-the front left-hand wheel driveshaft (see Front left-
hand wheel driveshaft: Removal - Refitting)
(29A, Driveshafts),
-the differential output seals (see Differential out-
put seal: Removal - Refitting) (21A, Manual gear-
box),
-the lower engine tie-bar (see 19D, Engine moun-
ting, Lower engine tie-bar: Removal - Refitting,
page 19D-33) ,
-the connecting hose (see 19B, Exhaust, Connec-
ting hose: Removal - Refitting, page 19B-60) ,
-the front impact cross member (see Front impact
cross member: Removal - Refitting) (41A, Front
lower structure),
-the upper air deflector,
-the side air deflectors,
-the audible warning (see Horn: Removal - Refit-
ting) (82B, Horn),
-the headlights (see Front headlight: Removal -
Refitting) (80B, Headlights),
-the front bumper mountings (see Front bumper
support: Removal - Refitting) (42A, Front upper
structure),
-the bonnet catch (see Bonnet latch: Removal -
Refitting) (52A, Non-side opening element mecha-
nisms).
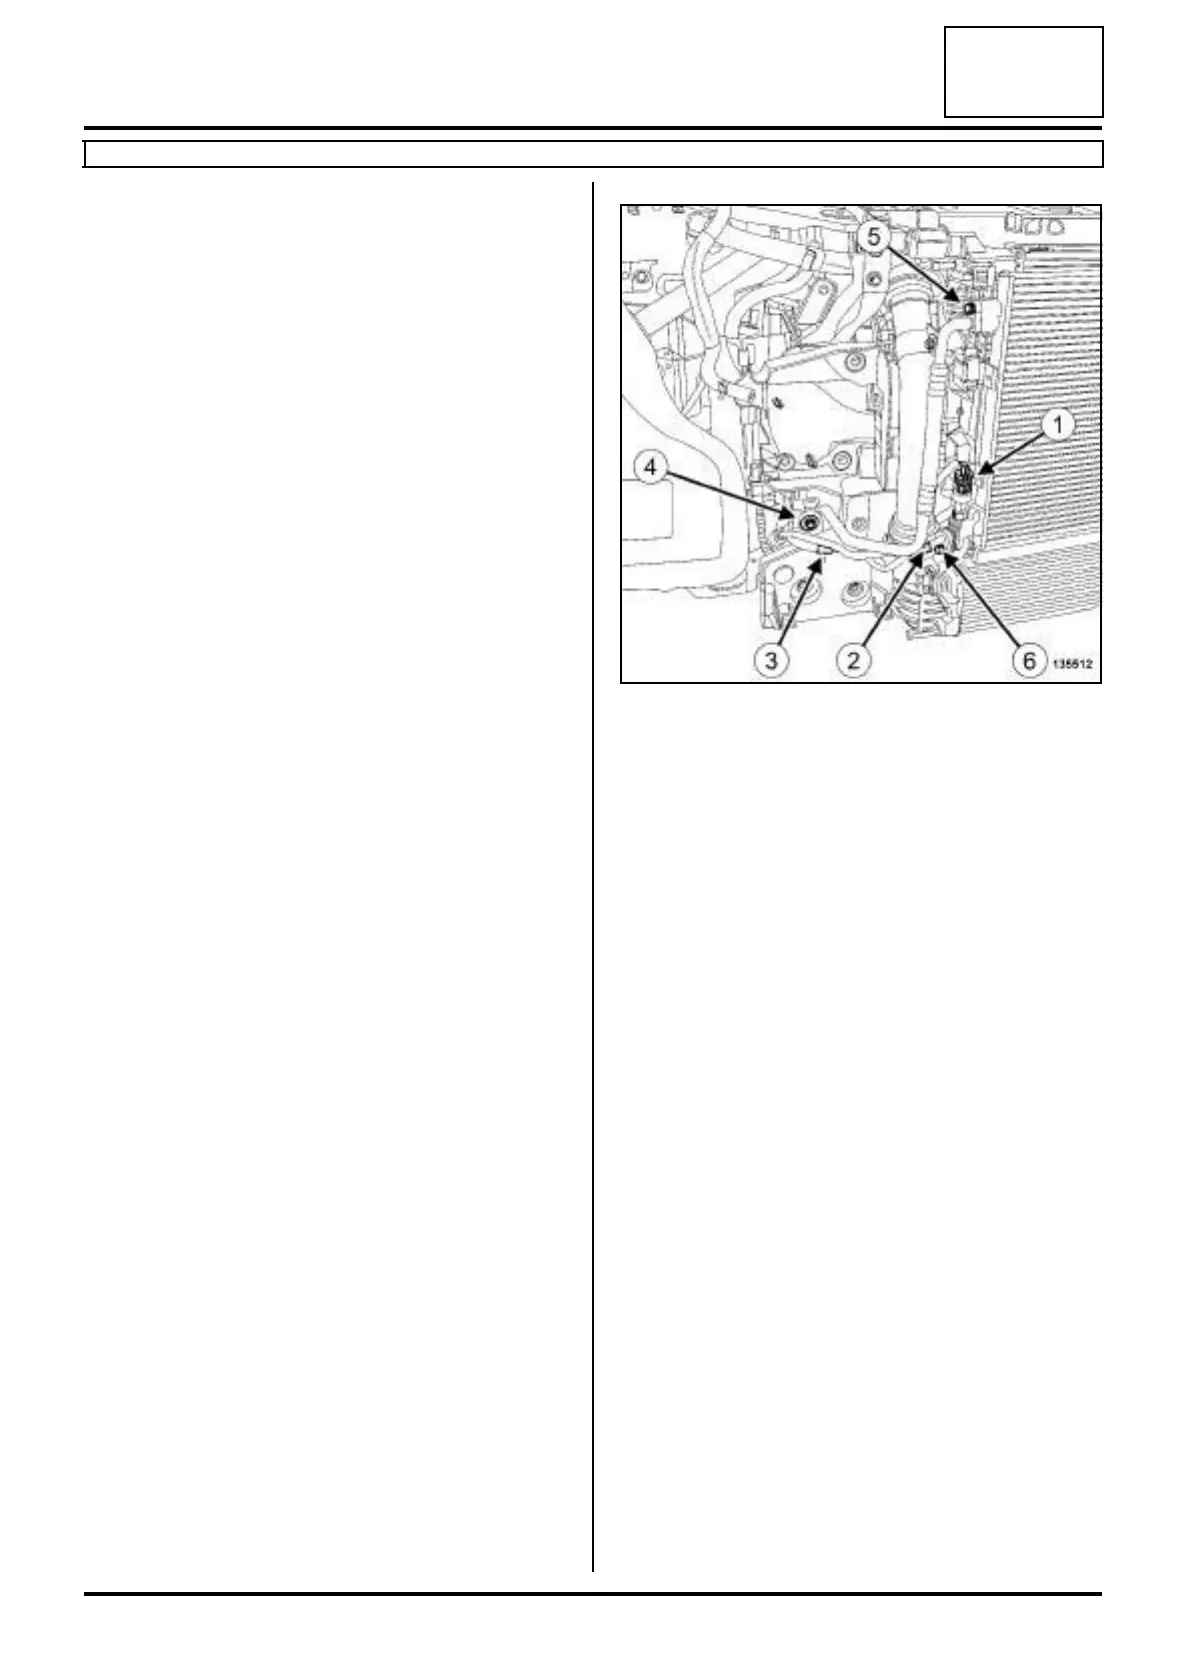
a Disconnect the connector (1) from the refrigerant cir-
cuit pressure sensor.
a Unclip:
- the refrigerant circuit pressure sensor wiring from
the « condenser - expansion valve » connecting
pipe at (2) ,
- the refrigerant circuit pressure sensor wiring from
the front end panel at (3) .
a Move aside the refrigerant circuit pressure sensor
wiring.
a Remove:
- the retaining bolt (4) of the « compressor -
condenser » connecting pipe from the body,
- the bolt (5) of the « compressor - condenser » con-
necting pipe bracket from the condenser.
a Disconnect the « compressor - condenser » connec-
ting pipe from the condenser.
a Remove the seal of the « compressor - condenser »
connecting pipe on the condenser side.
a Insert the blanking plugs.
a Remove the bolt (6) from the « condenser - expan-
sion valve » connecting pipe.
a Disconnect the « condenser - expansion valve »
connecting pipe from the condenser.
a Remove the seal of the « condenser - expansion
valve » connecting pipe on the condenser side.
a Insert the blanking plugs.
135512