13B-30
DIESEL INJECTION
High pressure pump: Removal - Refitting
K9K, and 832
13B
REMOVAL
I - REMOVAL PREPARATION OPERATION
a Position the vehicle on a two-post lift (see Vehicle:
Towing and lifting) (02A, Lifting equipment).
a Disconnect the battery (see Battery : Removal -
Refitting) (80A, Battery).
a Remove:
-the engine cover,
-the front right-hand wheel (see Wheel: Removal -
Refitting) (35A, Wheels and tyres),
-the front section of the front right-hand wheel arch
liner (see Front wheel arch liner: Removal - Re-
fitting) (55A, Exterior protection),
-the engine undertray bolts,
- the engine undertray,
- the accessories belt (see 11A, Top and front of
engine, Accessories belt: Removal - Refitting,
page 11A-7) ,
- the crankshaft accessories pulley (see 11A, Top
and front of engine, Crankshaft accessories
pulley: Removal - Refitting, page 11A-15) ,
-the windscreen wiper arms (see Windscreen wi-
per arm: Removal - Refitting) (85A, Wiping -
Washing),
- the scuttle panel grille (see Scuttle panel grille:
Removal - Refitting) (56A, Exterior equipment),
- the scoop under the scuttle panel grille (see Scoop
under scuttle panel grille: Removal - Refitting)
(56A, Exterior equipment),
- the right-hand suspended engine mounting (see
19D, Engine mounting, Right-hand suspended
engine mounting: Removal - Refitting, page
19D-18) ,
- the timing belt (see 11A, Top and front of engine,
Timing belt: Removal - Refitting, page 11A-29) .
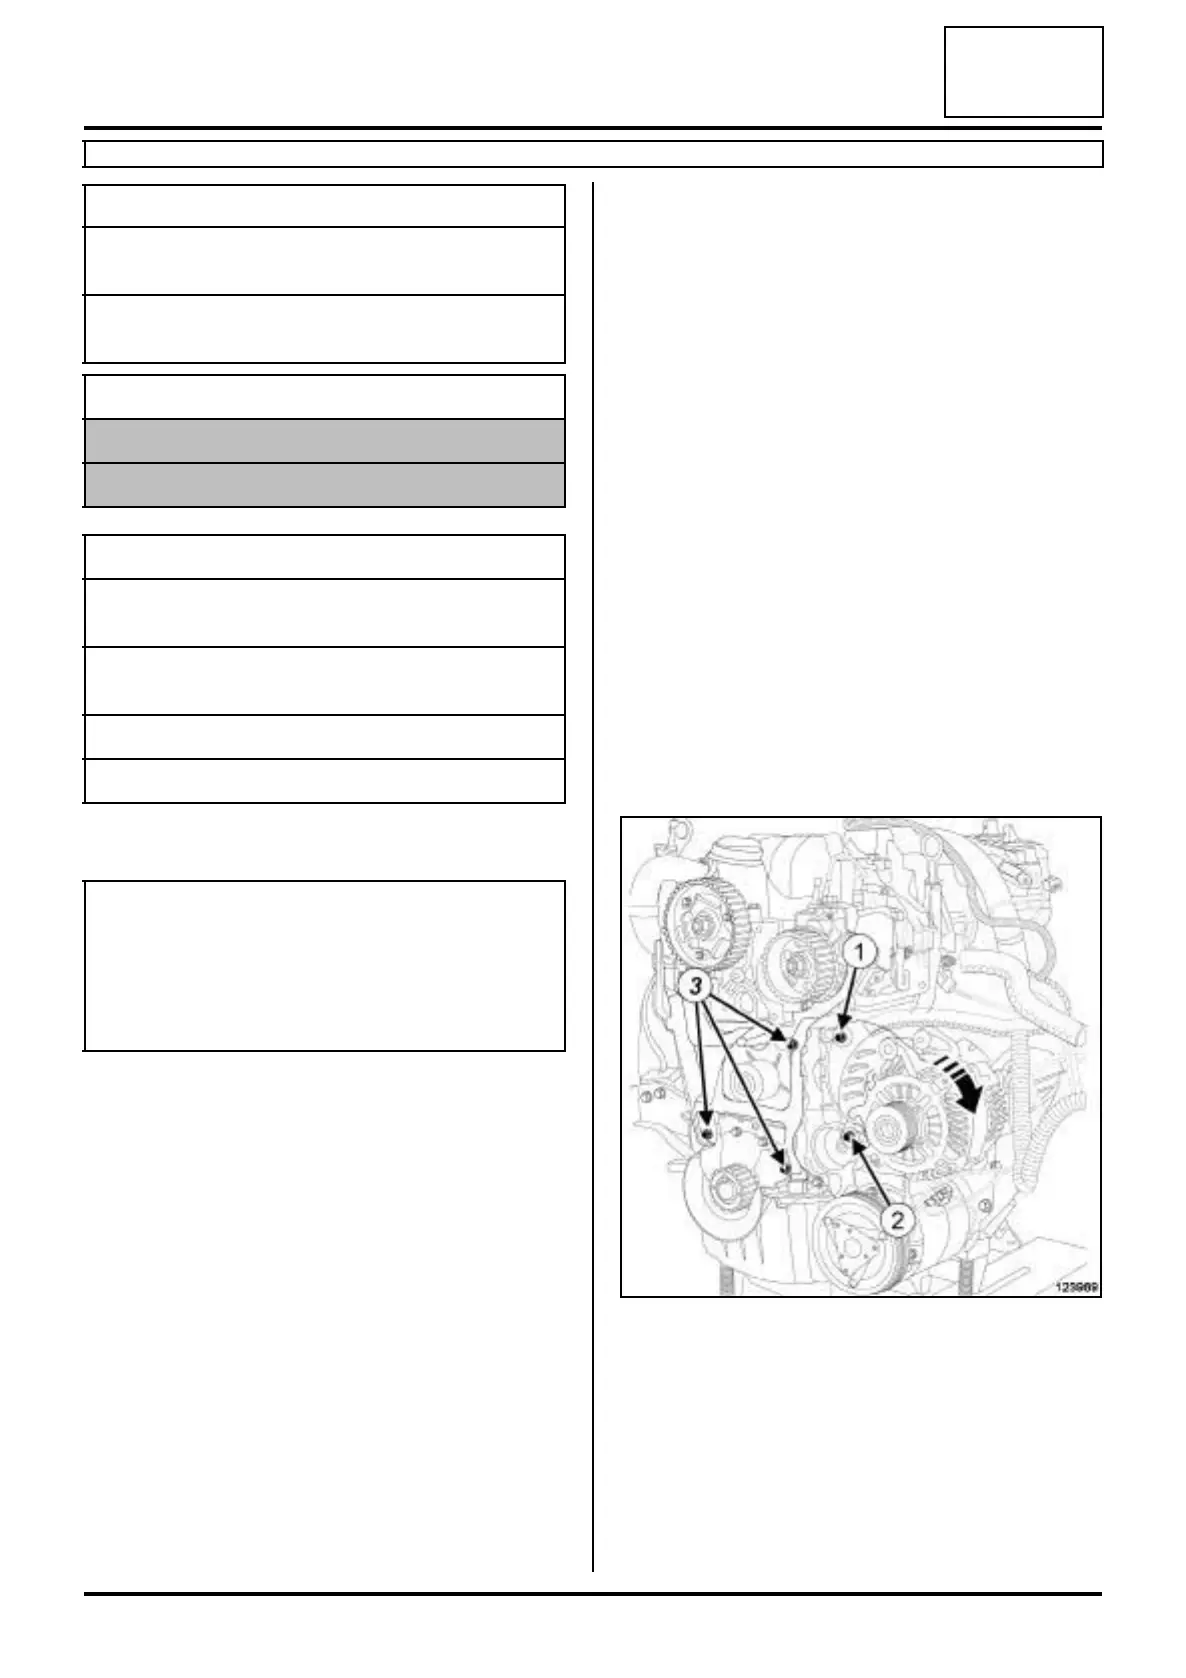
a Remove the alternator upper bolt (1) .
a Loosen the alternator lower bolt (2) .
a Tilt the alternator slightly towards the front of the ve-
hicle.
a Remove:
- the inner cover bolts (3) ,
- the inner cover,
Essential special tooling
Mot. 1768 Injection pump-pulley extrac-
tor claws.
Mot. 1525 Extractor for timing gear with
tapered hub.
Essential equipment
offset spanner
diagnostic tool
Tightening torquesm
high pressure pump pul-
ley nut
70 N.m
high pressure pump
bolts
23 N.m
alternator lower bolt 25 N.m
alternator upper bolt 25 N.m
IMPORTANT
To avoid all risk of damage to the systems, apply
the safety and cleanliness instructions and opera-
tion recommendations before carrying out any
repair (see 13B, Diesel injection, Diesel injec-
tion: Precautions for repair, page 13B-1) .
123969