13B-145
DIESEL INJECTION
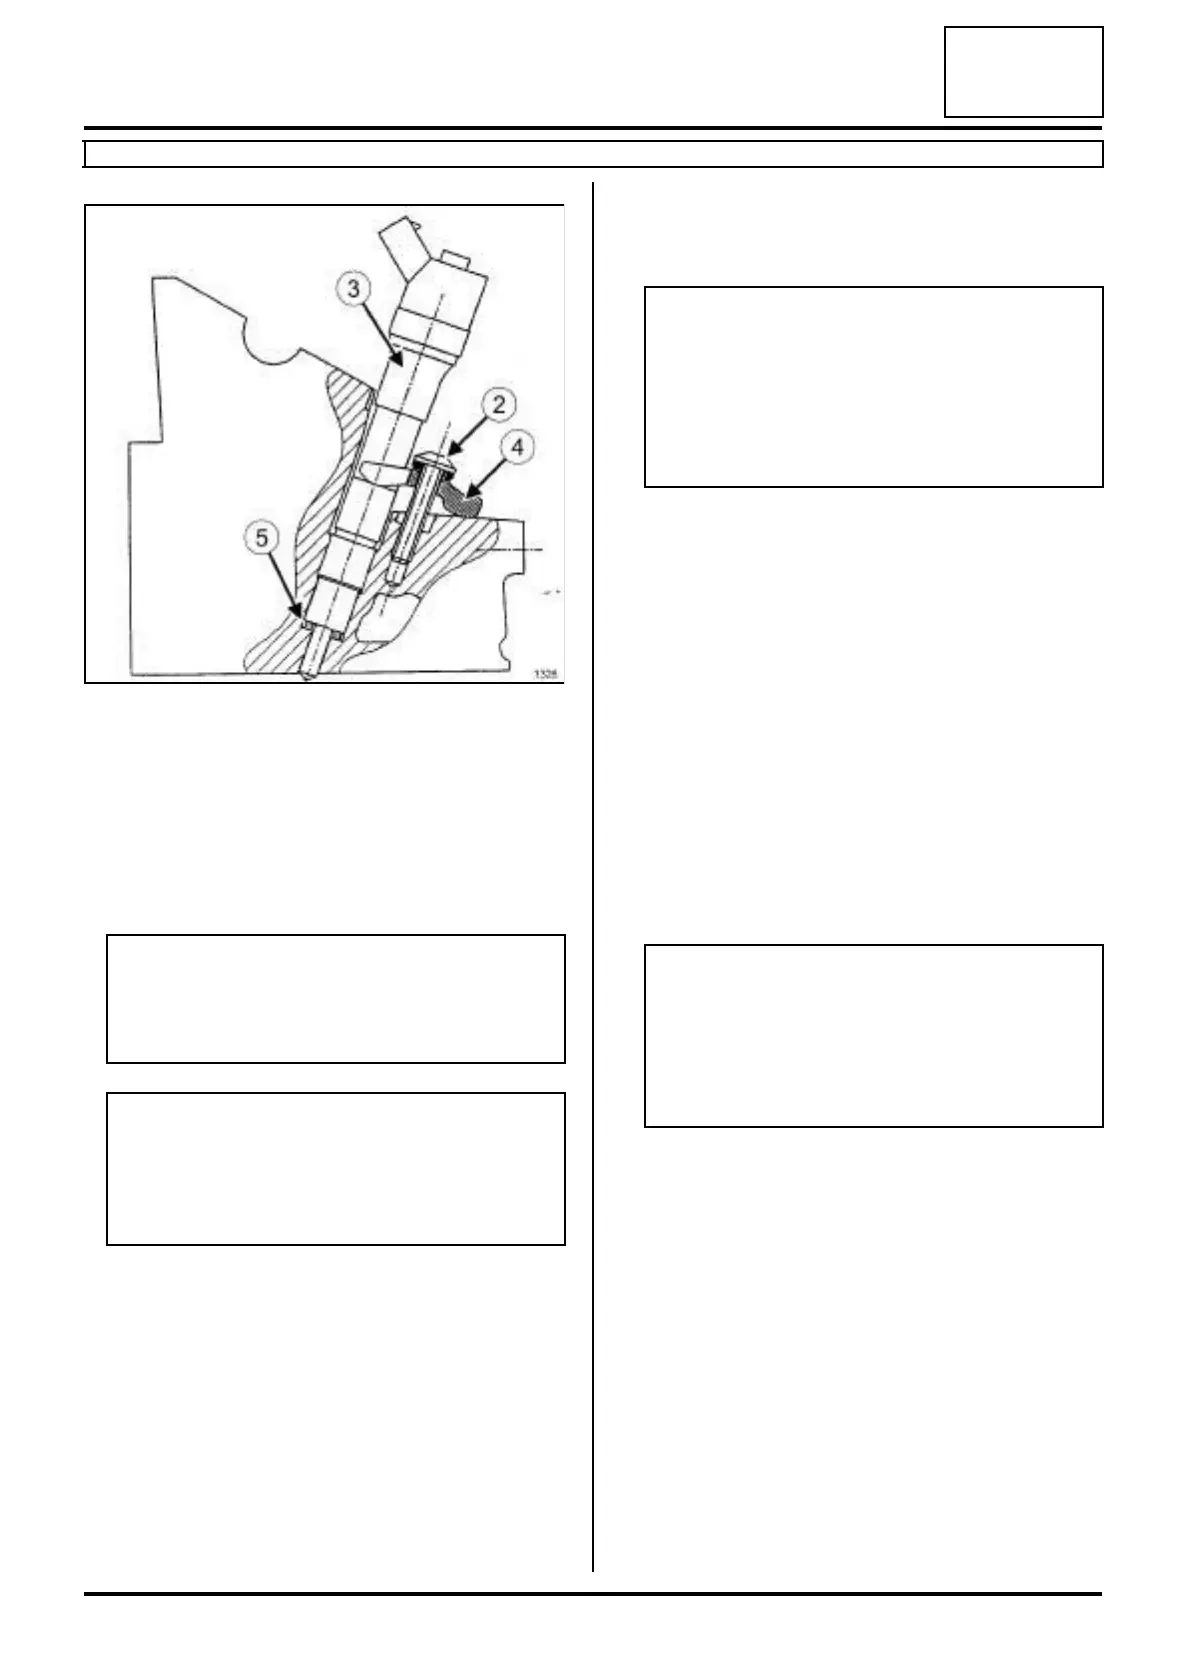
Diesel injector: Removal - Refitting
F9Q
13B
a Remove:
-the injector clamp bolt (2) ,
-the injector (3) and its clamp (4) ,
-the heat protection washer (5) .
a Fit an appropriate blanking plug on the diesel injec-
tor nose.
REFITTING
I - REFITTING PREPARATION OPERATION
a parts always to be replaced: injector seal (11,11,
02,02).
a Always clean the well of the removed injector (see
Injector well cleaning tool: Use) (Technical Note
6040, 13B, Diesel injection).
a If reusing the removed injector:
- clean the injector using a wipe soaked in injector
cleaning product or brake cleaner,
- if necessary, leave the injector nozzle to soak in in-
jector cleaner,
- wipe the injector with a new wipe,
- (see Vehicle: Parts and ingredients for the re-
pairwork) (04B, Consumables - Products) and
(see 13B, Diesel injection, Diesel injection: Pre-
cautions for repair, page 13B-1) .
II - REFITTING OPERATION FOR PART
CONCERNED
a
a Refit:
-a new compression washer,
- the diesel injector with its bracket.
a Torque tighten the diesel injector bracket bolt (25
N.m).
a Connect the injector connector.
III - FINAL OPERATION
a Refit:
- the high pressure pipes between the rail and the in-
jector (see 13B, Diesel injection, High-pressure
pipe between the rail and injector: Removal -
Refitting, page 13B-87) ,
1326
Note:
If reusing the diesel injector(s) keep them in a
hermetically sealed bag throughout the removal
operation.
Note:
If the compression washer is stuck at the bottom
of the well, use the tool (Mot. 1817) (see Injec-
tor well cleaning tool: Use) (Technical Note
6040, 13B, Diesel injection).
WARNING
It is strictly forbidden to clean the injectors with:
-a wire brush,
- an emery cloth,
- an ultrasonic cleaner.
WARNING
Do not remove the blanking plugs from each
component until the last moment.
Also, do not remove the components from their
packaging until they are to be fitted to the vehi-
cle.