16A-12
STARTING - CHARGING
Alternator: Removal - Refitting
F9Q
16A
REFITTING
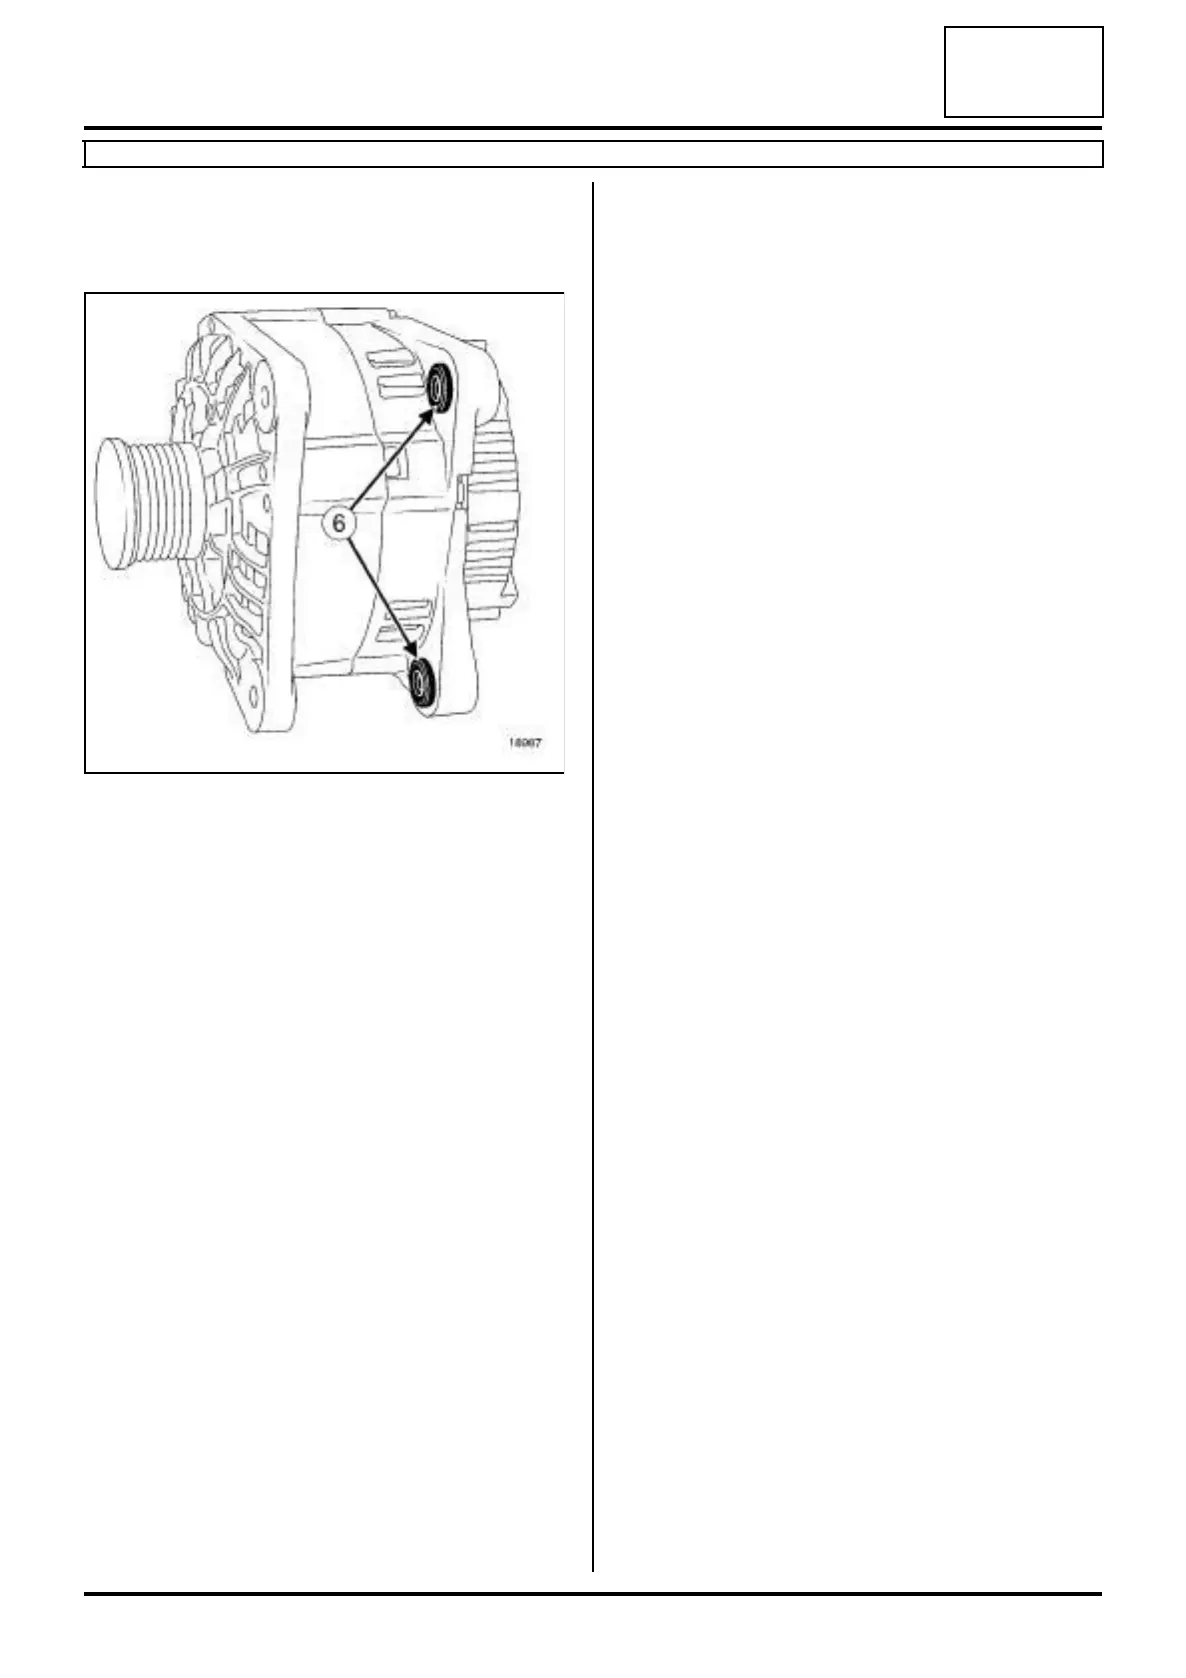
I - REFITTING PREPARATION OPERATION
a Compress the alternator rings (6) using pliers or a
vice to facilitate fitting.
II - REFITTING OPERATION FOR PART
CONCERNED
a Refit the alternator.
a Torque tighten the alternator bolts (25 N.m).
a Position the alternator wiring.
a Torque tighten the alternator positive terminal nut
(24 N.m).
a Connect the alternator regulator connector.
III - FINAL OPERATION
a Refit a new intercooler air outlet pipe (see 12B, Tur-
bocharging, Intercooler air outlet pipe: Removal
- Refitting, page 12B-56) .
a Refit:
-the front panel,
-the bonnet catch (see Bonnet latch: Removal -
Refitting) (52A, Non-side opening element mecha-
nisms),
-the bolts for the engine wiring harness channel,
-the accessories belt (see 11A, Top and front of
engine, Accessories belt: Removal - Refitting,
page 11A-7) ,
- the front bumper mountings (see Front bumper
support: Removal - Refitting) (42A, Front upper
structure),
-the front impact cross member (see Front impact
cross member: Removal - Refitting) (41A, Front
lower structure),
-the headlights (see Front headlight: Removal -
Refitting) (80B, Headlights),
- the front bumper (see Front bumper: Removal -
Refitting) (55A, Exterior protection),
- the front section of the front wheel arch liners (see
Front wheel arch liner: Removal - Refitting)
(55A, Exterior protection),
- the front wheels (see Wheel: Removal - Refitting)
(35A, Wheels and tyres),
- the engine undertray,
- the engine cover.
a Connect the battery (see Battery : Removal - Refit-
ting) (80A, Battery).
18987