Secon 5
Integra 3™ Basic Operaon
Research Instruments Ltd
5
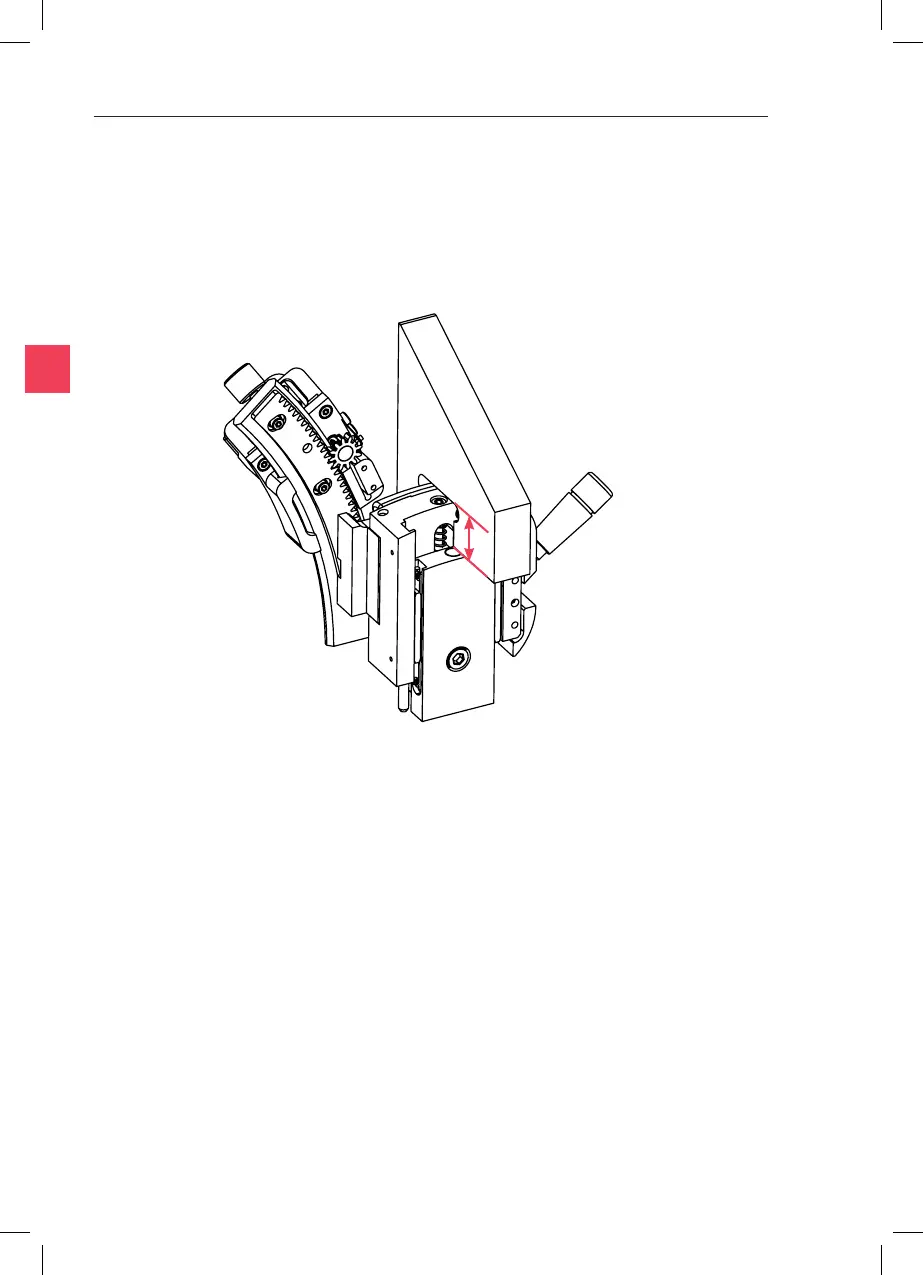
14mm
11. Ret the PL3 and set the Raised Posion Adjustment Screw at the
centre of the range of movement using the PL3 Set-up Tool (or
measure a height of 14mm). Hold the tool as shown, just to the side
of the Raised Posion Adjustment Screw. Adjust the screw unl it just
touches at the top and boom of the square cut-out.
12. Repeat from Step 9. Move to Step 13 when the pipee can be brought
into focus with the Raised Posion Adjustment Screw.
13. Select the low magnicaon objecve without spacer. The scratch on
the Petri dish should sll be in focus.
14. Lower the Set-up Levers fully. The pipees should come into view
slightly above the Petri dish surface. If the pipee is too high or too
low, turn the Lowered Posion Adjustment Screw,
to bring the p of the pipee just above the Petri dish surface.