10
Intera 3.2
Quick Start
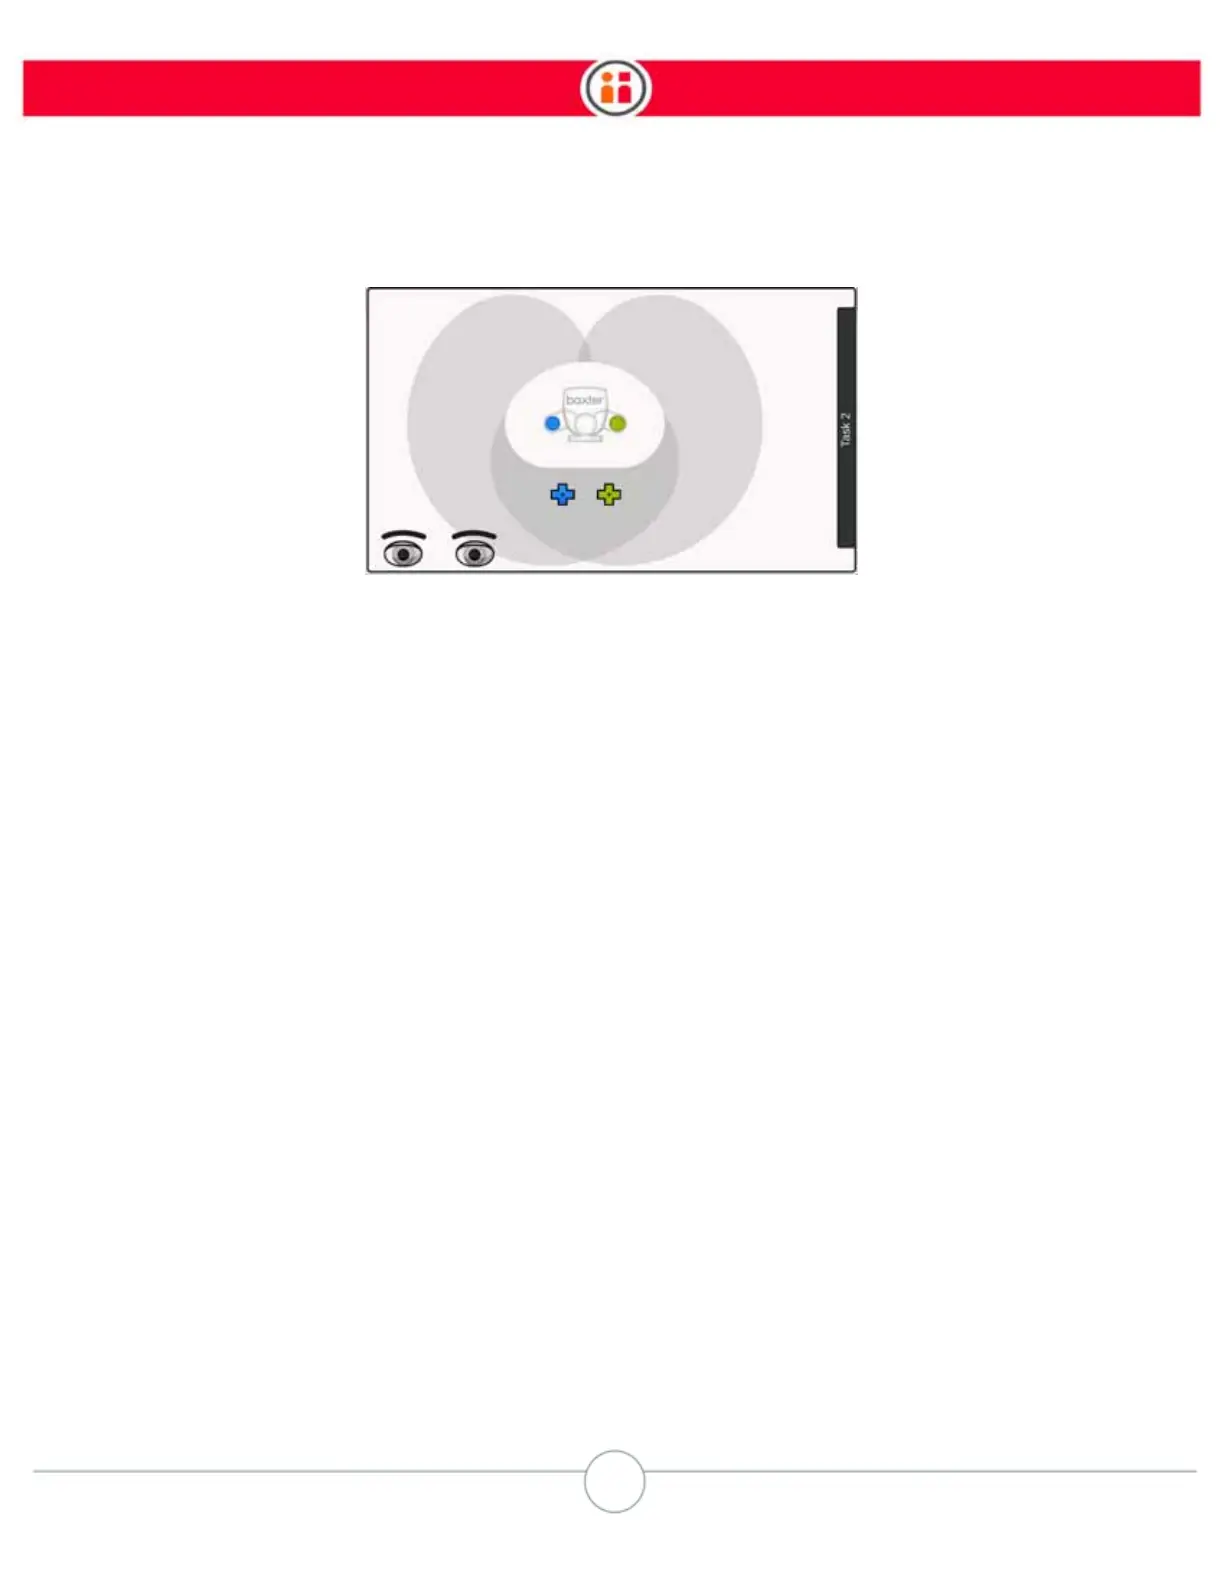
For now you just need to know that the blue icon on the display represents Baxter’s right arm, the
green icon represents the left arm, and the shaded area is where the arms can reach.
Squeeze the training cuff and move one of Baxter’s arms. Watch as the appropriate icon moves on
screen in response to the movement of the arm.
3. Grasp an Object
NOTE: If the end effectors have not already been configured, configure them now, otherwise the
gripper may not work. See “Appendix A: Configuring Grippers” on page 143.
Place an object on the work surface for Baxter to grasp.
Remember: For you to train a pick and place, Baxter must have at least one arm with a properly
working gripper attached. If not, follow the gripper kit instructions and install a gripper now.
If your Baxter has parallel electric grippers installed, make sure the grippers are open, then position
the fingers on either side of the object. If you’re using the vacuum grippers, position the object just
touching the vacuum cup.
Press the Grasp button on the training cuff.