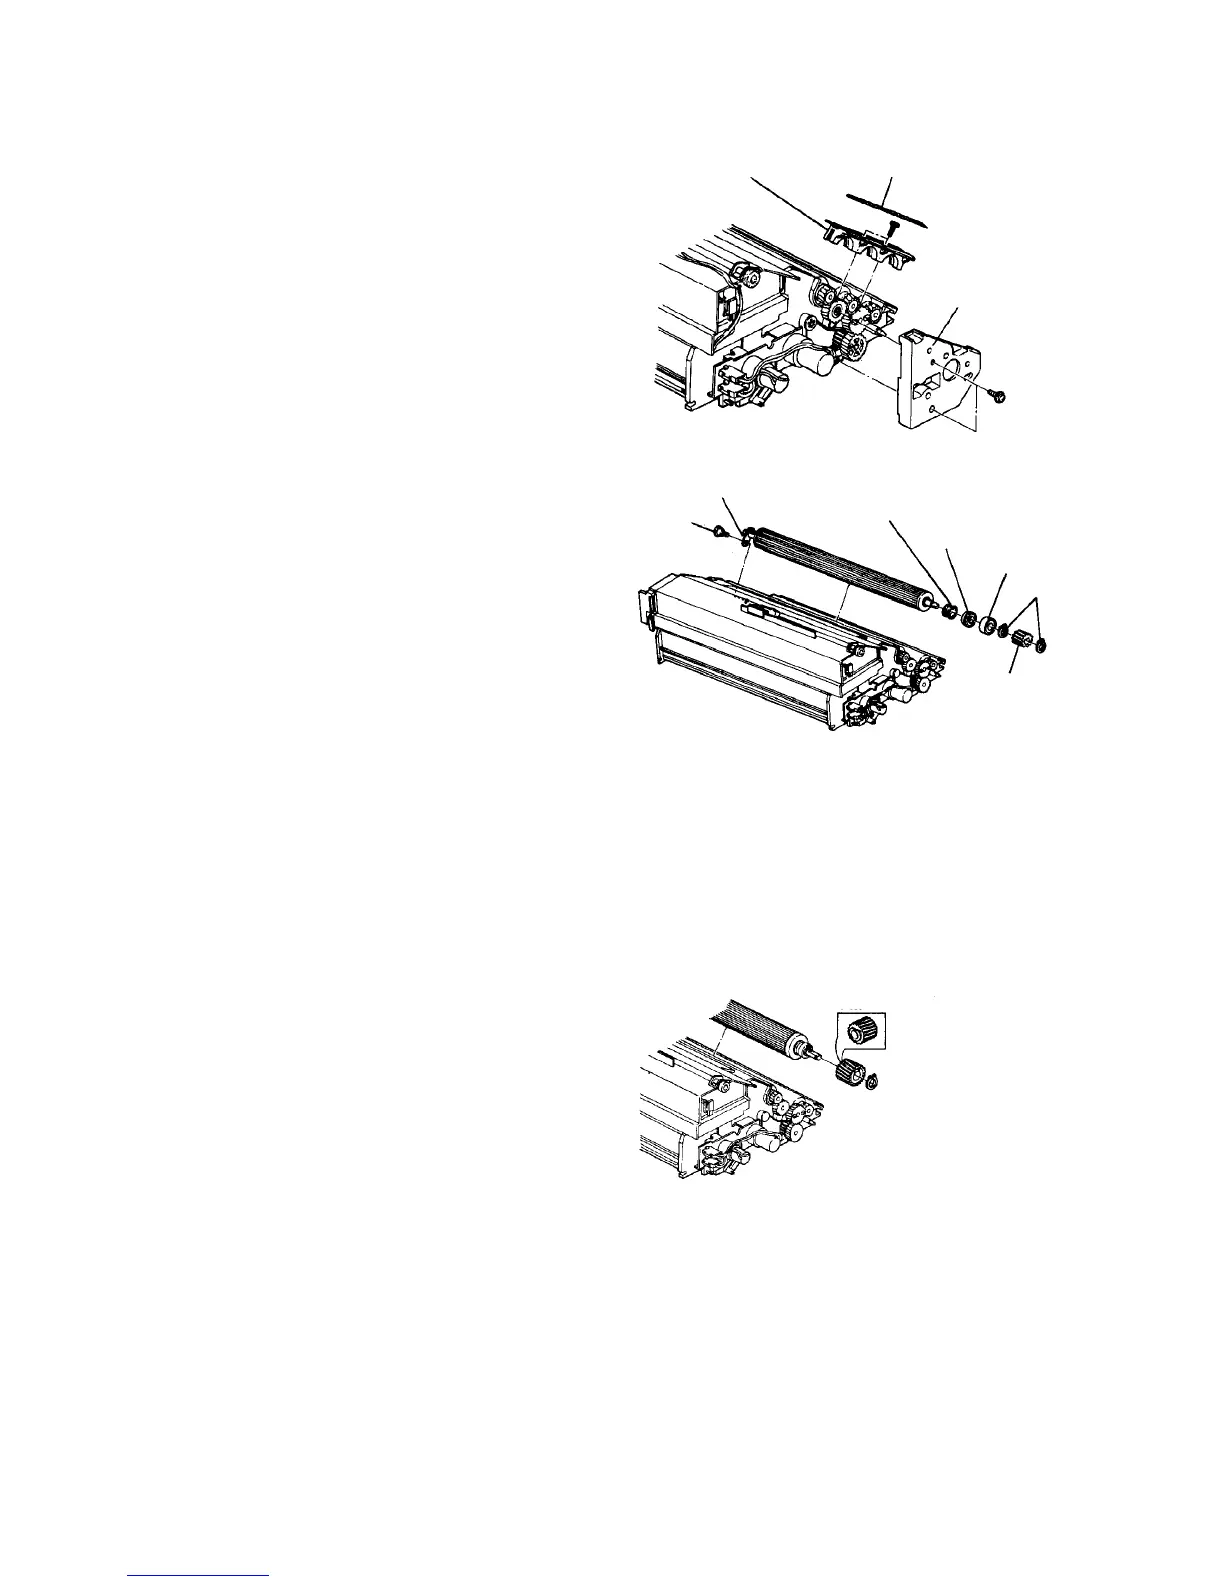
2.8.3 Replacing the development sleeves
1. Pull out and remove the development unit.
2. Remove the inner cover from the rear part of the
unit (2 screws).
3. Peel off front and rear side seals.
4. Remove the front and rear sleeve retainers (2
screws each).
5. Take off the slot head stepped screw to remove
no. 2 sleeve (middle one) main pole fixing plate.
Unless this screw is removed, sleeve 1 and 3
cannot be pulled out.
6. Take off the slot head stepped screw to remove
the main pole fixing plate of the sleeve to be
replaced.
7. Remove the C-rings, sleeve drive gear, bearing,
coupling, and V-seal in this order and replace the
sleeve.
8. Reassemble in the reverse order.
CAUTION
• Development sleeves 1, 2, and 3 differ from
one another. If they are arranged
incorrectly, this can cause a developer
circulation failure or an image error due to
improper main pole position and PG
(Photoconductor Gap). The development
sleeves are designated as follows:
No. 1 sleeve (lower one): 1095A
No. 2 sleeve (middle one): 1096A
No. 3 sleeve (upper one): 1097A
• The sleeve drive gears have the setting
direction.
• Be sure that bias terminal plate is in contact
with the bearing case.
• The V-seal has the setting direction.
• Take care not to catch the V-seal when the
sleeve retainer is installed.
• Meet the cutout of the bearing coupling
flange with the projection when set.
Sleeve retainer Side seal
Inner cover
Minus
stepped
screw
Main pole fixing plate
V-seal
Coupling
Bearing
C-ring
Sleeve drive gear
Drive gear



 To Next Page