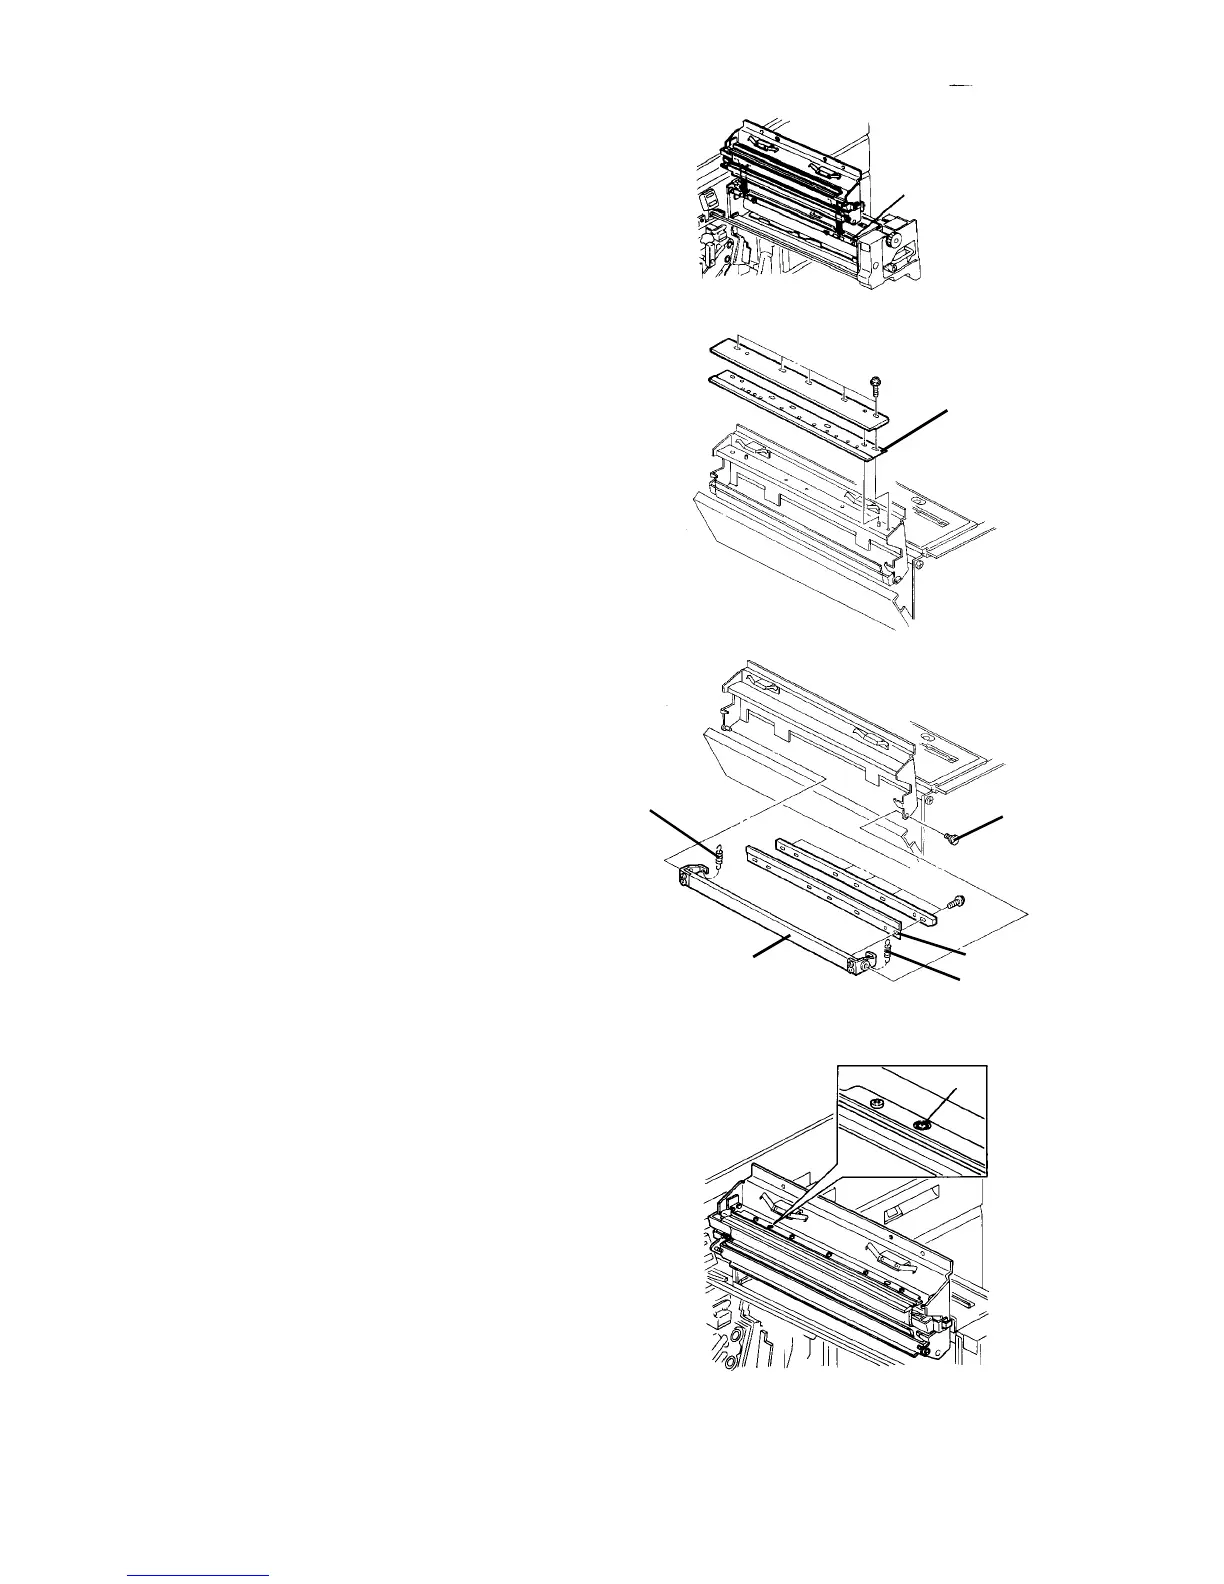
8. Put the lock pawls of the oil supply unit on the stay
of the fusing unit and hang up the unit as shown.
CAUTION
Place a large sheet to avoid spilling the silicon
oil on the floor.
9. Remove the cleaning blade (5 screws).
10. Remove the front and rear pressure springs of the
metering blade unit.
11. Remove the minus head stepped screw from the
rear of the blade unit (front side in this position)
and pull the blade unit out.
12. Remove the metering blade from the bracket (5
screws).
13. Replace the blades and pad with new ones.
14. Reassemble in the reverse order.
CAUTION
At the reassembling, be careful of the following:
• Check that the front and rear pressure
springs of the metering blade unit are
hooked after installing the oil supply unit
on the heat insulating cover. They tend to
be unhooked easily.
• At the installation of the fusing and
metering blades, align the holes of the
bronze plate with the pins of the blade
support bracket. They have setting
directions. Be careful of the setting
directions of the blade support plates as
they also have setting directions.
Stay
Cleaning blade
Front pressure
spring
Metering blade unit
Rear pressure
spring
Metering blade
Stepped screw
Pin



 To Next Page