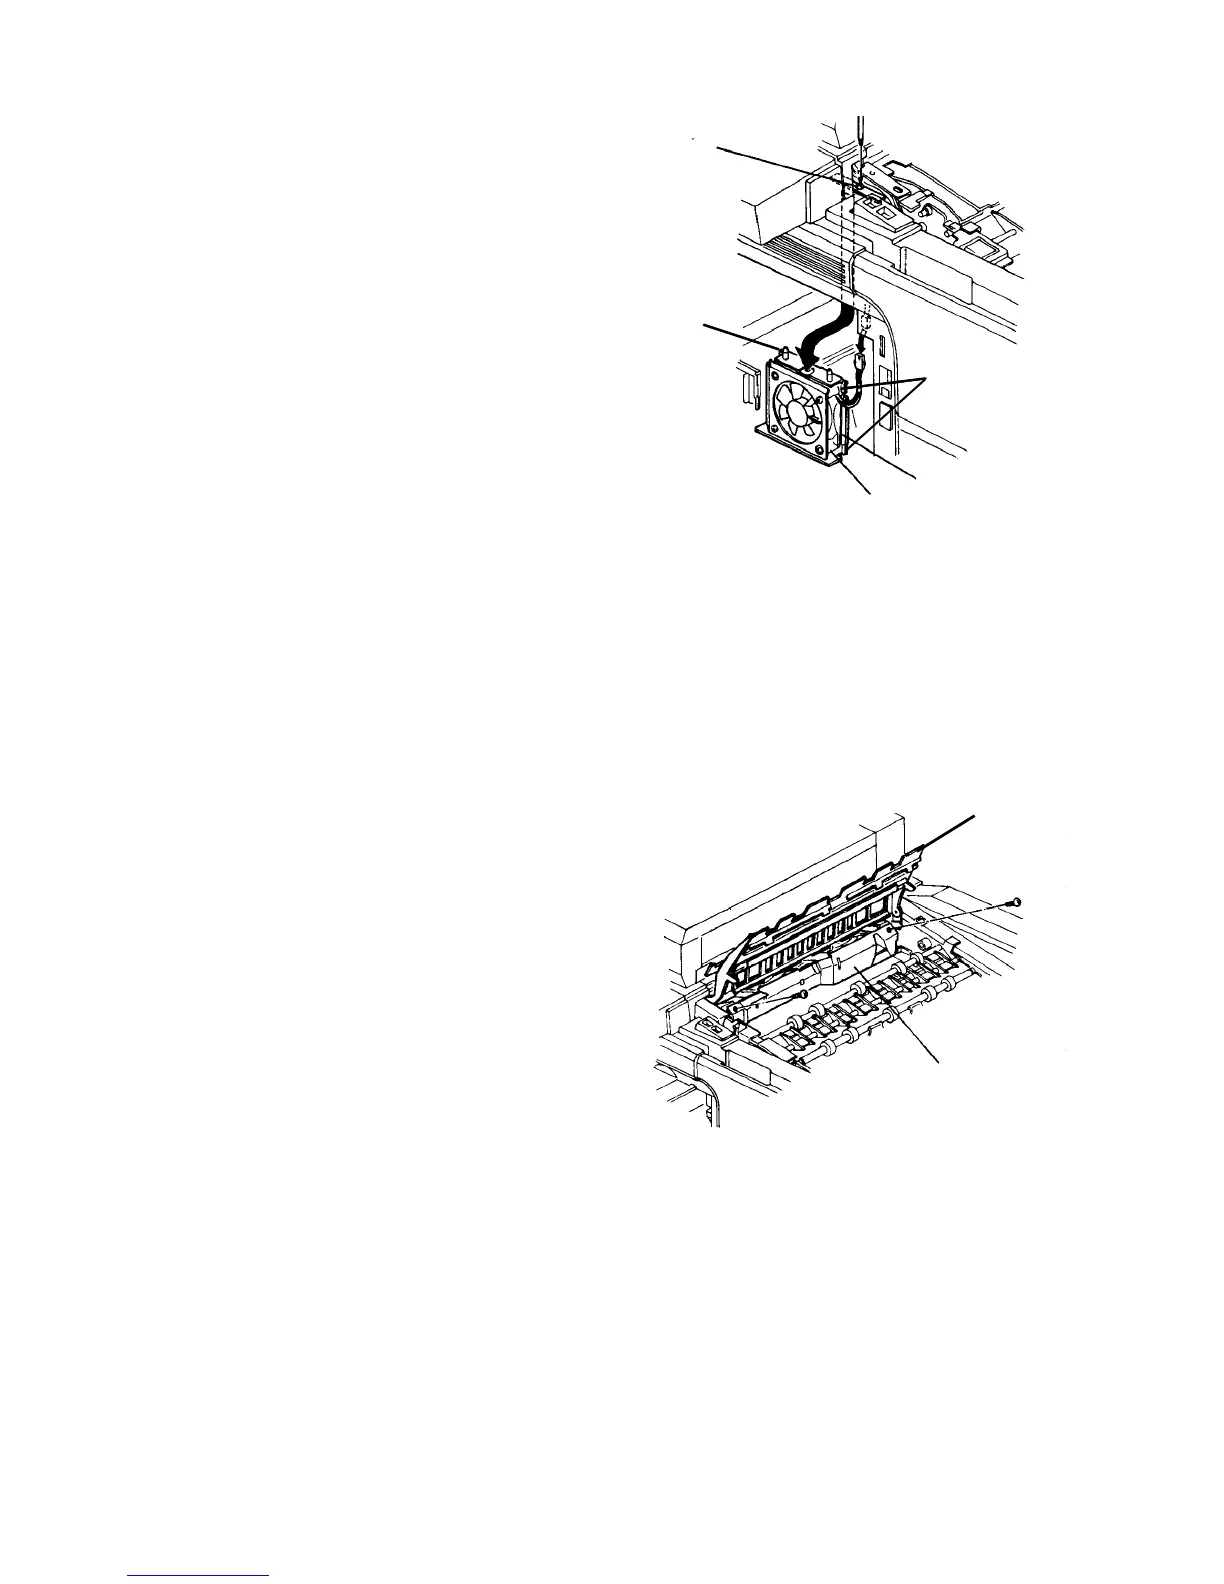
2.10.15 Replacing the 2nd fusing cooling blower
1. Turn off the main switch, and open the front door.
2. Slide out the fusing unit, and remove it (one
stepped screw).
3. Open the copy tray.
4. Remove the entrance junction inner cover at the
front left corner of the duplex/exit unit (2 plated
screw).
5. Loosen the one plated screw fixing the 2nd fusing
cooling blower from the top. The blower will slide
down, and you can catch it in the space where the
fusing unit was.
6. Disconnect the connector, and replace the blower.
7. Reassemble in the reverse order.
CAUTION
• Do not catch the connector and harness
between the frame and blower when
installing the blower.
• There are four hooks at the corner of the
blower. Meet the hooks with the edges of
the duplex/exit unit frame, and slide the
blower up. The hooks should come beyond
the frame.
2.10.16 Replacing the curl remover fans
1. Remove the 2nd fusing cooling blower. (Refer the
above steps.)
2. Raise the curl remover fan guide.
3. Remove two fixing screws from the front and rear
ends of the curl remover fan unit.
4. Catch the unit in the space where the fusing unit
was.
5. Bring the connector of the fan unit out from the
space where the fusing cooling blower was.
6. Disconnect the connector and remove the fan unit.
7. Remove the small and large curl remover fans (2
screws and one connector each).
8. Replace the fans, and reassemble in the reverse
order.
CAUTION
• Do not catch the connector and harness
between the frame and blower when
installing the fusing cooling blower.
• Put the pin at the bottom middle of the fan
unit in the hole. Then, tighten screws to
install the fan unit.
Blower
fixing screw
2nd fusing
cooling blower
Hook
Hook
Curl remover fan unit
Curl remover
fan guide



 To Next Page