2.11.13 Removing the intermediate transport unit
1. Turn off the main switch, and remove the ADF rear
cover (7 plated screws).
CAUTION
The ADF rear cover is made of metal. So, the
cover may touch electric elements on the
boards shorting them out when you remove the
cover. Be sure to turn off the main switch when
you remove the ADF rear cover.
2. Remove the ADF control board.
CAUTION
• Before installing the board, be sure to
connect the three connectors on both the
front and back of the board.
• Be sure not to damage electric elements on
the board.
• Be sure not to cut the harnesses by pulling
the board or rubbing the harnesses with the
edges of any brackets or plates.
• Do not pull the fiber optics cable when you
disconnect it from the ADF control board.
Grasp its connector using pliers and pull it
out. Remove the ADF control board.
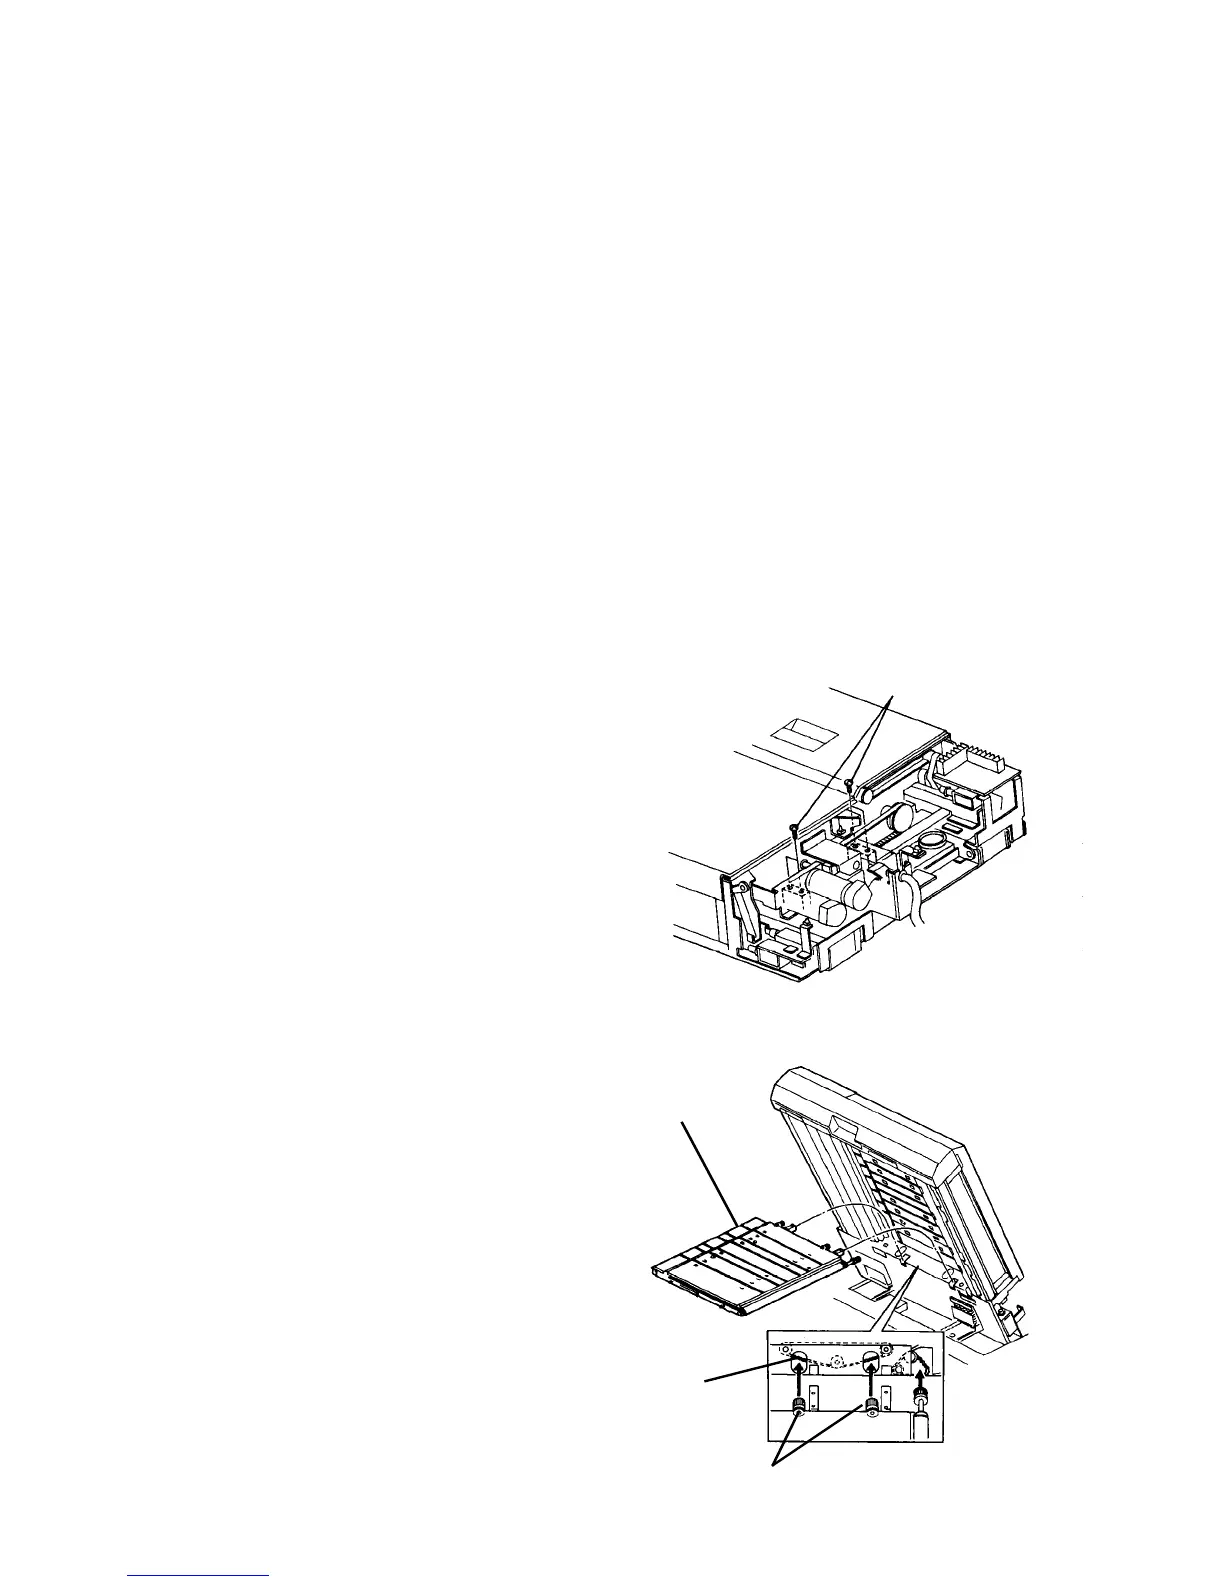
3. Remove the blower unit.
4. Remove two screws each from the right and left
support shafts at the rear of the intermediate
transport unit.
5. Raise the ADF and push the release button to the
right to lower the intermediate transport unit.
CAUTION
When pushing the release button, support the
intermediate transport unit with the left hand.
6. Pull out the intermediate transport unit.
7. Reassemble in the reverse order.
CAUTION
Pay attention to the setting position of the drive
pulleys at the rear of the intermediate transport
unit. The drive pulleys must be situated under
the 2-sided timing belt. (See illustration.)
Support shaft screws (4)
Unit drive pulleys
2-sided timing
belt
Intermediate
transport unit