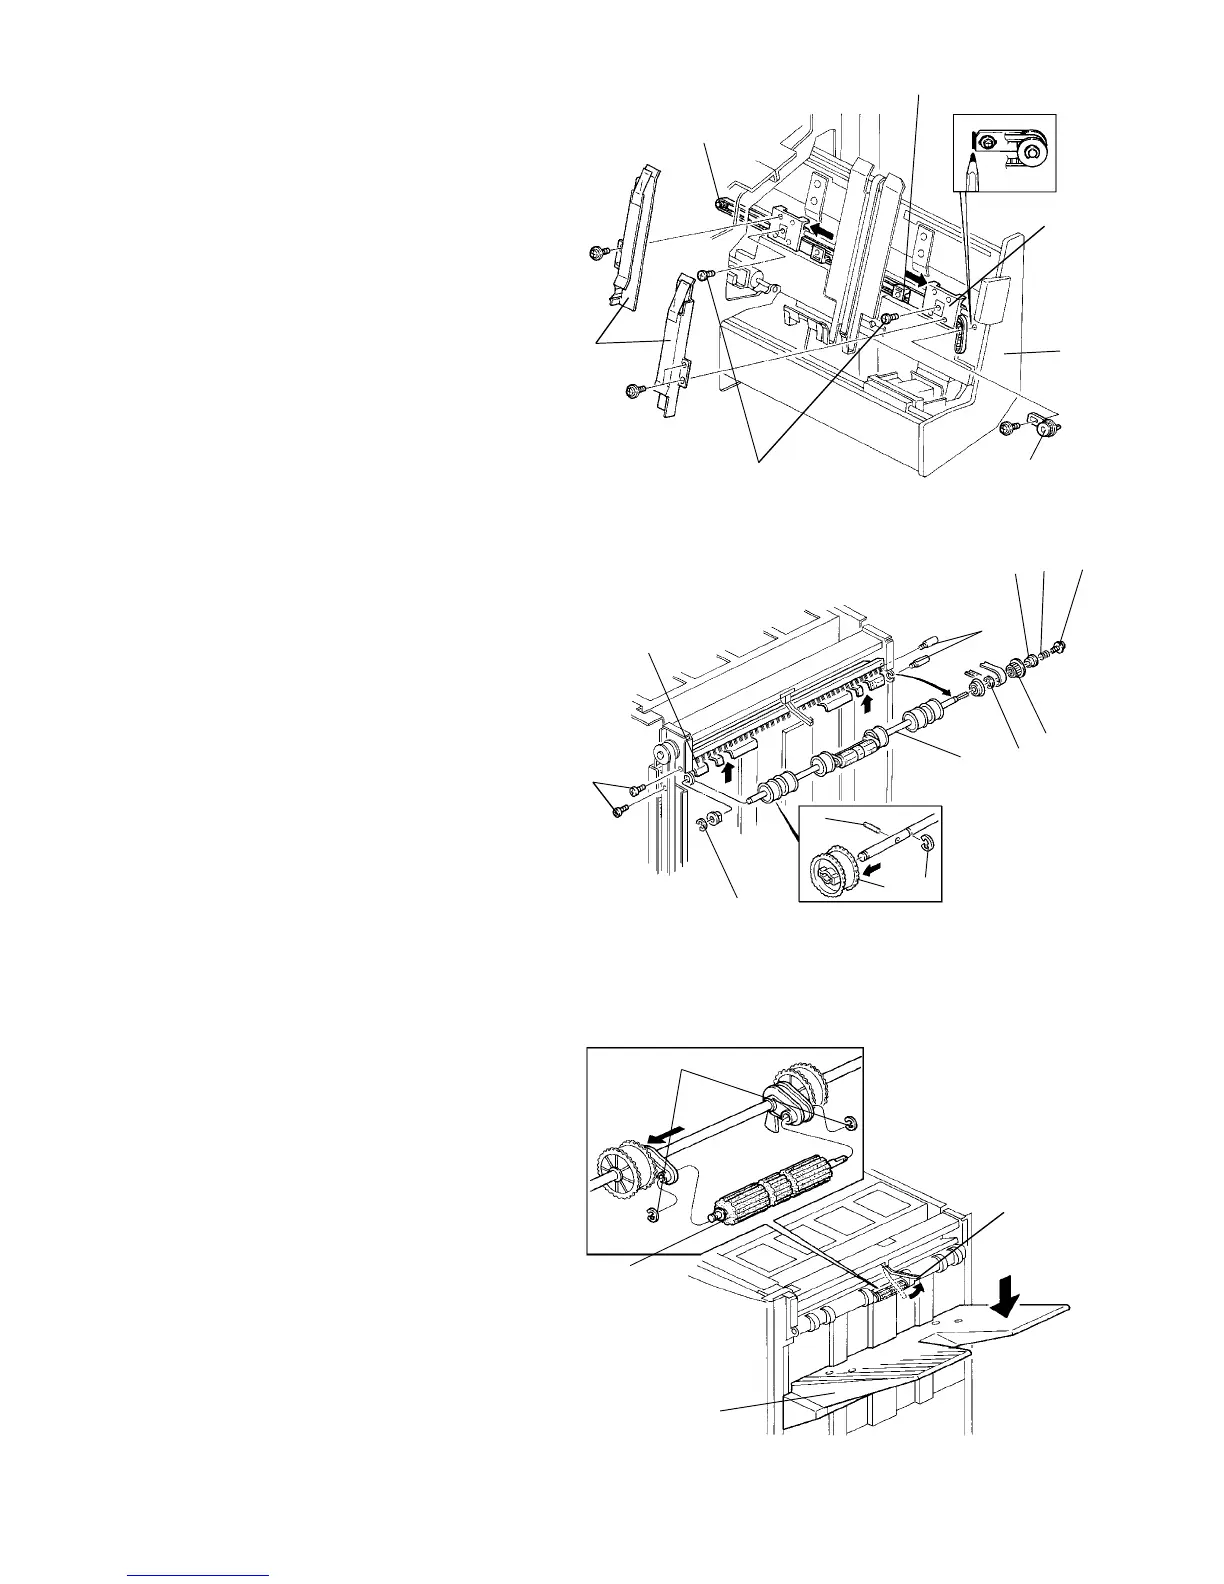
2.15.5 Removing the jogger drive belt
1. Turn the main switch off and unplug the copier.
2. Open the front door and slide out the staple unit [A].
3. Remove the front and rear jogger fences [B] (2
screws each).
4. Remove the 2 screws [C] fixing the jogger fence
sliders [D] to the belt clampers [E].
5. Mark the position of the tension bracket [F] and
remove (1 screw).
6. Remove the jogger drive belt [G] with the belt
clampers [E].
NOTE:
When reassembling, put the bracket [F] back to the
marked position.
2.15.6 Removing the exit rollers
1. Turn the main switch off and unplug the copier.
2. Remove the upper cover, front door, front shift
cover, rear cover, and right upper cover.
3. Remove the screw [A], spring [B], bushing [C], and
pulley [D].
4. Remove the 4 screws [E] fixing the lower exit
guide plate [F].
5. Remove the 2 E-rings [G] and remove the exit
roller assembly [H].
6. Remove the E-rings [I], pins [J] and replace the
exit rollers [K].
NOTE:
Do not lose the pins [J].
2.15.7 Removing the shift tray positioning roller
1. Raise the stack height sensor actuator [A] and
hold it until the shift tray automatically lowers.
2. Turn off the main switch before the shift tray
returns to its home position. Then, unplug the
copier.
NOTE:
If the machine is in a condition that does not allow
the shift tray to be lowered electrically, then remove
the shift tray [B].
3. Remove the 2 E-rings [C] and replace the shift tray
positioning roller [D].
[G]
[E]
[D]
[A]
[B]
[C]
[F]
[E]
[F]
[G]
[H]
[D]
[I]
[C]
[J]
[G]
[K]
[B]
[A]
[E]
[C]
[A]
[D]
[B]
1 July 1994 Finisher
2-123
 Loading...


