2.2.7 Replacing the flash power supply unit
WARNING
Before you start working, turn off the main switch
and wait for at least one minute to allow for
discharge.
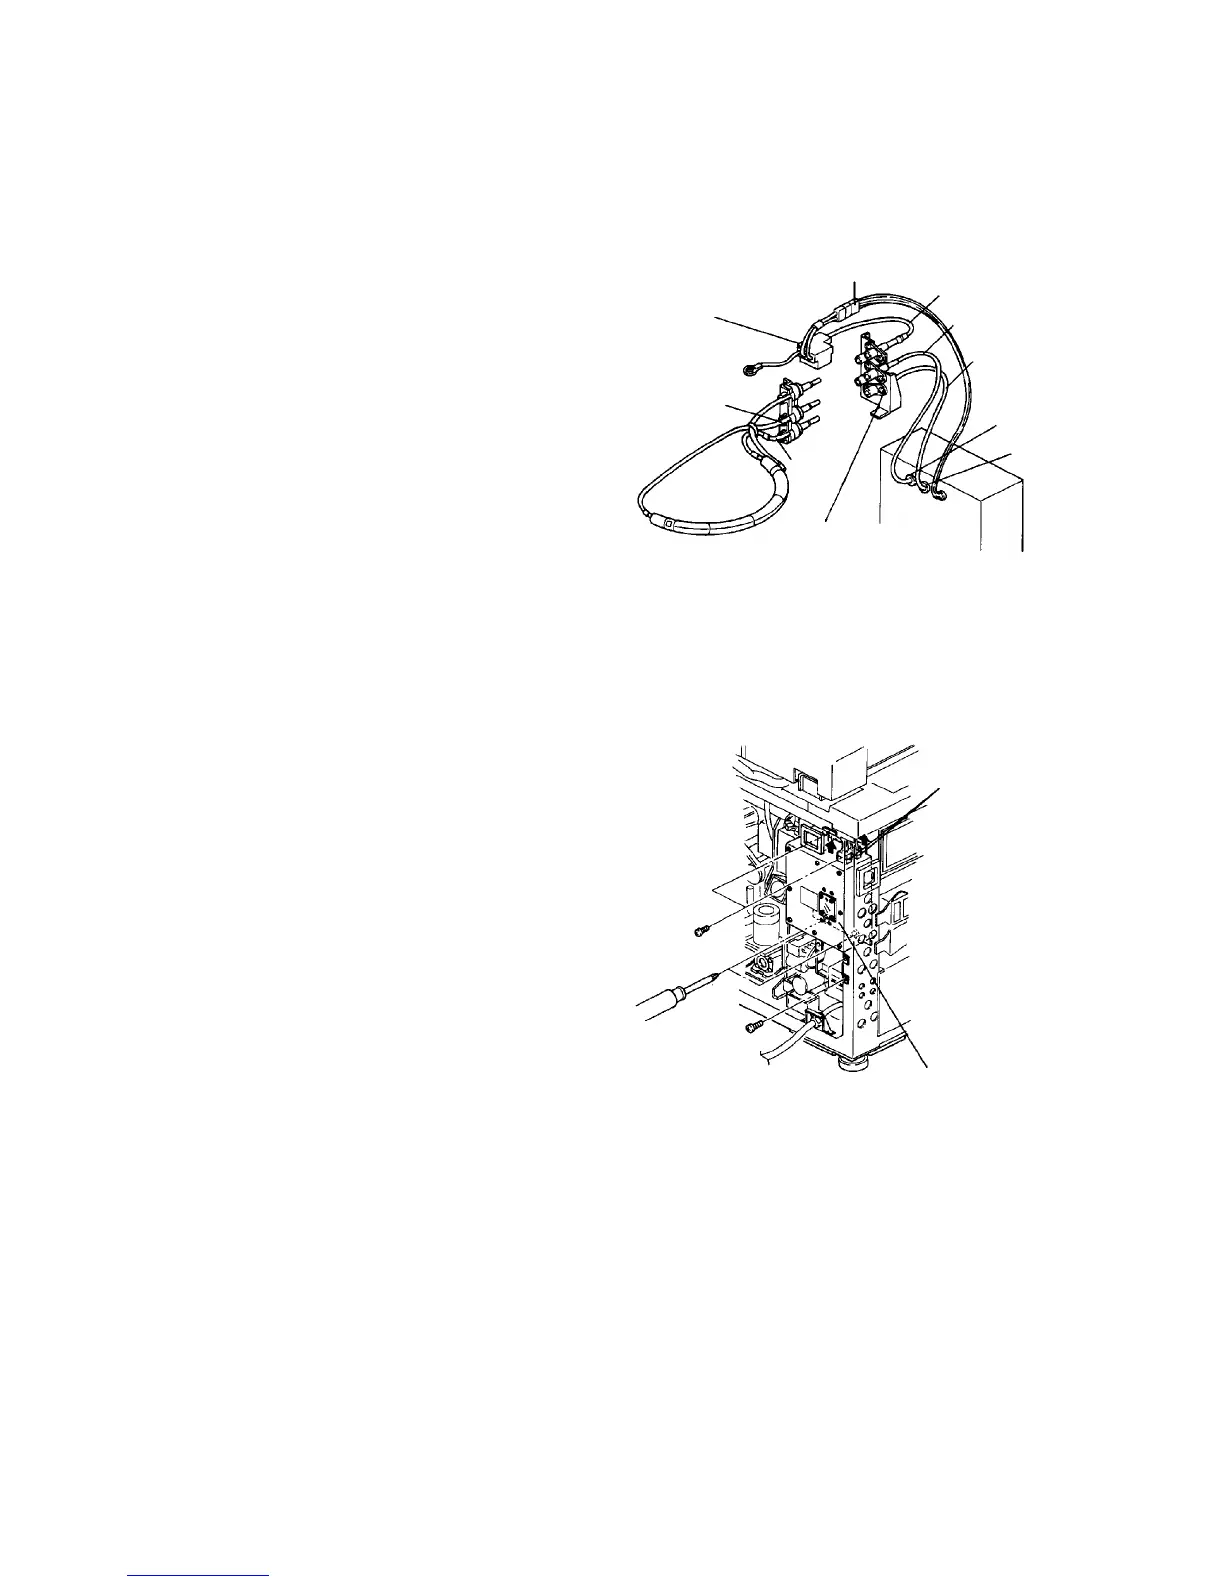
1. Turn off the main switch.
2. Remove the left cover (2 screws).
3. Disconnect the connector from the flash exhaust
unit and remove four screws to remove it.
4. Remove the connectors for the xenon lamp
(2 screws).
5. Disconnect the 2P connector to the trigger
transformer.
6. Remove three lines connected from the flash
power supply unit to xenon lamp connector
together with the terminal fixed with two screws
each.
7. Remove the rear left cover.
8. Disconnect two connectors (15P and 3P) from the
upper part of the flash power supply unit.
9. Remove the air blow guide (2 screws) from the
lower part of the flash power supply unit.
10. Remove the flash power supply unit.
Remove the upper two screws and only loosen the
lower two.
11. Replace the flash power supply unit and
reassemble in the reverse order.
CAUTION
• Be sure to wire the three flash power
source lines correctly, the white wire (from
the trigger transformer), red line and black
line from the top. If wired incorrectly, the
lamp may burn up.
• To avoid xenon lamp damage, firmly fit the
lamp connector to the socket. Push each
connector end with your fingers. Then,
tighten two screws.
Trigger transformer
Red
2P connector White line
(trigger)
Red wire (tape
indicates polarity)
Black line (tape
indicates polarity)
(+)
(-)
Flash power
source line
Black
Connector
Flash power
supply unit



 To Next Page