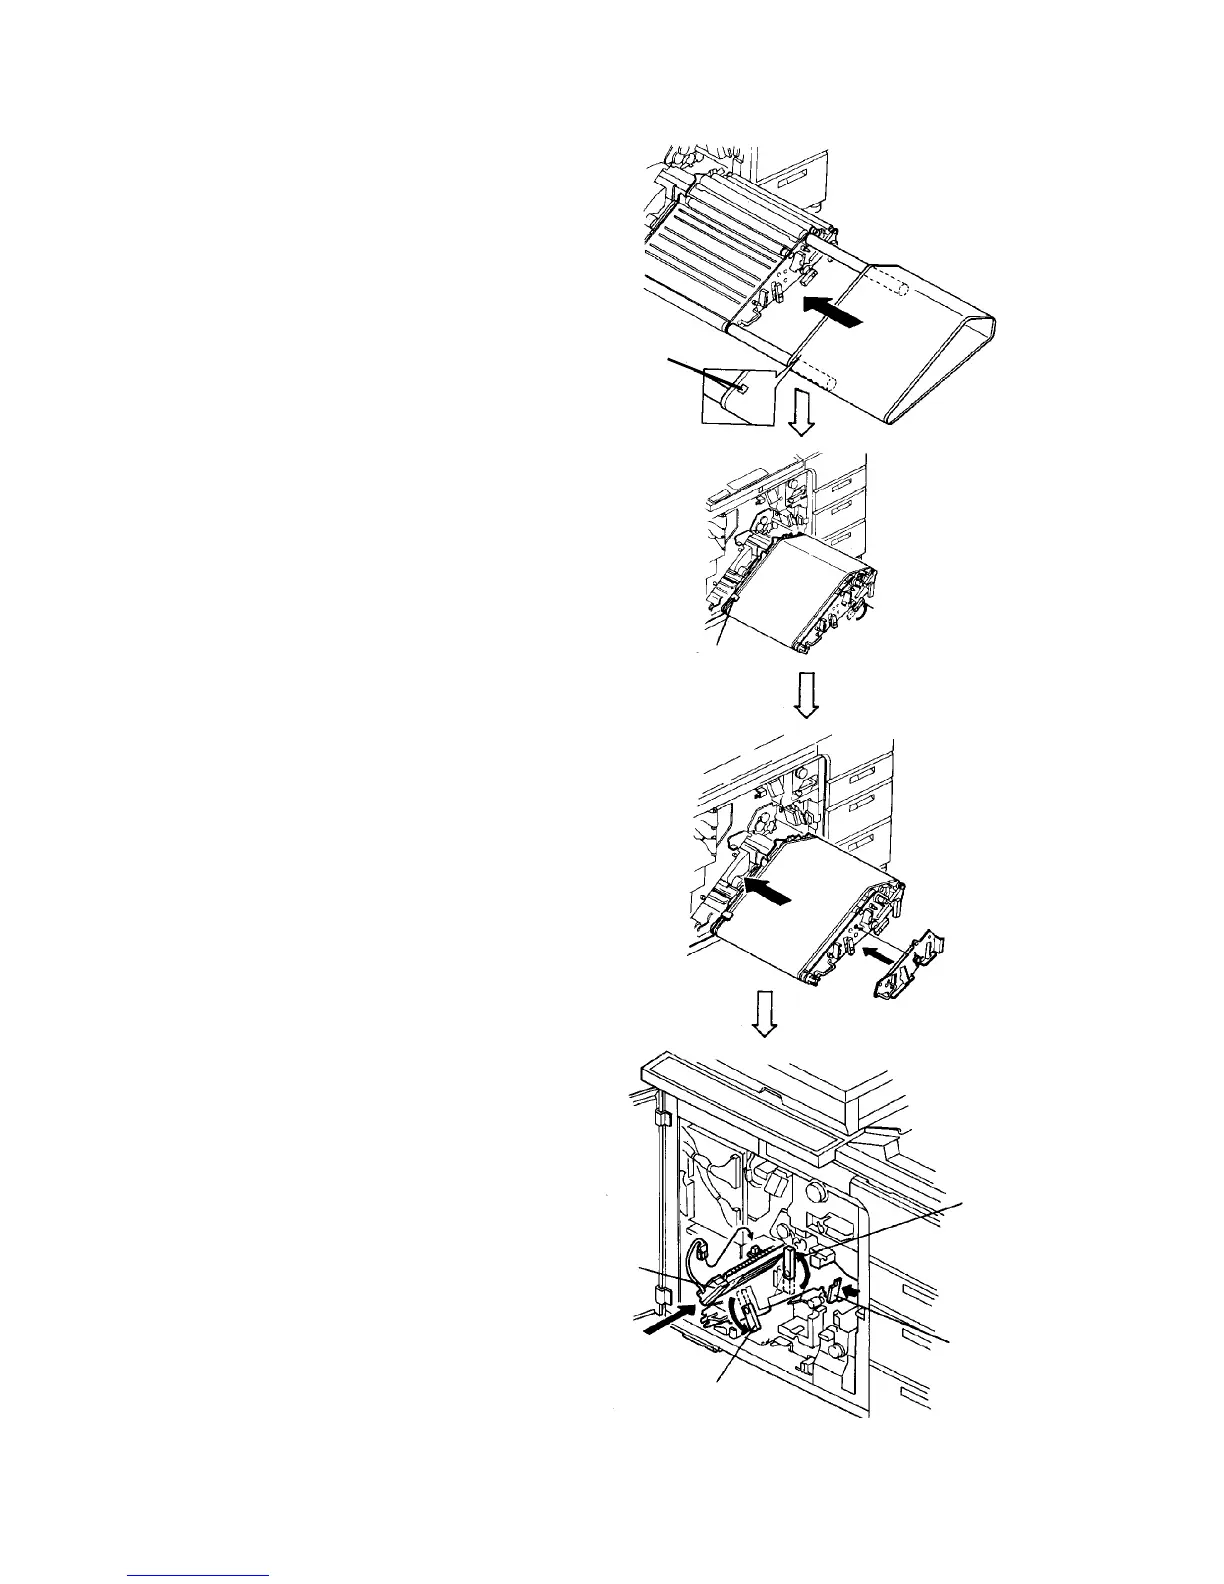
14. Set a new OPC belt.
CAUTION
• Set the OPC belt so the mark is on the far
side.
• Put far side of the OPC in the OPC sensor
and set it in the center.
• Never touch the OPC surface, and position
the OPC belt carefully to prevent bending it.
• Do not expose the OPC belt to daylight for
more than a few minutes. When not
installed, keep the OPC belt in its case and
store it in a cool, dark place. If copying is
done while the exterior covers are off and in
slight daylight, even after it is set in the
copier, the copy image becomes extremely
light.
• Never use alcohol or other chemicals to
clean the OPC.
15. Slowly turn lever (3) back to its original position
and put tension the OPC belt.
16. Press and set the OPC unit.
17. Fit the OPC unit stay.
18. Turn levers (1) and (2) to set the development and
cleaning backup rollers.
19. Shift the transport unit to the left.
20. Fit the charge corona unit and the connector.
21. Install the inner cover and doors in the reverse
order.
22. Turn on the main switch and wait for the machine
stand-by.
23. Access service tool [3-04] (or [4-04]) and perform
the OPC forming. Reset the supply yield counter
for the OPC to 0 at the same time.
24. Select service tool [5-06] and check the tracking
operation. If necessary, adjust the tracking amount
(see Adjusting the tracking amount section).
25. Select service tool [4-02] and check the VSG. If
the value is not between 2.5 and 4.5 volts or it is
locked, perform setting C.
Mark
Lever (3)
OPC sensor
Lever (1)
Transport unit
Lever (2)
Charge
corona unit



 To Next Page