2.6 Cleaning Unit
CAUTION
When you pull out the cleaning unit and turn the
cleaning knob, toner will fall from the toner exit
pipe of the unit. When you do this, place a sheet
under the toner exit pipe to prevent the OPC unit
from becoming dirty by toner.
2.6.1 Replacing the cleaning carrier
PM cycle: Replace every 400K
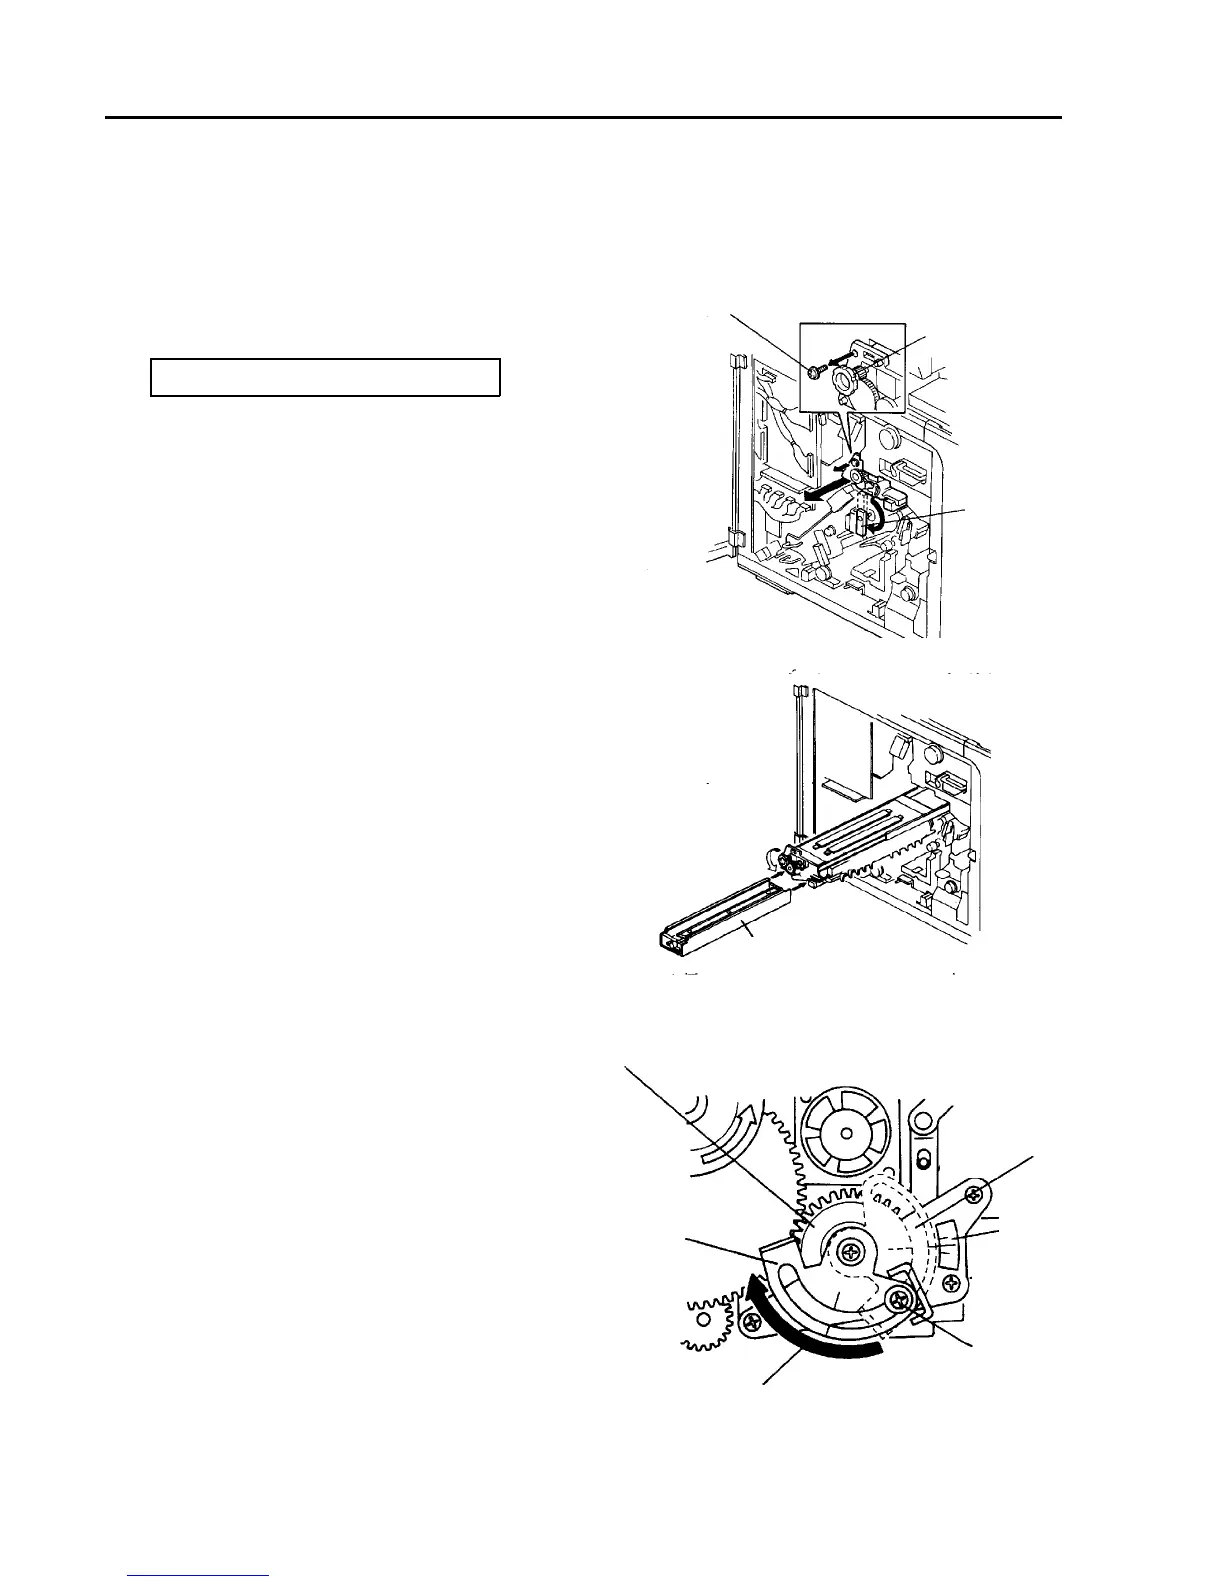
1. Turn off the main switch. Open the front door, and
remove 2 screws to allow it to open further.
2. Remove the inner cover (2 screws and one
connector).
3. Remove the cleaning unit fixing screw.
4. Turn the lever to release the cleaning backup roller
of the OPC unit.
5. Grasp the knob of the cleaning unit and pull it out.
6. Put the cleaning carrier collecting vessel on the
bottom of the unit. Set its lever to the carrier
collecting position to erect the rubber blade.
7. Loosen the main pole adjusting plate fixing screw
(gold screw) and move the main pole adjusting
plate to the carrier collecting side.
CAUTION
Remember the position of the main pole
adjusting plate. This position is sometimes
different from one machine to another.
8. Turn the cleaning knob toward the arrow and
collect the cleaning carrier.
9. Remove the cleaning filter cover (4 screws), and
clean the inside from the above using the carrier
collecting magnet.
10. Return the main pole adjusting plate to its original
position. Tighten the gold screw.
Cleaning unit
fixing screw
Cleaning knob
lever
Cleaning carrier
collecting vessel
Original
position
Main pole
position decal
Gold screw
Cleaning roller gear
Main pole
adjusting plate
Carrier collecting direction



 To Next Page