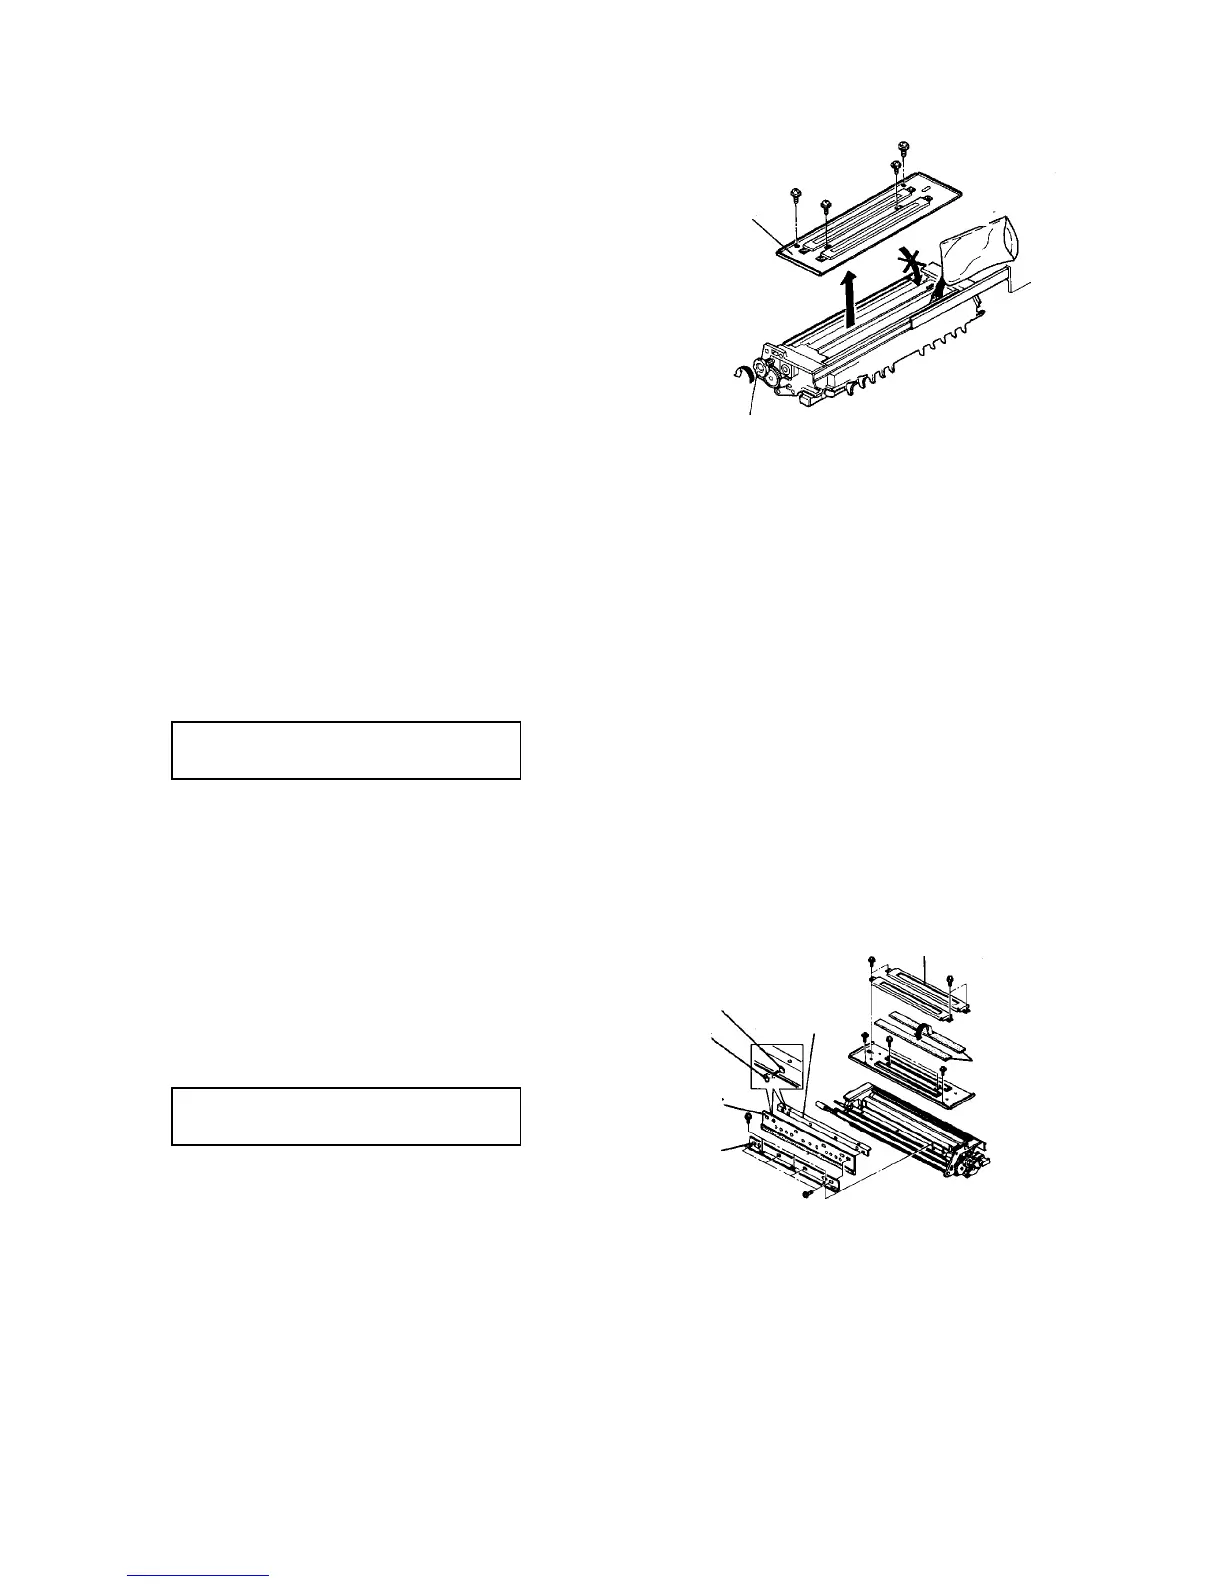
11. Put one bag of cleaning carrier in the right side
spread evenly.
CAUTION
Never put in cleaning carrier on the left side
(scavenging roller side).
12. Turn the cleaning knob to circulate the cleaning
carrier evenly on the cleaning roller.
NOTE
The cleaning unit has no agitation mechanism like as the
development unit.
13. Assemble in the reverse order.
14. Turn on the main switch and wait for the copy
stand-by.
15. Access service tool [3-04] and perform the
cleaning carrier forming. At the same time, reset
the supply yield counter for the cleaning carrier to
0.
2.6.2 Replacing the air filters
PM cycle: Rotate between left and right
every 200K. Replace every 400K.
1. Slide out the cleaning unit.
2. Remove the filter cases (2 screws).
3. Rotate the filter right to left, or replace them.
CAUTION
The filters have a setting direction. Be sure that
the side with a red line on the edge is facing the
inside of the unit.
2.6.3 Replacing the scavenging blade
PM cycle: Inspect every 200K. Replace
every 600K.
1. Slide out the cleaning unit, and remove cleaning
filter cover.
2. Remove the blade bracket (3 screws).
3. To replace the blade, remove the blade support
plate (4 screws).
NOTE
• Align the holes of the scavenging blade with
the projections of the blade support plate.
• If the blade is dirty, clean it with alcohol.
Cleaning filter cover
Cleaning
carrier
Cleaning knob
Filter case
Air filter
Blade
support plate
Projection
Hole
Scavenging blade
Blade bracket



 To Next Page