11
Turning the JUPITER-X On
1. Power-on the equipment in the order of JUPITER-X
0 connected devices.
* In order to protect its circuitry, the JUPITER-X waits for a while after
being powered-on before it begins operating.
2. Switch on power to the connected equipment, and
raise the volume to an appropriate level.
* The power to this unit will be turned o automatically after
a predetermined amount of time has passed since it was
last used for playing music, or its buttons or controls were
operated (Auto O function).
If you do not want the power to be turned o automatically, disengage the Auto
O function.
& “Using the Auto O Function”
5 Unsaved data is lost when the power turns o. Before turning the
power o, save the data that you want to keep.
5 To restore power, turn the JUPITER-X on again.
Turning O the Power
1. Power-o the equipment in the order of the
connected devices 0 JUPITER-X.
* If you need to turn o the power completely, rst turn o the unit, then
unplug the power cord from the power outlet.
Refer to “To completely turn o power to the unit, pull out the
plug from the outlet” (Owner’s Manual: p. 2).
Using the Auto O Function
You can make the power turn o automatically when a certain time
has elapsed since the unit was last played or operated.
1. Press the [MENU] button.
2. Use the [1] knob to select “SYSTEM,” and then press
the [ENTER] button.
You can also make this selection by using the PAGE [ ] [ ]
buttons instead of the [1] knob.
3. Use the [1] knob to select “Auto O” and use the [2]
knob to change the setting.
If you don’t want the unit to turn o automatically, choose
“OFF” setting.
Parameter
[1] knob
Value
[2] knob
Explanation
Auto O
OFF,
30 [min],
240 [min]
Species whether the unit will turn o
automatically after a certain time has
elapsed.
If you don’t want the unit to turn o
automatically, choose “OFF” setting.
4. To save the setting, press the [WRITE] button.
A conrmation message appears.
If you decide to cancel, press the [EXIT] button.
5. To execute, press the [ENTER] button.
Getting Ready to Play
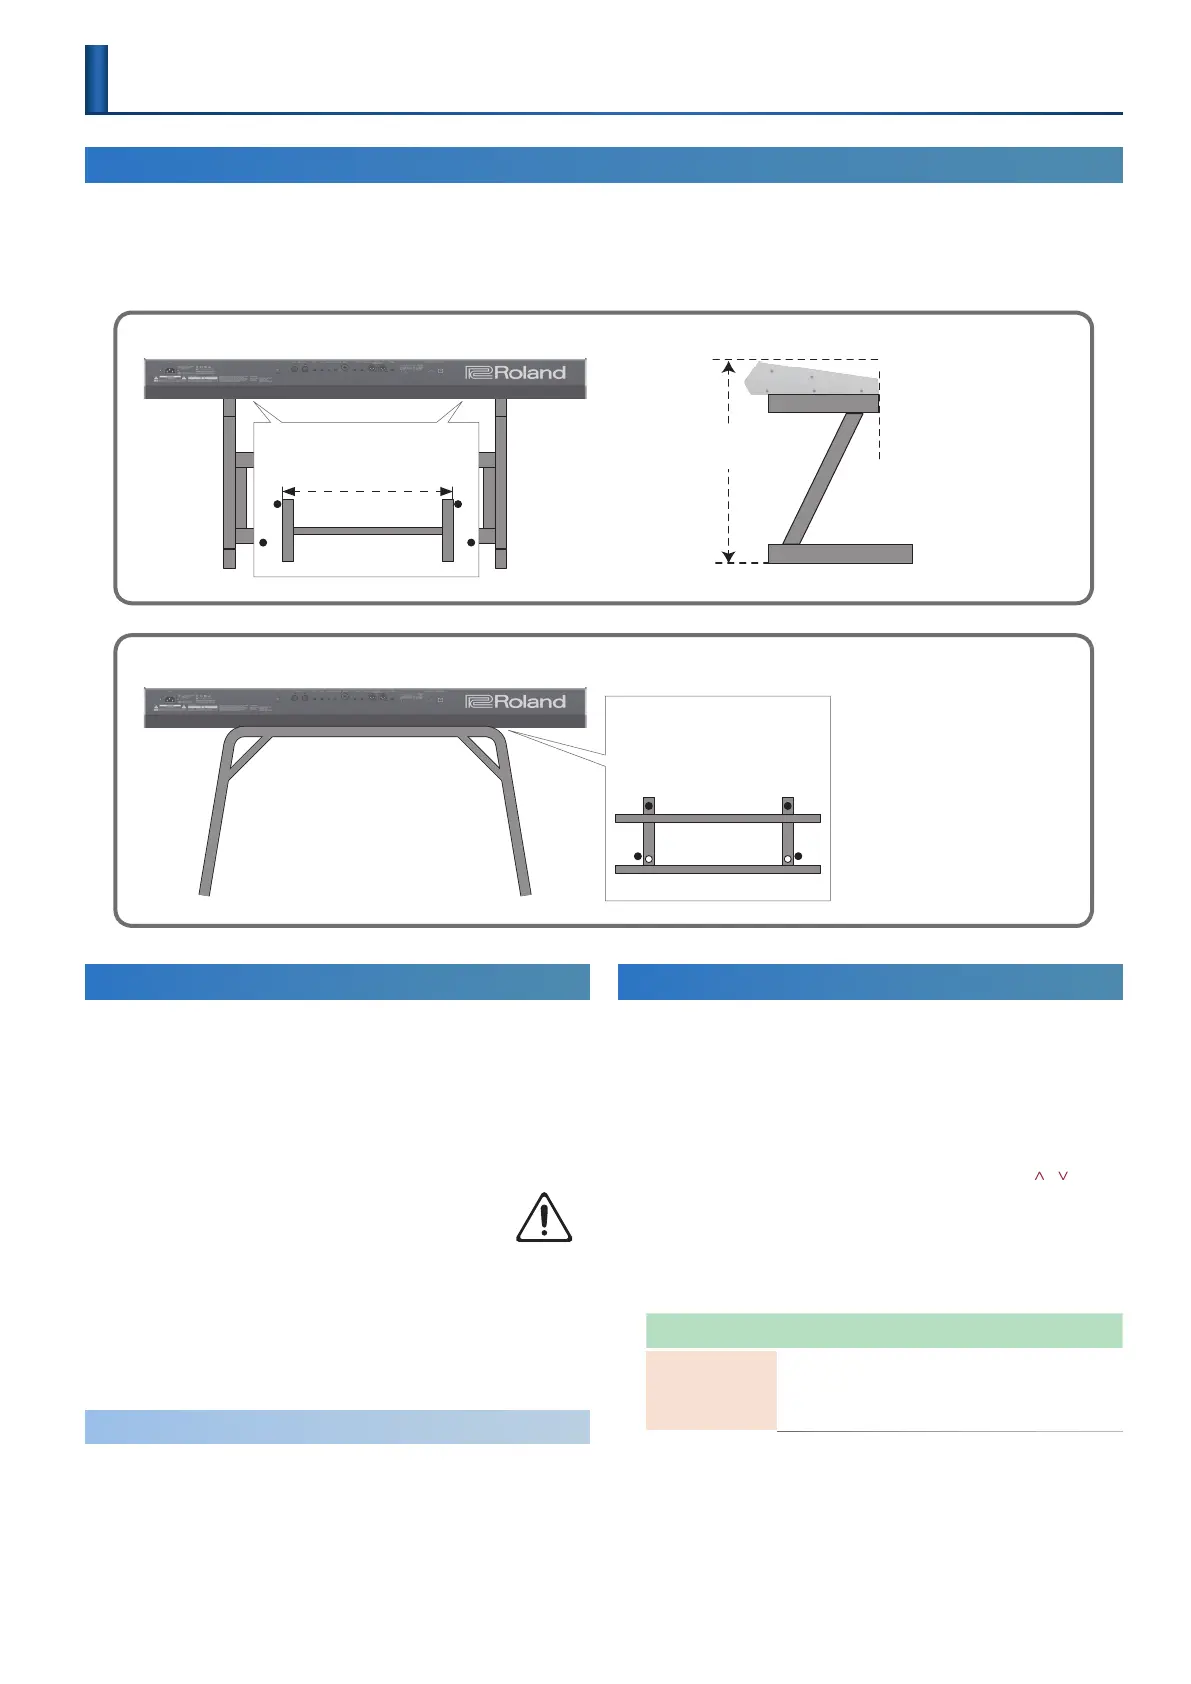
Placing the JUPITER-X on a Stand
If you want to place the JUPITER-X on a stand, use the Roland KS-10Z or KS-12. Place the JUPITER-X on the stand as follows.
Be sure to follow the instructions in the Owner’s Manual carefully when placing this unit on a stand. If it is not set up properly, you risk creating an
unstable situation which could lead to the unit falling or the stand toppling, and may result in injury.
* Be careful not to pinch your ngers when setting up the stand.
KS-10Z
Adjust the horizontal width of the
stand as shown in the illustration.
Top view
Adjust so that the height does
not exceed 1 meter.
Align the front of the JUPITER-X
with the front of the stand.
680 mm
KS-12
Adjust the width of the stand
so that the rubber feet on the
keyboard side of the bottom of
the keyboard t into the holes
provided for the rubber.
Top view

 Loading...


