23
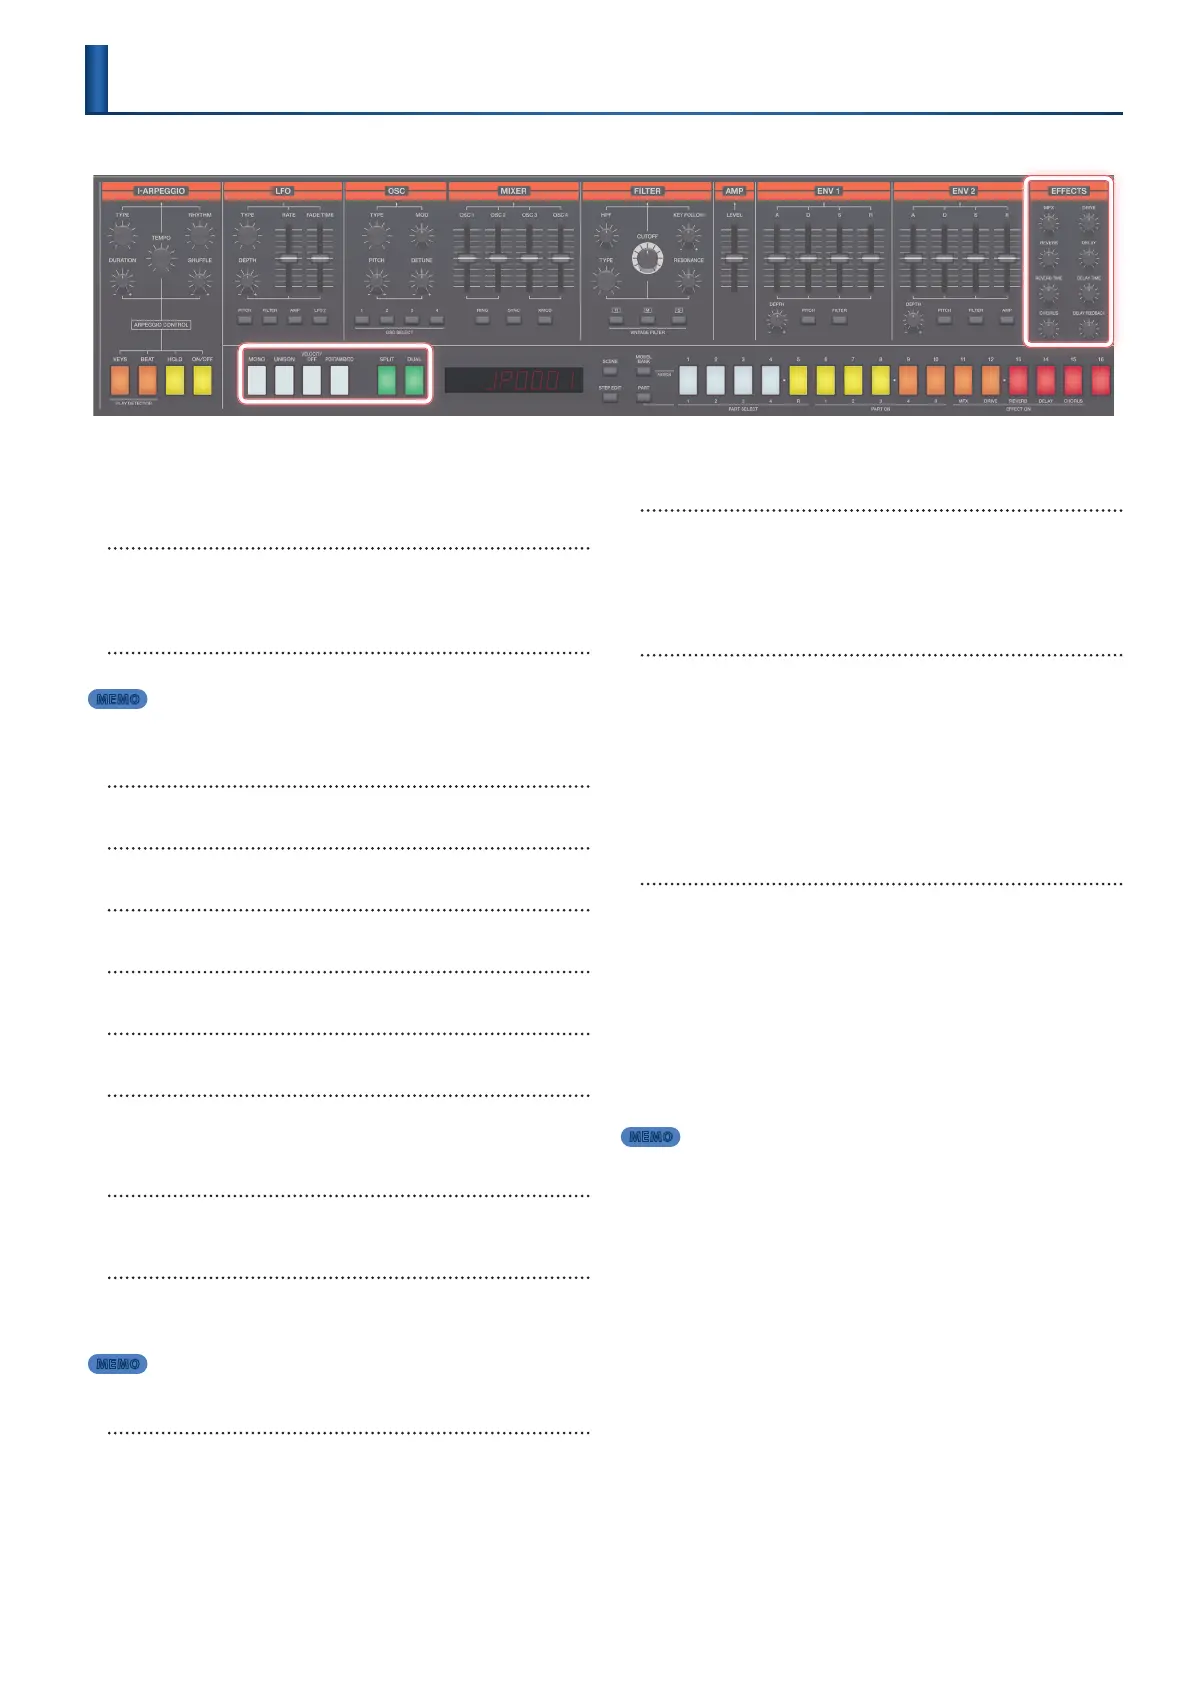
Eects section
[MFX] knob
Adjusts the MFX depth for each part.
The MFX type can be specied by the edit page “TONE MFX”
setting.
[DRIVE] knob
Species the amount of drive distortion.
MEMO
5 Be aware that the drive depth cannot be specied individually for each part.
5 To enable drive, set the SCENE PART EDIT “Output” to “DRIVE.”
[REVERB] knob
Adjusts the reverb depth for each part.
[REVERB TIME] knob
Species the length of reverb.
[CHORUS] knob
Adjusts the chorus depth for each part.
[DELAY] knob
Adjusts the delay depth for each part.
[DELAY TIME] knob
Adjusts the delay time.
[DELAY FEEDBACK] knob
Adjusts the amount of delay feedback.
Edit section
[MONO] button
If you turn the Mono function on by making this button light,
the sound plays monophonically (one note at a time).
[UNISON] button
If you turn the Unison function on by making this button light,
slightly pitch-shifted copies of the same tone as the tone are
layered to make the sound thicker.
MEMO
The eect depth diers depending on the settings of the selected tone.
[VELOCITY OFF] button
If you turn the Velocity O function on by making this button
light, notes play without being aected by your keyboard
playing dynamics.
[PORTAMENTO] button
If you turn the Portamento function on by making this button
light, you can make the pitch change gradually between notes.
If you hold down the [SHIFT] button and press the
[PORTAMENTO] button, a screen appears where you can adjust
the speed of pitch change.
[SPLIT] button
If you turn the Split function on by making this button light,
you can perform with the keyboard divided into two regions.
If you hold down this button and play a key, the keyboard is
divided into regions at that key.
The Split function turns on/o each time you press the [SPLIT]
button.
* This function can be used to divide the keyboard only when using PART1
and PART2. If you want to divide the keyboard using other parts, refer to
“Specifying the Key Range” (p. 17).
[DUAL] button
If you turn the Dual function on by making this button light,
you can play two sounds layered together.
If you hold down the [SHIFT] button and press the [DUAL]
button, the left side of the keyboard plays the PART1 sound and
the right side of the keyboard plays the PART2 sound.
The Dual function turns on/o each time you press the [DUAL]
button.
* This function can be used to layer sounds only when using PART1 and
PART2. If you want to layer the sounds of other parts, turn “KeySw” “ON”
in SCENE PART EDIT or as described in “Selecting the Parts to Perform”
(p. 14).
MEMO
The parameters that can be edited using the controllers dier
depending on the model of the sound and on the type of edit
page that is shown.
For details, refer to “Correspondence Between Controllers and
Parameters” (p. 29).
Editing a Scene
(SCENE EDIT)
Eects section
Edit section
* You can use the knobs and buttons to instantly edit the scene even while you perform.

 Loading...


