24
Editing a Scene (SCENE EDIT)
Scene Edit
The scene edit pages let you make settings that are common to the
scene.
1. Press the [SCENE] button.
The scene top screen appears.
2. Use the PAGE [<] [>] buttons to move to the scene edit
page for the item that you want to edit.
3. Use the [1] knob to select a parameter, and use the [2]
knob to edit the value.
For details, refer to “Parameter Guide” (PDF).
4. If you want to save the settings, write the scene.
& “Saving the Scene Settings (SCENE WRITE)” (p. 25)
Common settings related to I-Arpeggio
(ARP COMMON EDIT)
These are I-Arpeggio settings that are common to all parts.
You can also specify the rhythm pattern that’s used for arpeggio
performance, and the keyboard region that is detected by I-Arpeggio.
Basic settings for scenes (SCENE COMMON EDIT)
These are basic settings for scenes.
You can assign functions to controllers, and make settings for the
controllers of an external device.
Chorus settings (SCENE EFX CHORUS)
These are settings for the chorus eect that is used in common by all
parts.
* These settings are valid only if the “SYSTEM EFFECT: Cho” source is set to
“SCENE.”
& “Editing the System Settings (System)” (p. 43)
Delay settings (SCENE EFX DELAY)
These are settings for the delay eect that is used in common by all
parts.
* These settings are valid only if the “SYSTEM EFFECT: Dly” source is set to
“SCENE.”
& “Editing the System Settings (System)” (p. 43)
Reverb settings (SCENE EFX REVERB)
These are settings for the reverb eect that is used in common by all
parts.
* These settings are valid only if the “SYSTEM EFFECT: Rev” source is set to
“SCENE.”
& “Editing the System Settings (System)” (p. 43)
Overdrive settings (SCENE EFX OverDrive)
These are settings for the overdrive eect that is used in common by
all parts.
* These settings are valid only for parts whose “SCENE PART EDIT” setting
“Output” is set to “DRIVE.”
& “Editing a Scene (SCENE EDIT)” (p. 23)
MEMO
One eect such as chorus and delay can be used for each scene,
and you can specify its depth for each part.
If you want to use dierent eects for each part, specify the
eects individually from “SCENE PART MFX” or “TONE MFX.”
& “Eect settings for each part
(SCENE PART MFX)” (p. 25)
& “Editing a Tone
(TONE EDIT)” (p. 26)
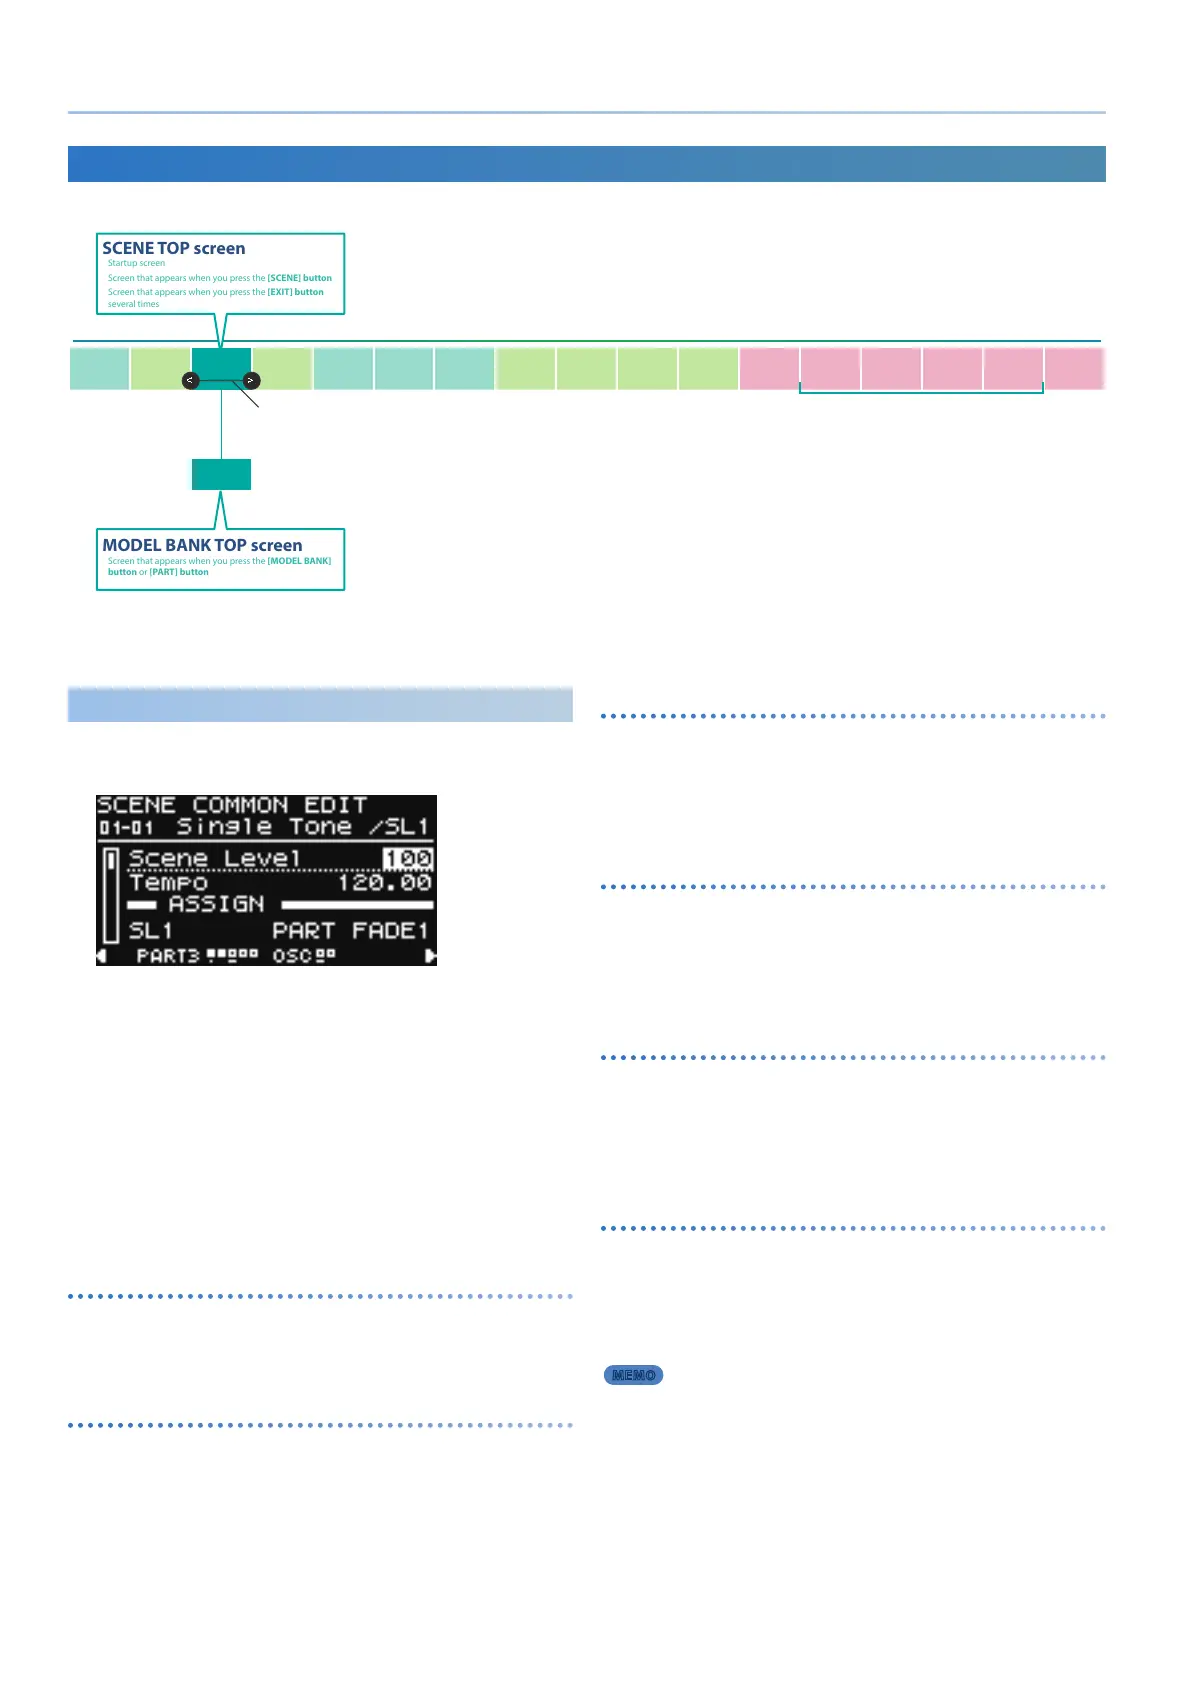
Scene Edit/Part Edit
Detailed settings can be made using the edit pages which you can access from the SCENE TOP screen by using the PAGE [<] [>] buttons.
ARP PART
EDIT
ARP
COMMON
EDIT
SCENE TOP
SCENE
COMMON
EDIT
SCENE
PART EDIT
SCENE
ZONE EDIT
SCENE
PART MFX
SCENE EFX
CHORUS
SCENE EFX
DELAY
SCENE EFX
REVERB
SCENE EFX
OverDrive
TONE
COMMON
EDIT
TONE
PARTIAL 1
TONE
PARTIAL 2
TONE
PARTIAL 3
TONE
PARTIAL 4
TONE MFX
<<<<<<<<< Use the cursor [<] [>] buttons to switch screens. >>>>>>>>>
SCENE TOP screen
Startup screen
Screen that appears when you press the [SCENE] button
Screen that appears when you press the [EXIT] button
several times
Enters the edit screen with a part selected (you can switch parts at any times).
When you use the cursor buttons to return, you return to the screen where you were before accessing the
edit screen.
MODEL
BANK TOP
MODEL BANK TOP screen
Screen that appears when you press the [MODEL BANK]
button or [PART] button
For some models, pages are not divided by partial.

 Loading...


