13
Selecting Sounds
On the JUPITER-X, you select a scene and play the sounds that are
assigned to each of the ve parts.
Recalling/Saving a Scene (Scene Select Mode)
The JUPITER-X can store a total of 256 scenes, organized as 16 banks
each containing 16 scenes.
Recalling a Scene
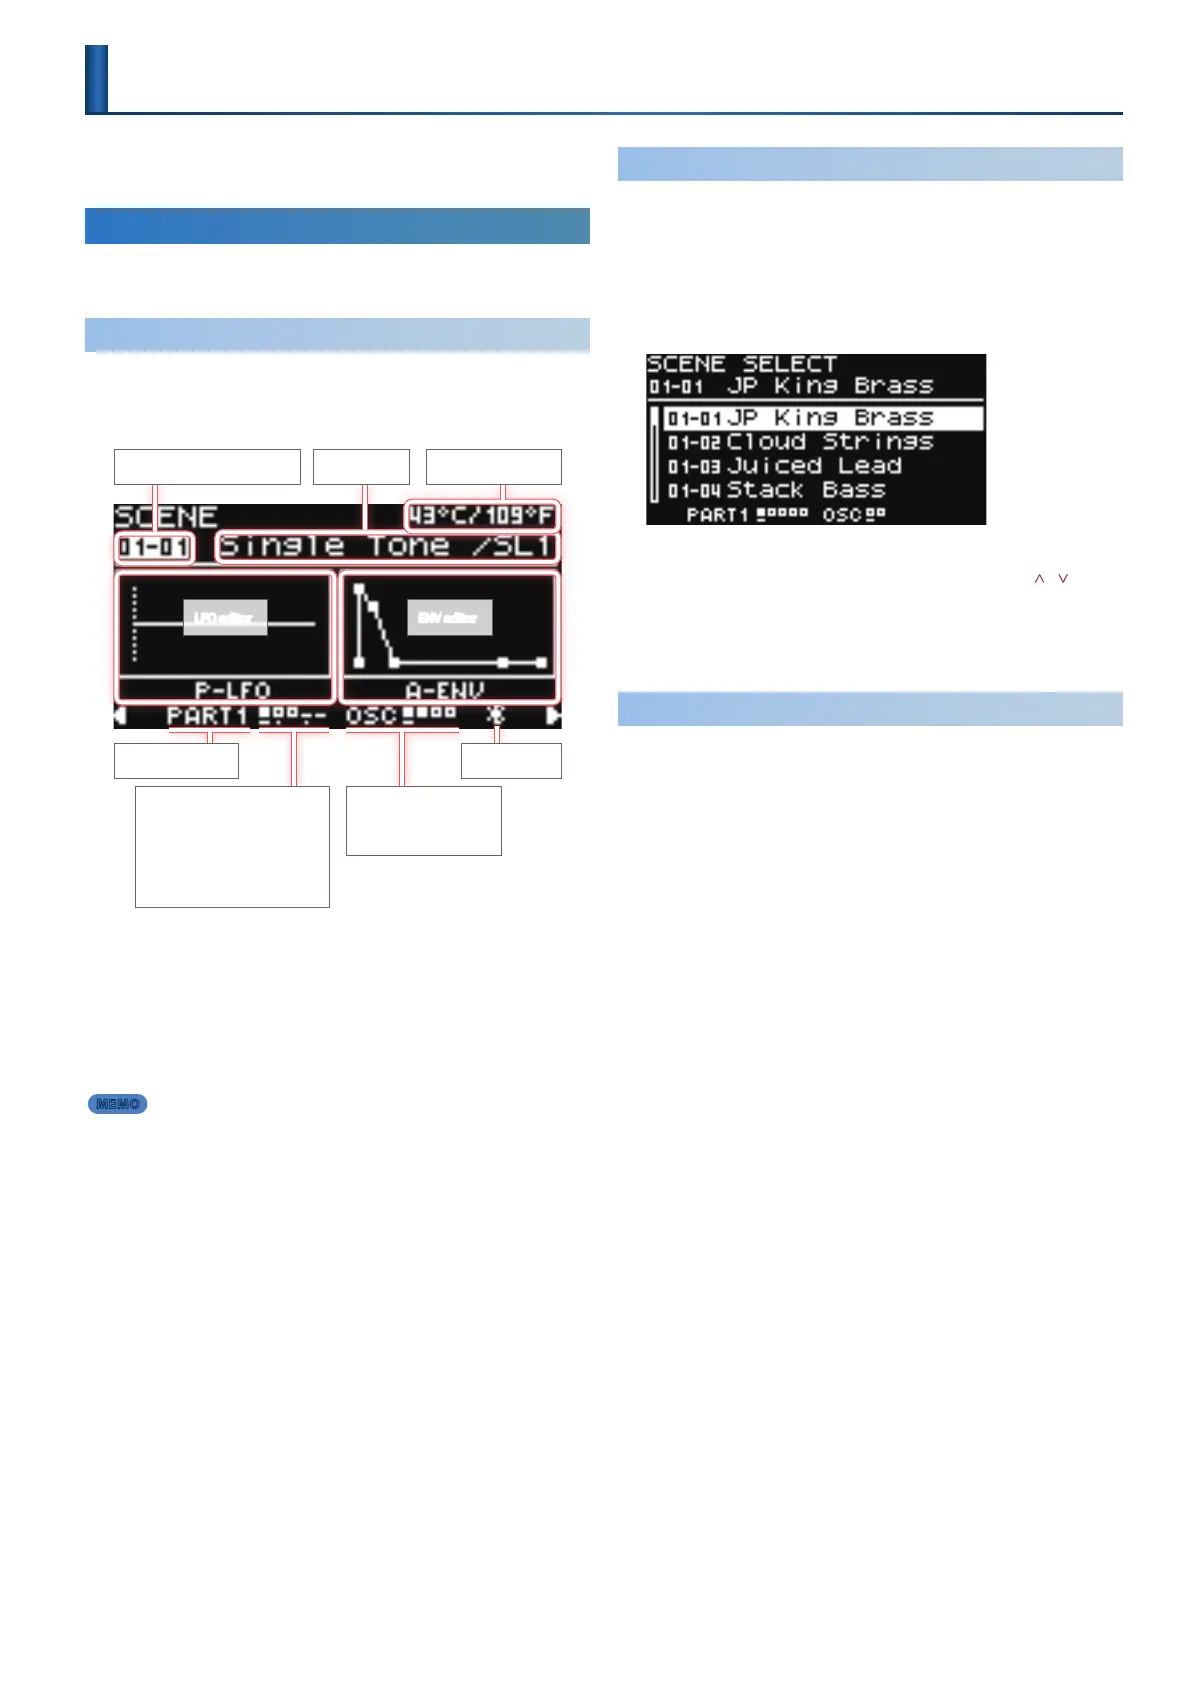
1. Press the [SCENE] button to enter scene select mode.
The SCENE TOP screen appears.
Bank number–Scene number
Current internal
temperature
Scene Name
LFO editor
ENV editor
Current part name
9: Key Sw is ON
8: Key Sw is OFF
–
: Part Sw is OFF
+: Arpeggio part
–
: Current part
5
: Being edited simultaneously
9: PARTIAL Sw is ON
8: PARTIAL Sw is OFF
–
: Being edited
Bluetooth Sw
2. Hold down the [SCENE] button and press the [1]–[16]
buttons to select a scene bank.
Instead of using the buttons, you can also use the [1] knob to
select.
3. Use the [1]–[16] buttons to select a scene.
Instead of using the buttons, you can also use the [2] knob to
select.
MEMO
The system parameter “Startup SCENE” lets you specify the
scene that is selected at start-up.
& “System Parameter List” (p. 44)
Selecting a Scene from a List
1. Press the [SCENE] button to enter scene select mode.
The SCENE TOP screen appears.
The [1]–[16] buttons switch to scene select mode.
2. Press the [ENTER] button.
The scene list appears.
3. Use the [2] knob to select a scene.
You can also make this selection by using the PAGE [ ] [ ]
buttons instead of the [2] knob.
Alternatively, you can use the [1] knob to jump to the previous
or next scene bank.
4. Press the [ENTER] button to conrm the scene.
Saving a Scene
The edits that you make to a part or tone, or the data that you record,
are temporary. They are lost when you turn o the power, or when
you select another scene or tone. If you want to keep the result of your
editing or recording, you must save it to a scene.
* If you want to save a tone individually, use the tone write operation
(p. 27).
1. Press the [SCENE] button, and then press the [WRITE]
button.
The WRITE MENU screen appears.
2. Use the [1] knob to select “SCENE,” and then press the
[ENTER] button.
3. Use the [2] knob to select the save-destination, and
then press the [ENTER] button.
If you want to rename the scene that’s being saved, use the
PAGE [<] [>] buttons to move the cursor and use the [2] knob to
specify characters.
4. Press the [ENTER] button.
A conrmation message appears.
If you decide to cancel, press the [EXIT] button.
5. To execute, press the [ENTER] button.

 Loading...


