Section 6 - Service
74 SCHWARZE HYPERVAC HV-18 revised 11/18
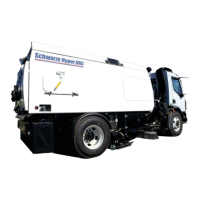
Nozzle Tilt Adjustment
To maintain a proper gap around the nozzle as shown in
the Adjusting the Nozzle aps section, the angle of the
nozzle may need to be adjusted. Adjust the nozzle angle
as shown below until the desired gap between the nozzle
is consistent.
1.
Loosen the jam nut on the screw.
2. Tighten or loosen the adjusting screw until the desired
level of pitch is achieved.
3. Tighten the jam nut to prevent the screw from
loosening.
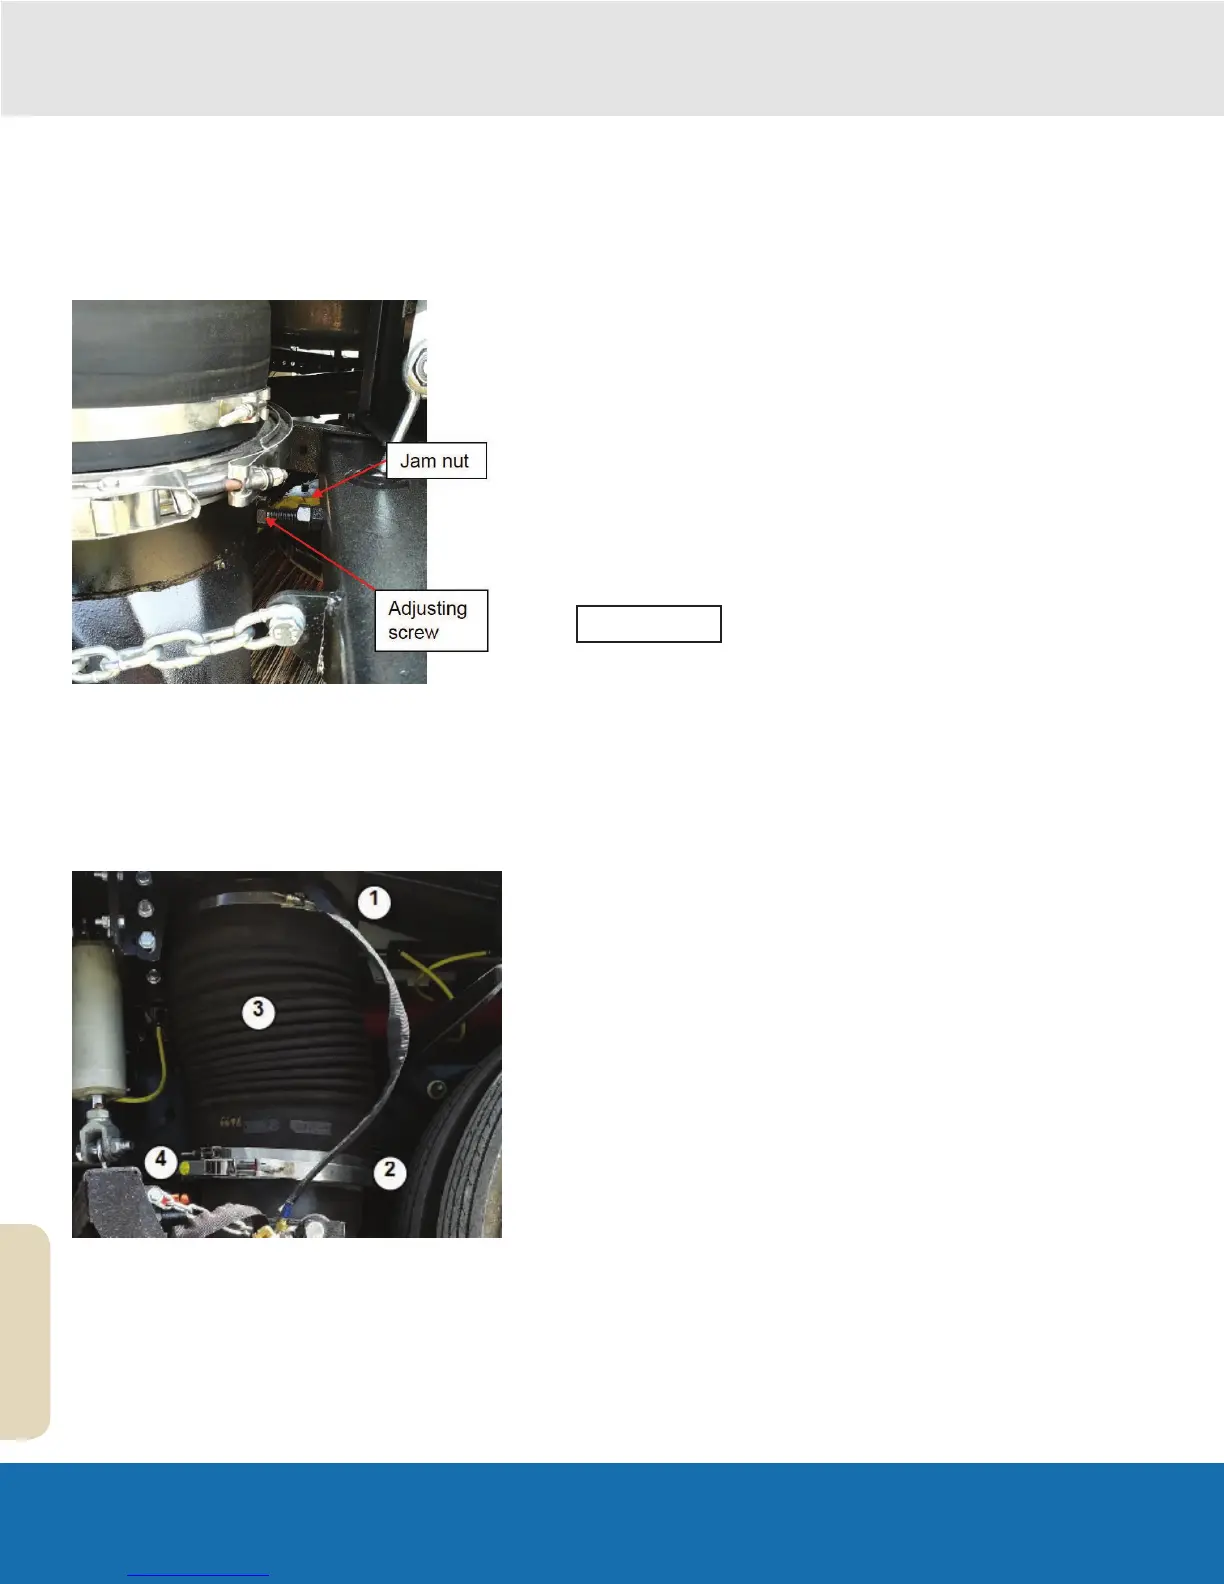
Replacing the Nozzle Hose
1.
Release the Clamp locking the HD Suction Hose to
the Upper Tube of the Nozzle.
2. Loosen the two remaining Hose Clamps. One will be
located on the top section of the HD Suction Hose,
the second will be located on the bottom section of
the HD Suction Hose.
3. Rotate or replace the HD Suction Hose.
4. Use the Clamp to lock the bottom section of the
HD Suction Hose to the Upper Tube of the Nozzle.
Tighten the two Hose Clamps into place.
6.3 Hopper
The hopper is a simple component and needs little in the
way of maintenance. Clean the hopper daily to prevent
debris build-up and follow the lubrication schedules.
Replacing the Hopper Seals
It is important that the sweeper’s seals on the fan housing
be kept in the best condition possible. These include
the seals on the suction hose inlet, around the hopper’s
inspection door opening and on the rear door. Pickup
power is vacuum dependent, so a tight seal can make a
signicant difference in pickup ability. Maintain resilience
by keeping the seals well lubricated with a good grade of
petroleum-based jelly or grease.
Lubrication of the side inspection door
seals is not necessary.
For longer seal life, when the sweeper is parked for an
extended period of time, leave the dump and all inspection
doors open and raise the hopper a few inches so their
seals can regain their shape.
Eventually the seals will become worn or non-resilient and
must be replaced.
Replacement
1. Use a gasket scraper, putty knife or screwdriver to
remove the seal from its sweeper component. Get the
metal surface as clean as possible. Be sure it is free
of all dirt, old glue, and seal material.
2. Liberally apply a coat of weather-strip-type adhesive
onto the new seal and body component. Allow the
adhesive to set up for several minutes (follow the
adhesive manufacturer’s instructions) and then put
the new seal in place.
Replacing the Hopper
Needed for a hopper replacement:
• Two workers
• Overhead crane
• Support blocks
Removal
1. Install approved lifting eyes and load spreader if
needed in the two front lifting eye positions.
2. Raise the hopper and insert the safety props.
NOTE