Section 6 - Service
HV-18 revised 11/18 SCHWARZE HYPERVAC 81
6. When proper belt tension is achieved, re-thread the
loose adjustment nuts tightly against their power
module platform tabs. (If you’re adjusting the engine
away from the fan shaft, these would be the inner
adjustment nuts; toward the fan shaft, these would
be the outer adjustment nuts.) Tighten any loose jam
nuts back against their respective adjustment nuts.
7. Tighten the four tie-down bolts at the corners of the
engine skid.
8. Start the sweeper engine. Squealing or abnormal
vibrations indicate low belt drive tension. Adjust as
needed.
9. Re-bolt the belt guard back into position.
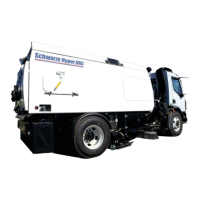
Replacing the Drive Belt
Replace the drive belt when it shows signs of wear, rather
than waiting for it to break. This practice will help to ensure
optimum sweeper performance and avoid downtime.
To replace the drive belt, reposition the sweeper engine.
1. Remove the sweeper engine’s keys and/or disconnect
the battery cable to prevent the sweeper engine from
being started accidentally.
2. Follow the procedures outlined in steps 1-4 in section
‘Drive Belt Tension Adjustment’ of this manual
3. Loosen the mounting bolts and jackscrews so the
engine skid is pushed toward the fan shaft.
4. As the engine skid moves toward the fan shaft, the
drive belt will become loose enough to be slipped
from its pulleys.
5. Inspect the pulley grooves for burrs and other
irregularities that may cause abnormal belt wear.
Replace when needed.
6. Slip the replacement belt into position.
7. Tighten the jackscrew nuts so the engine skid is
pulled away from the fan shaft.
8. Continue to tighten until the belt has 1/2” deflection
between the pulleys using 30 lbs. of pressure (roughly
the equivalent of pressing down on the belt with your
thumb).
9. Check the alignment of the pulleys, using a string or
straight edge, from the face of one pulley to the face
of the other. This will allow you to determine whether
the pulleys are in line with each other.
For slight misalignment, the pulleys
may be repositioned on their respective
shafts. If greater adjustment is needed
than pulley repositioning can achieve,
the entire engine/engine skid assembly
must be moved to obtain alignment.
The slotted tie-down holes of the
engine skid allow a limited amount of
forward & back movement.
10. Once proper pulley alignment is achieved, run the jam
nuts back against their respective jackscrew nuts.
11. Tighten the four tie-down bolts at the corners of the
engine skid.
12. Start the sweeper engine. Squealing or abnormal
vibrations indicate low belt drive tension. Adjust as
needed.
13. Re-bolt the belt guard back into position.
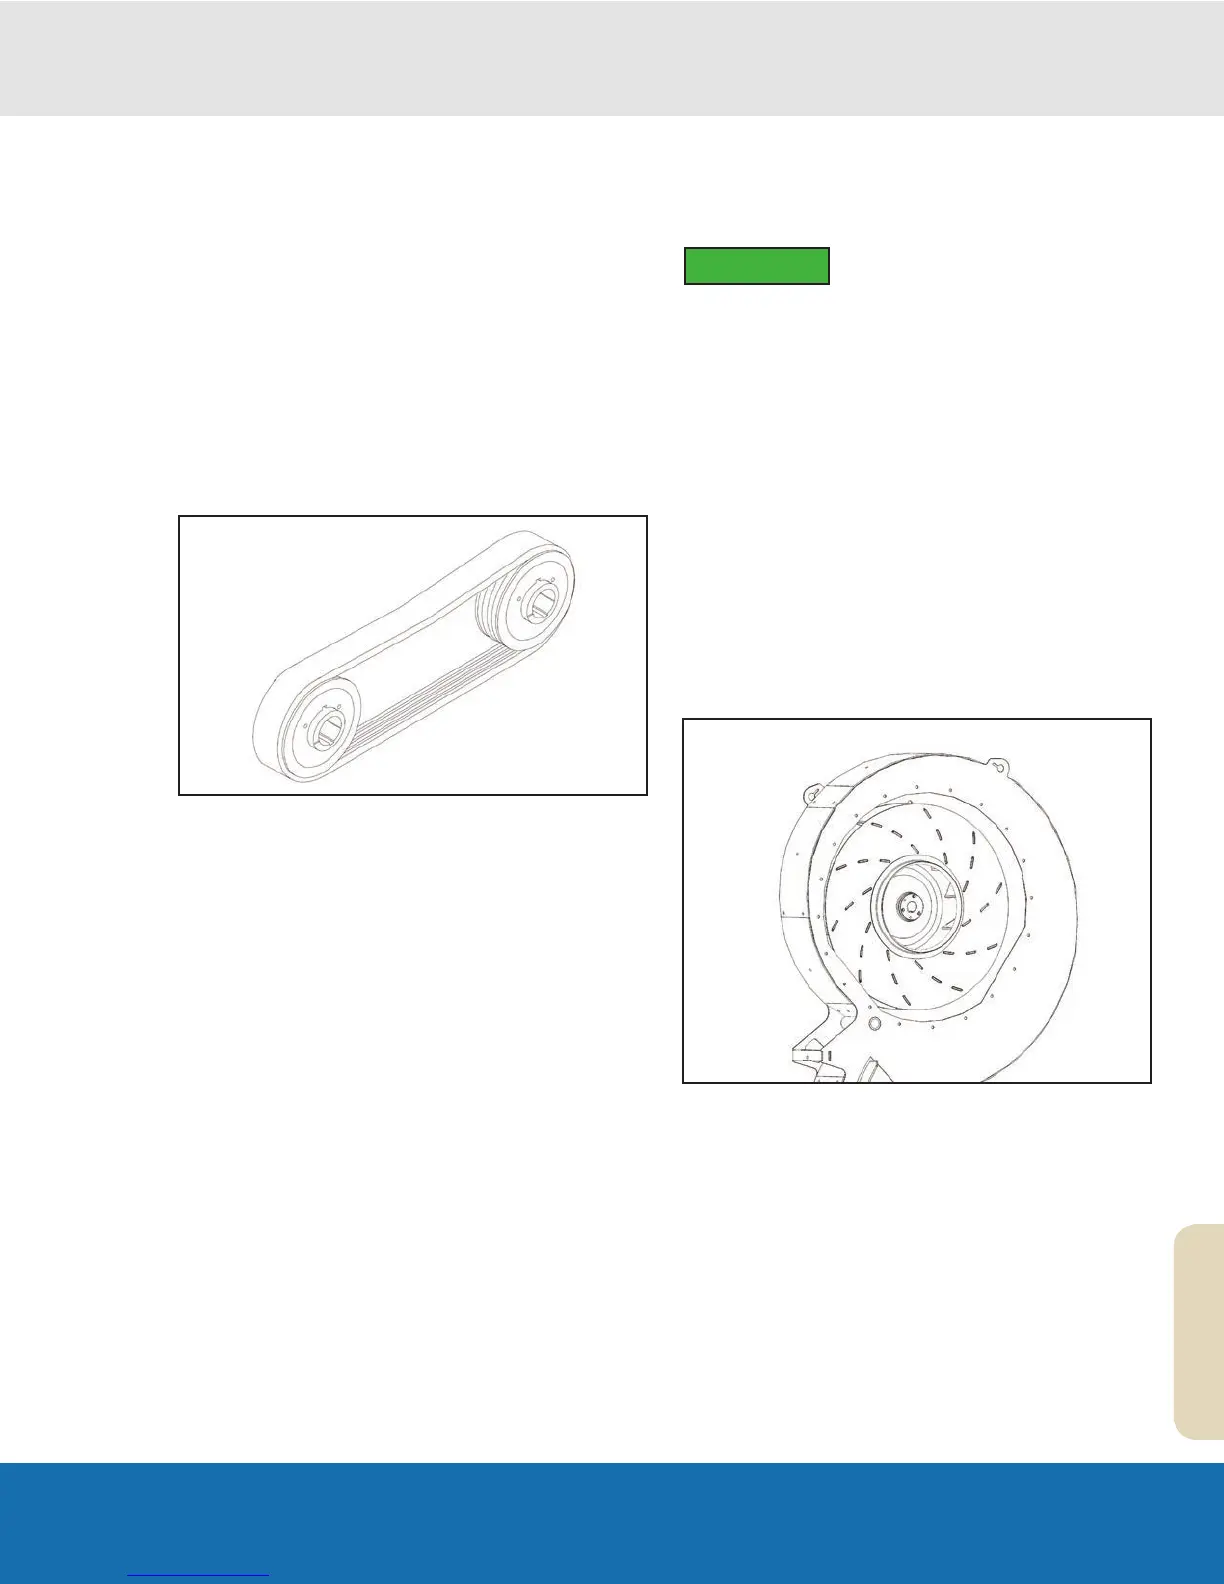
Inspecting the Sweeping Fan System
Over time, dust will cause wear to the fan house liner, fan
house liner bolts and fan blades.
Inspection
1. Raise the hopper and lower the safety prop into
position.
2. Remove the sweeper engine’s keys and disconnect
the battery cable to prevent the engine from starting
accidentally
3. Remove the back plate.
4. Using a flashlight, inspect the fan blades, fan bushing,
fan housing liner bolts and the fan housing liner for
wear.
IMPORTANT