Section 6 - Service
88 SCHWARZE HYPERVAC HV-18 revised 11/18
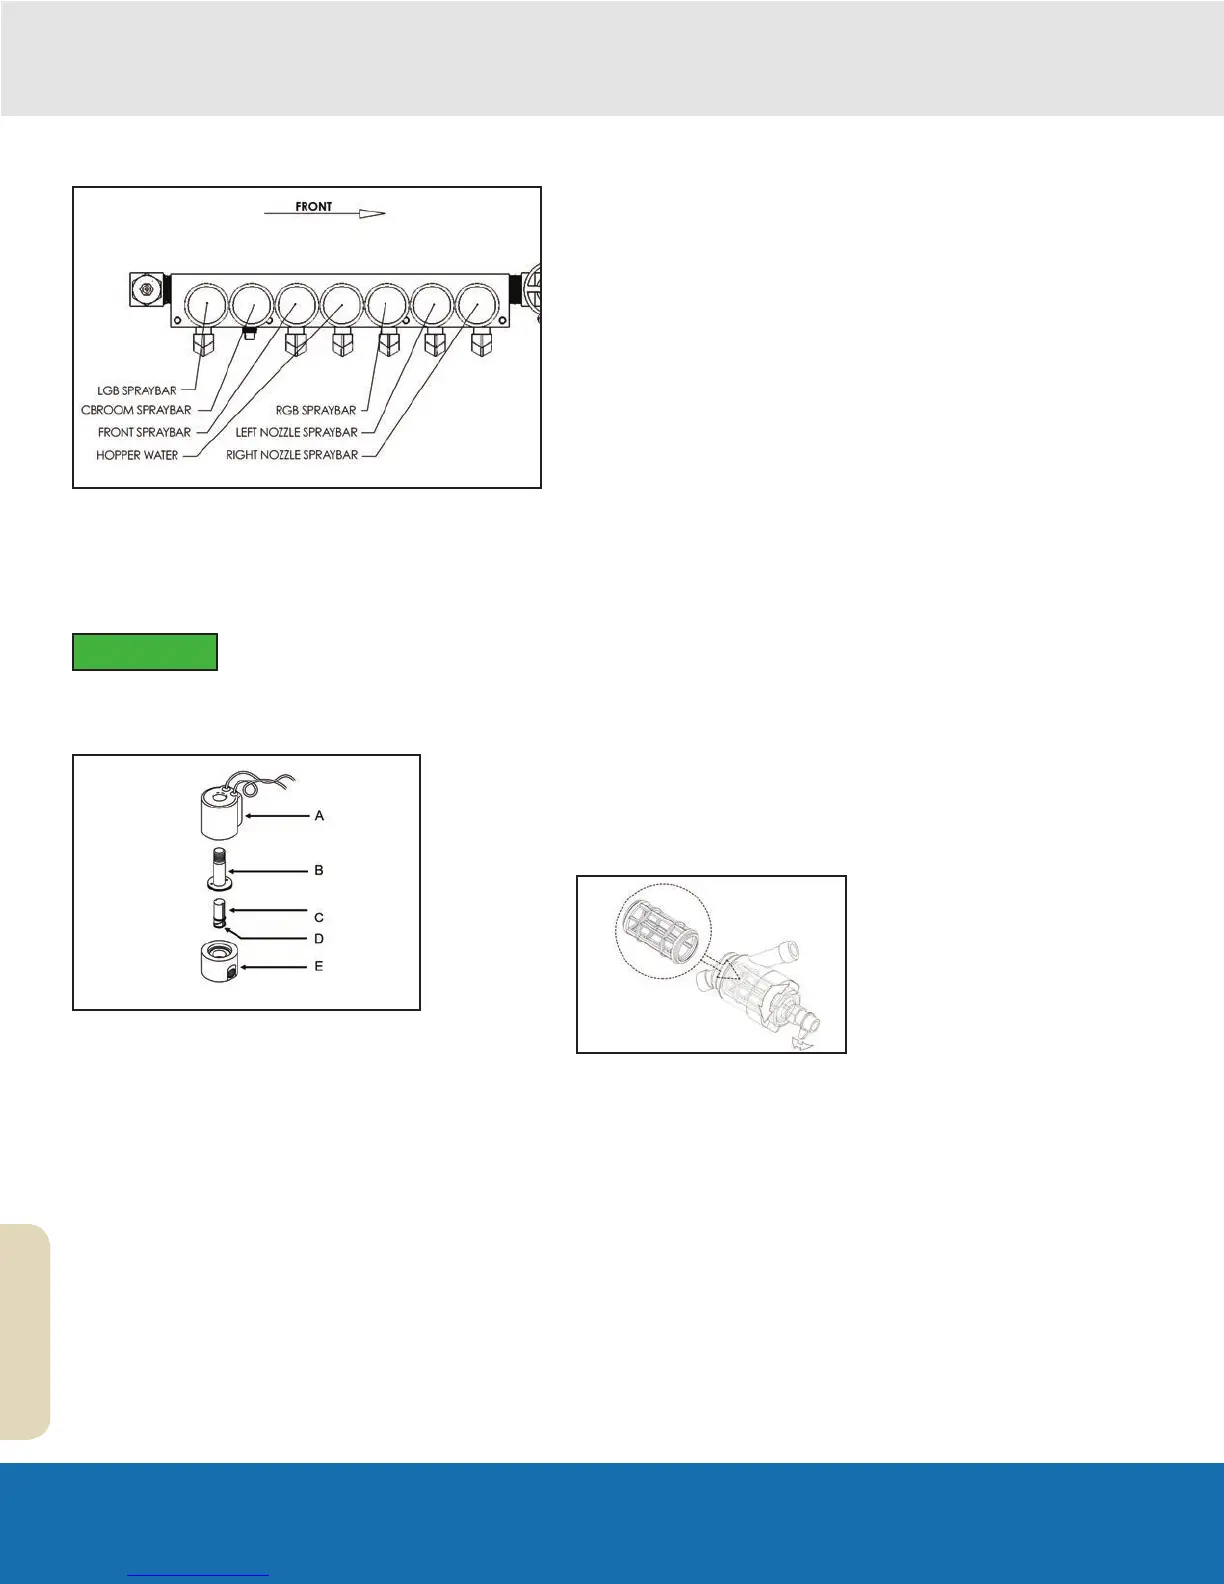
Cleaning the Water Manifold Solenoid
The water manifold solenoid should be cleaned when the
nozzle has been cleaned or replaced and:
• Water leaks or sprays weakly from the nozzles.
• Little or no water flows from the nozzles.
Never use ANY type of cleaning uid
to clean the solenoid valve plunger
assembly or seals.
1. Shutoff all electrical current and pressure.
A Solenoid Housing
B Sleeve Assembly
C Plunger
D Soft Insert
E Base
2. Remove the nut at the top of the solenoid valve.
3. Remove the name plate, coil and housing from the
body.
4. If the valve does not leak from the seat and the
plunger does not stick in the energized position,
the problem is electrical and further cleaning is not
required.
5. If the valve leaks from the seat or the plunger does
stick in the energized position, proceed to the next
step.
6. Use the supplied Peter Paul wrench to remove the
sleeve assembly.
7. Examine the soft inserts in the plunger and carefully
clean.
8. Examine the inside of the sleeve assembly and
carefully clean.
9. If the inserts show excessive wear, replace the
plunger.
10. If the valve emitted a loud buzzing noise during
operation, examine both the inside of the sleeve and
upper portion of the plunger and remove all foreign
matter.
11. After cleaning or replacing parts, verify that both the
ange seal and the return spring are in place.
12. Loosely screw the sleeve assembly into the body.
13. If the valve has a sleeve port, cap the port and apply
pressure to the port leading to the body chamber.
14. If the media is air or gas, apply water to the joint and
watch for air bubbles.
15. Reattach the name plate, coil, and housing to the
body.
16. Carefully tighten the nut at the top of the solenoid
valve. Excessive tightening of the nut can cause
unnecessary strain on either the sleeve assembly or
the coil under the housing.
17. Restart the electrical current and pressure.
Cleaning/Replacing the ‘Y’ Strainer
Cleaning the ‘Y’ strainer requires opening the ‘Y’ strainer
housing. This procedure should be done at the end of the
work shift when the reservoir’s water level will be at its
lowest.
1. Turn off the ball valve.
2. Unscrew the bottom of the ‘Y’ strainer.
3. Remove the screen from inside the ‘Y’ strainer
housing and examine.
4. Remove any debris inside the ‘Y’ strainer and rinse
the cylindrical screen.
5. If the strainer is damaged, replace it.
6. Slip the screen back into position.
7. Reassemble the ‘Y’ strainer housing.
IMPORTANT