Section 6 - Service
82 SCHWARZE HYPERVAC HV-18 revised 11/18
5. If no excess wear or abnormal wear is evident,
replace the back plate, swing the hopper’s safety prop
back into its stored travel position and reconnect the
battery cables.
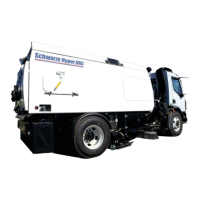
Replacing the Fan System Fan
A Fan Bushing
If a worn fan is causing reduced sweeping efciency,
it should be replaced promptly. The fan shaft bearings
have a life expectancy of roughly 2500 hours. When a
fan replacement becomes necessary near the end of the
bearing’s life expectancy, the bearings should likewise be
replaced.
Removal
1. Raise the hopper and lower the safety prop into
position.
2. Remove the sweeper engine’s keys and/or disconnect
the battery cable to prevent the sweeper engine from
being started accidentally.
3. Remove the 3/8” bolts and washers from around the
back cover plate and lift it off.
4. Remove the 3/8” bolts and lock washers from the
fan’s bushing.
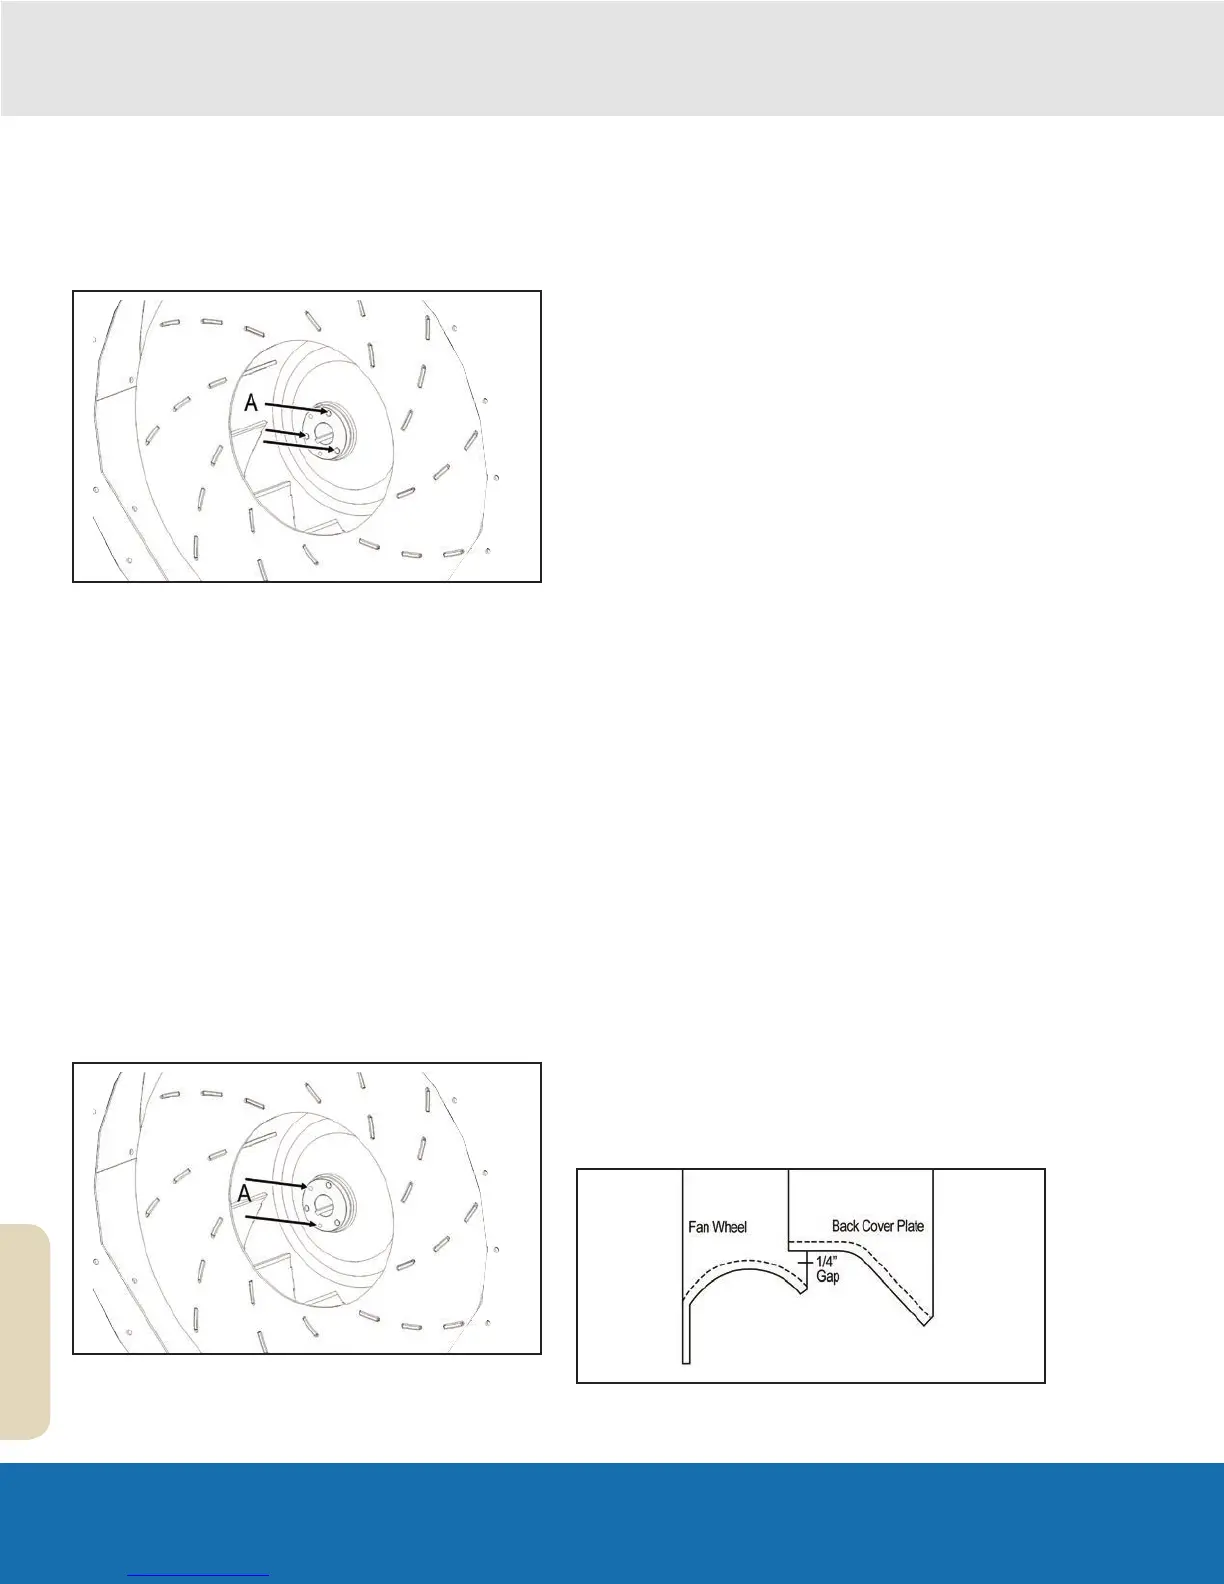
A Tapped Bushing Holes
5. Reinsert two 3/8” bolts into the tapped holes of the
bushing. Tighten these bolts evenly. This will push the
fan off the bushing.
6. Use a gear puller to remove the bushing from the fan
shaft.
7. Remove the fan from the fan shaft and fan housing.
Replacement
8. Inspect the end of the fan shaft. Remove any burrs or
rust from the shaft end with sandpaper.
9. Place the fan on the fan shaft and push it back into
the fan housing.
10. Inspect the bushing. If the bushing is not cracked
or otherwise damaged, the original bushing may be
reused.
11. Apply an anti-seize agent to the tapered area of the
bushing.
12. Slip the key into the bushing/fan shaft key-way.
13. Position the fan bushing onto the fan shaft while
aligning it with the shaft key as well as the fan.
Spread the bushing apart if necessary - remember, it
will crack if it is overspread.
14. Drive the fan bushing onto the fan shaft until
approximately 1/4” of the shaft extends from the face
of the bushing. (Use a rubber hammer or a wooden
block and metal hammer to drive the bushing on.)
15. Insert the three 3/8” bolts with lock washers through
the untapped bushing holes and into the tapped holes
of the fan. Finger tighten the bolts. Do not tighten the
bolts so as to secure the fan to the fan shaft.
16. Apply strip caulk, or a similar sealing agent, to the
face of the fan housing.
17. Install the back cover plate (it may be necessary
to move the fan and its bushing further into the fan
housing before the back cover plate can be mounted).
Before tightening the bolts, pull the fan back until it
contacts the back cover plate’s inlet ring. Using the
available slack, center the cover plate’s inlet ring in
the fan’s orifice. Feel around the perimeter of the inlet
ring to confirm an even gap or fit. Tighten the cover
plate bolts.