Section 6 - Service
HV-18 revised 11/18 SCHWARZE HYPERVAC 83
18. Move the fan back onto the fan shaft. A gap distance
will have to be determined (see illustration). The ideal
gap distance is 1/4” from the cover plate orifice to the
narrowest part of the fan’s orifice
19. Position the fan on the fan shaft, taking into
consideration that, as the fan is tightened onto its
bushing, it will travel roughly 1/4” toward the cover
plate’s orifice.
20. While holding the fan in position on the fan shaft, tap
the fan bushing along the fan shaft and into the fan’s
hub.
21. When the fan bushing is snug inside the fan’s hub,
insert the 3/8” bolts and tighten the fan onto the fan
bushing. As the bolts are tightened and the fan is
drawn onto the bushing, the fan should move 1/4”
toward the cover plate.
22. Turn the fan to determine if the two orifices rub as the
fan rotates. If the orifices touch, mark the bushing’s
present position on the fan shaft (so it may later be
used as a reference point). Remove the fan from its
bushing and follow steps 11-15 to remount the fan
further into the fan house. If the orifices do not touch,
proceed on to Step 16.
23. When the fan is properly mounted, swing the hopper
safety prop into its stowed position and lower the
hopper. Start the auxiliary engine and, again, listen
for sounds of contact between the cover plate orifice
and fan orifice. If none are audible, the unit is ready to
sweep. If sounds are detected, the hopper should be
raised and the fan readjusted.
Exceptions to fan/bearing replacement:
• If you sweep in extremely sandy conditions, or do not
use the sweeper’s water system, you may have to replace
fans more often than bearings.
• If the proper bearing lubrication procedures aren’t
followed, you may have to replace bearings more often
than fans.
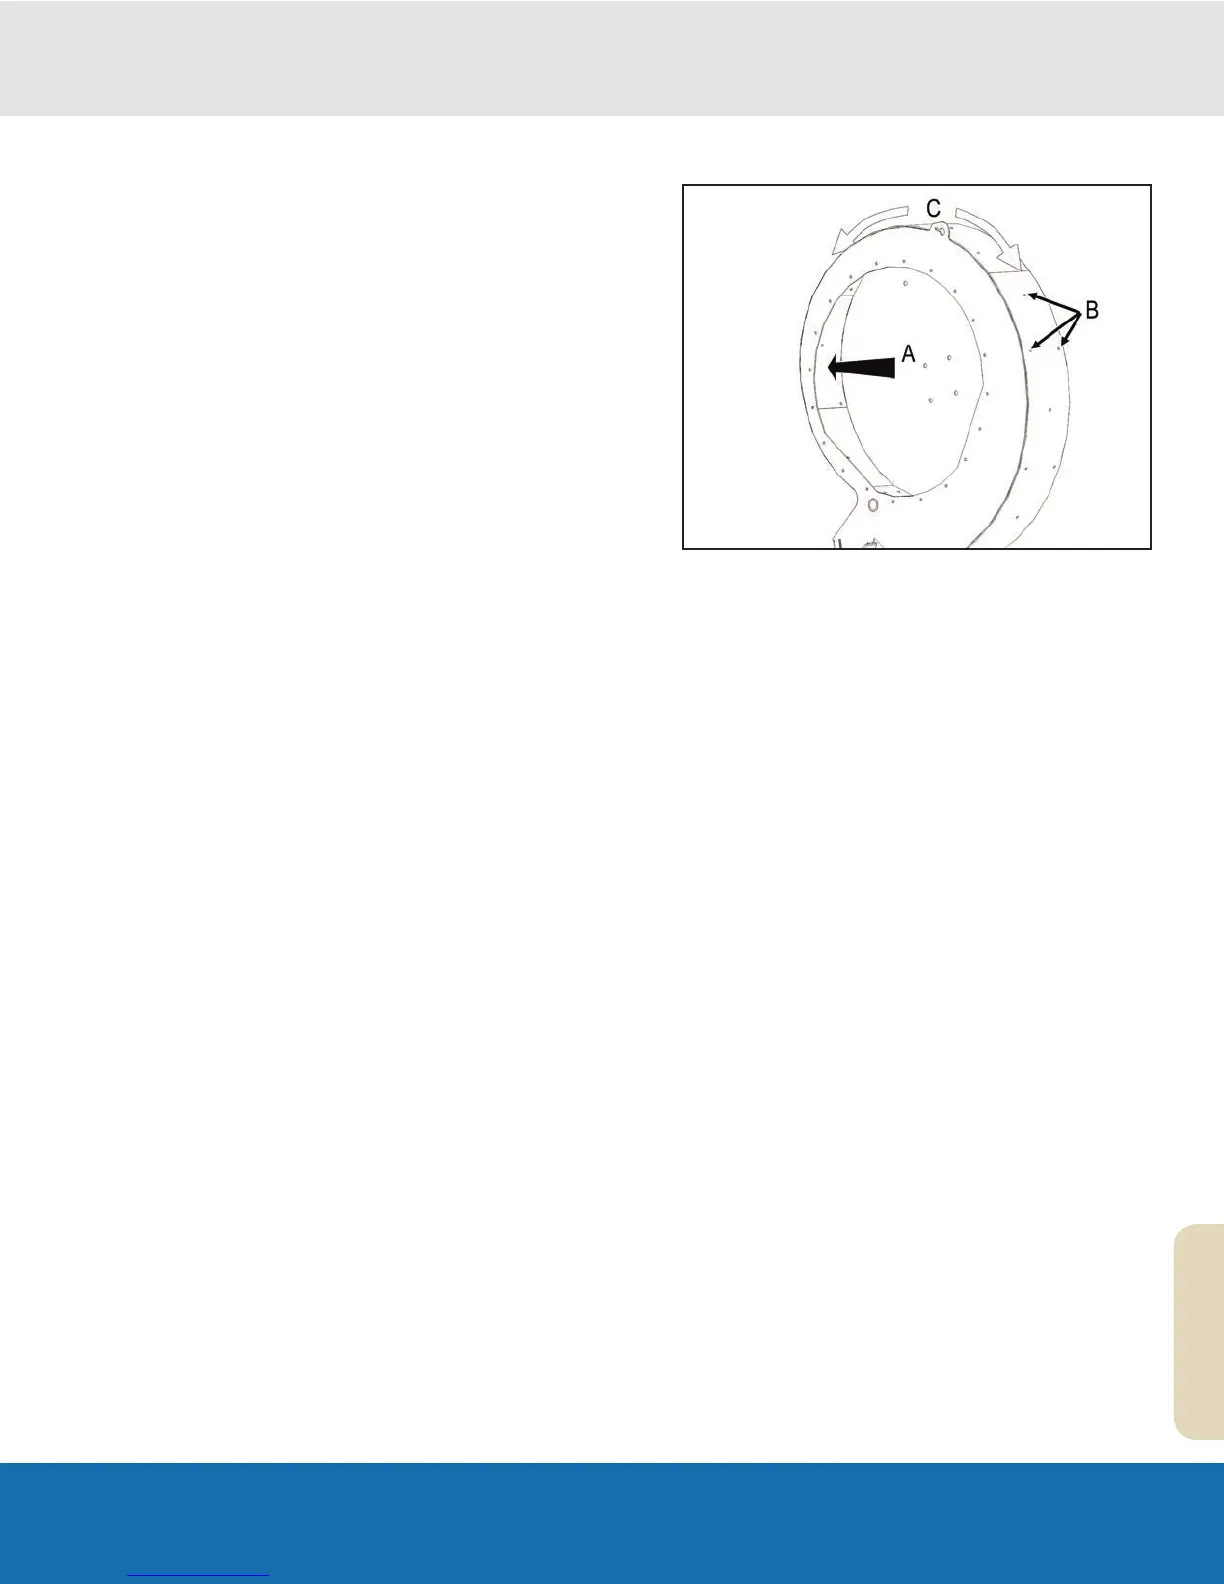
Replacing the Fan House Liner
A Fan Liner
B Fan Liner Bolts
C Install Out and Down
To prevent damage to the fan housing, a rubber liner is
attached to the inside of the fan housing. Check the liner
regularly for holes, tears or pitted areas. If the fan housing
is exposed to direct wear because of a worn liner, the liner
should be replaced.
1. Follow the procedures outlined in steps 1-7 in section
‘Replacing the Fan System Fan’ of this manual
2. Unscrew the 3/8” nuts from around the outside of the
fan housing and remove the elevator bolts holding the
rubber liner in place. Worn bolts should be discarded
and replacements used upon re-installation.
3. Remove the worn liner.
4. Notice that the replacement liner hole pattern is
different at each end. Be sure to position the liner
so that the holes match the hole pattern of the fan
housing.
5. Start by installing the elevator bolts that hold the
rubber liner to the top of the fan housing, and then
continue installing the remainder of the elevator bolts,
working out and down from the top of the fan housing.