B.11
Date Code 20020903 SEL-587Z Instruction Manual
Firmware Upgrade Instructions
Check Relay Self-Tests
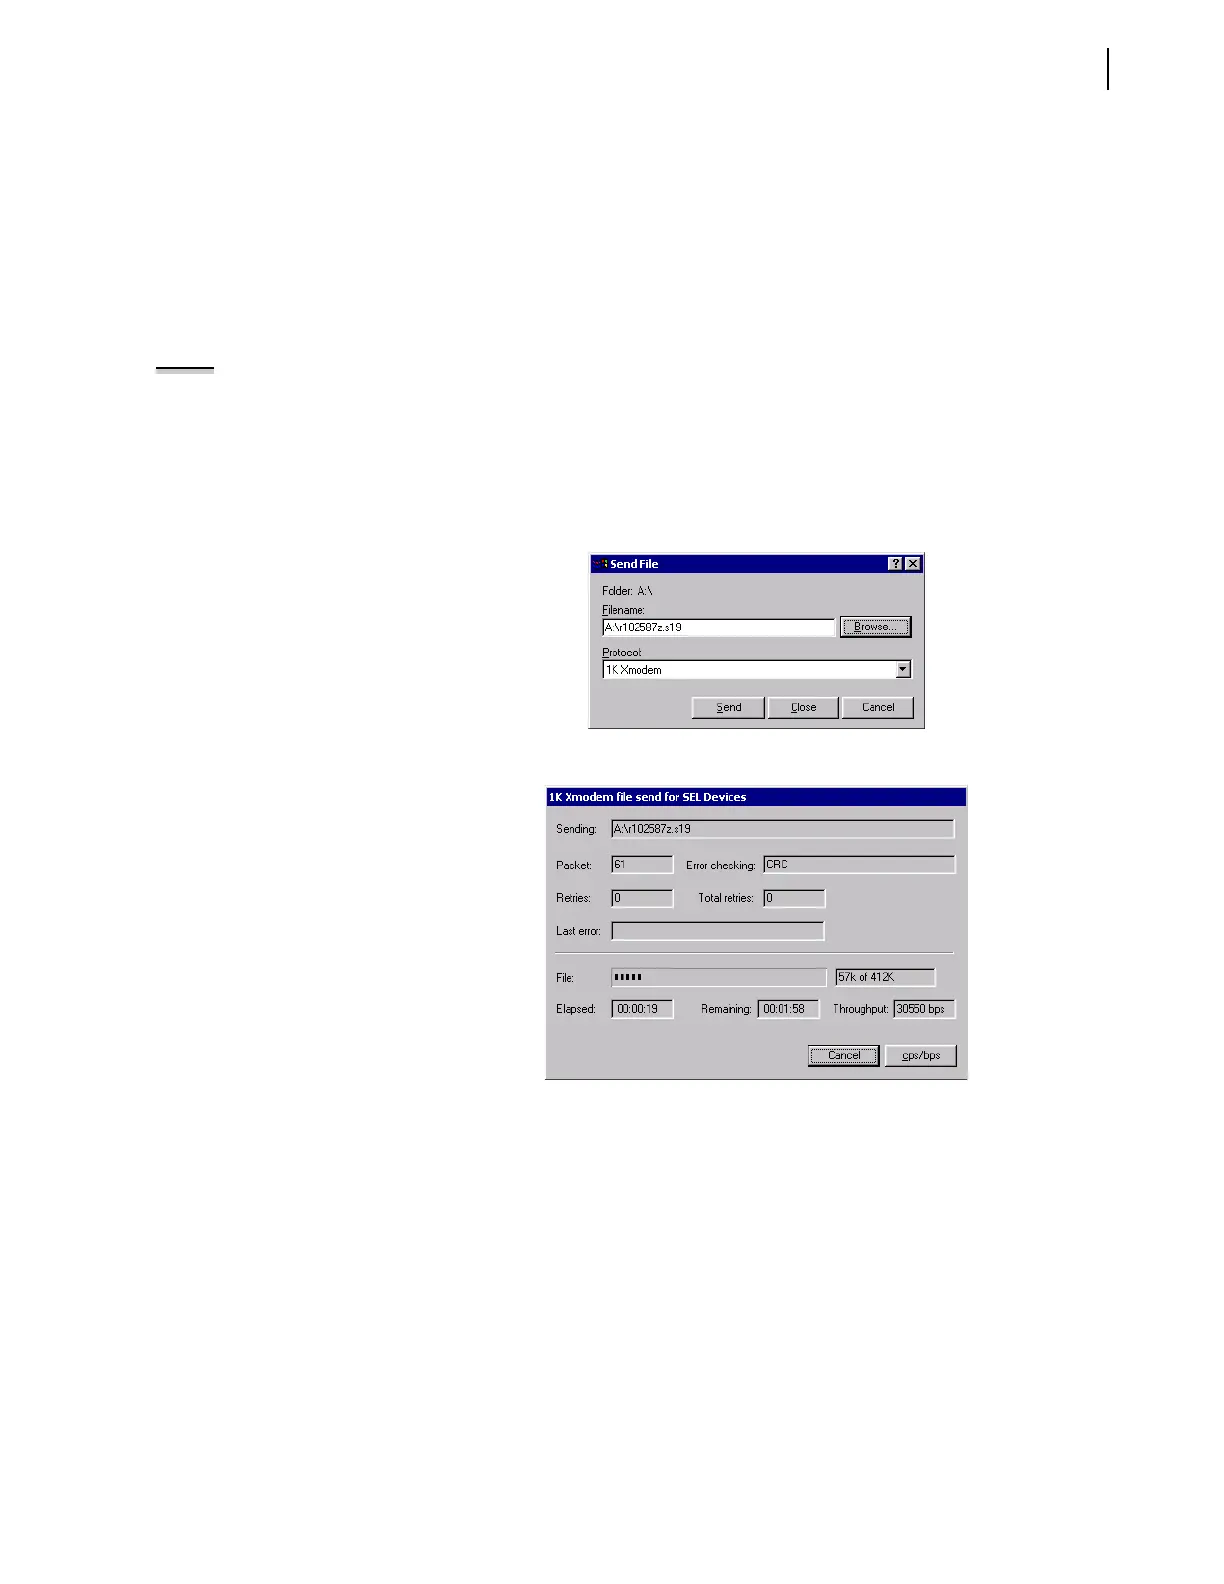
c. In the Protocol text box, select “1K Xmodem” if you
have this protocol available.
If you do not have 1K Xmodem, select “Xmodem.”
d. Click Send to send the file containing the new firmware
(e.g., r101587Z.s19).
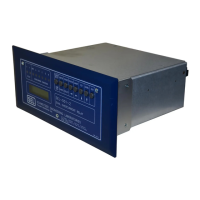
You should see a dialog box similar to Figure B.13 on
page B.11. Incrementing numbers in the Packet box
and a bar advancing from left to right in the File box
indicate a transfer in progress.
NOTE: The relay restarts in SELBOOT
if relay power fails while receiving new
firmware after the firmware is erased.
At power up, the relay defaults to a
data speed of 2400 bps. Perform the
steps beginning at Establish Terminal
Connection on page B.2 to increase
the serial connection data speed.
Then resume the firmware upgrade
process again at Upload New
Firmware on page B.10 of this
document.
Receiving software takes approximately 10 minutes at
38400 bps. If you see no indication of a transfer in progress
within a few minutes after clicking Send, use the REC
command again and reattempt the transfer.
After the transfer completes, the relay displays “Upload
completed successfully. Attempting a restart.”
Figure B.12 Selecting the New Firmware to Send to the Relay.
Figure B.13 Transferring New Firmware to the Relay
G Check Relay Self-Tests
Step 1. View the front-panel EN LED and confirm that the LED is
illuminated.
Unless there is a serious problem, the EN LED illuminates
without any intervention, and the relay retains all settings.
(LED illumination can be delayed for as long as two minutes).
Step 2. Press <Enter> and confirm that the Access Level 0 action
prompt = appears on your terminal screen.
If the EN LED is illuminated and the Access Level 0 prompt is
visible, proceed to Verify Calibration, Status, and Metering on
page B.13. If this is not the case, perform the following steps.


 To Next Page