BIESSE S.p.A. Woodworking Machinery
(l138h009.fm-141101)
&KDSWHU 5HSODFHPHQWVDQG$GMXVWPHQWV
This chapter describes how to replace those parts of the machine that, if worn, could cause
machine malfunctioning. Moreover, a few indications are given on how to adjust those parts which,
for different reasons, could be subject to a modification of their initial calibration.
%ODGHV5HSODFHPHQW
'$1*(5
:HDUJORYHVZKHQFDUU\LQJRXWWKLVLQWHUYHQWLRQ
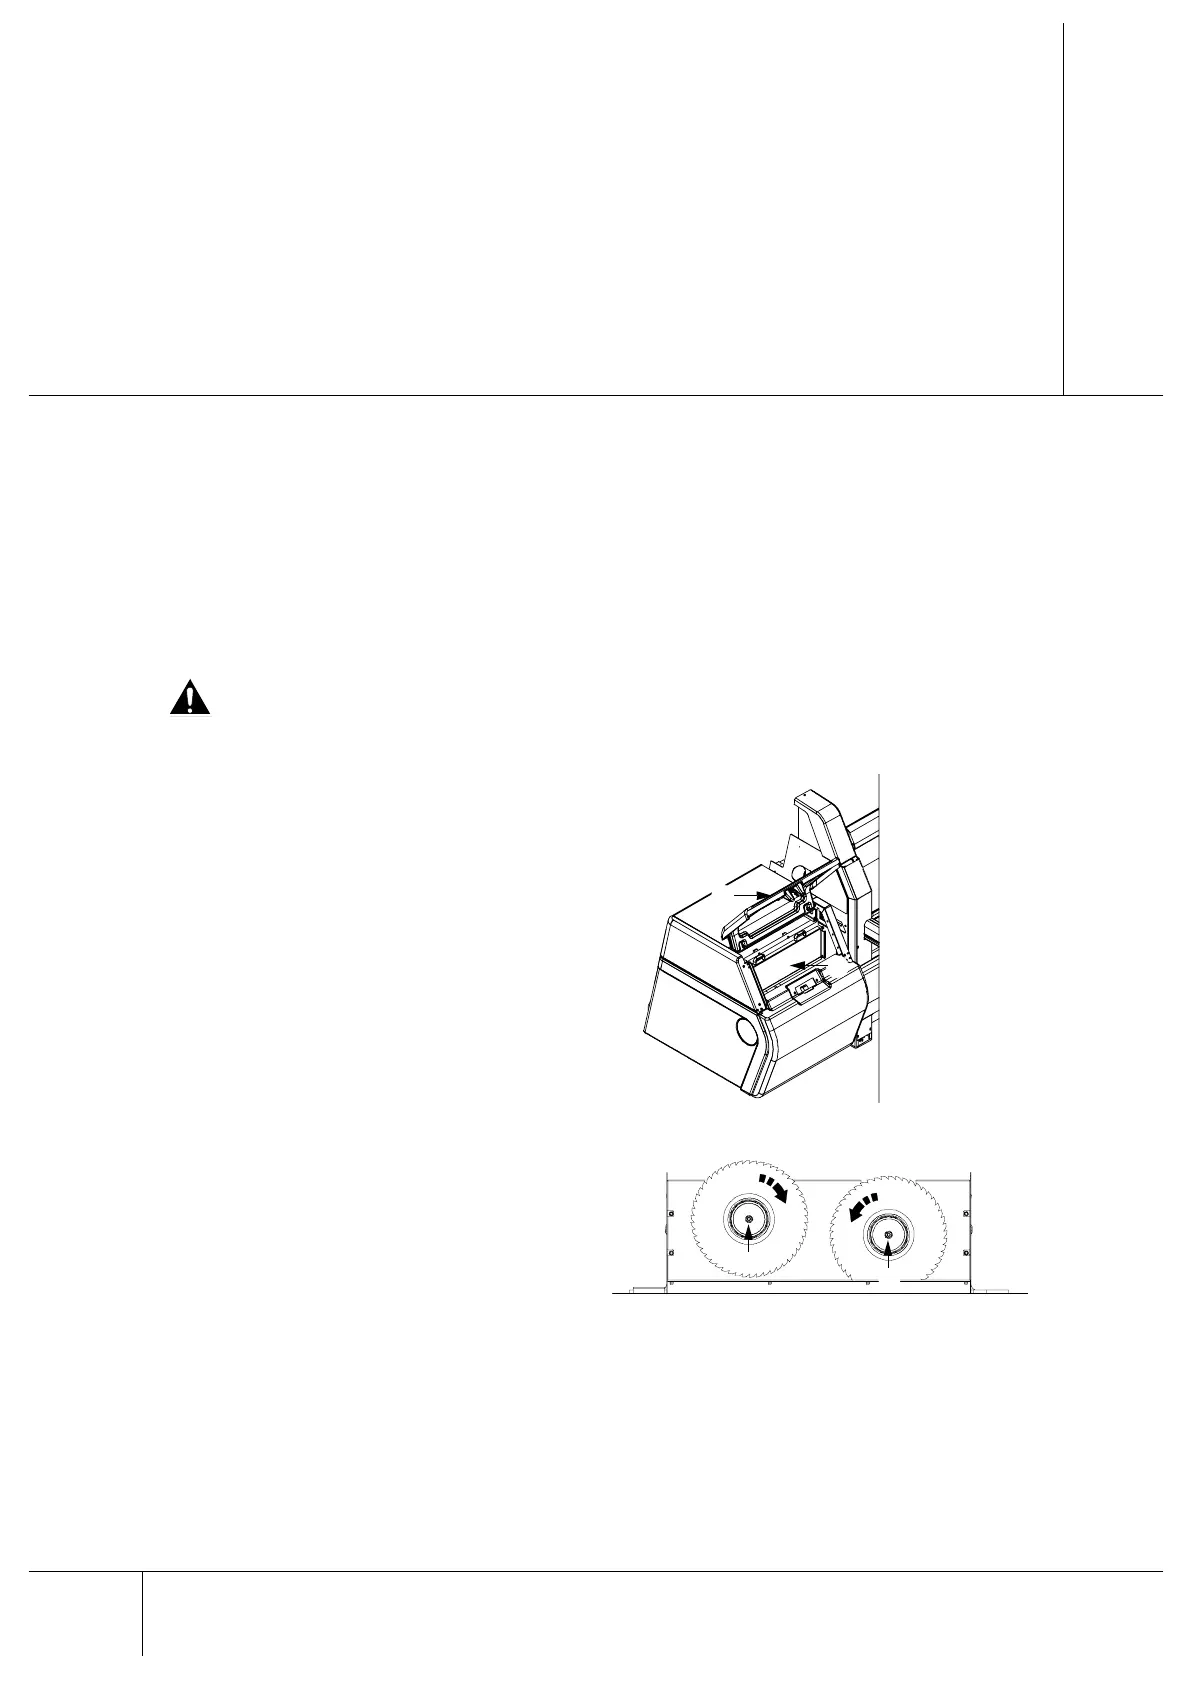
1. Turn the blade change selector (key) on the
main button pad to the right (ref. B5, page
3 - 3), and remove the key. The motors
switch off, the carriage moves to a pre-set
position and a system which, after a lapse
of time, automatically releases the blade $
access hatch, is enabled.
2. Open the blade $ access hatch once the
lamp on the pushing device selector
(yellow) is lit; this selector is located on the
main button pad (ref. B8, page 3 - 3).
3. Open also the % hatch.
4. Remove the flange & as described in the
paragraph “Disassembling the Blade
Locking Flange” on page 8 - 2.
5. Replace the blade, making sure to install
the new blade in the correct direction (see
the relative figure). Use only appropriate
tools for this operation; the technical
specifications are described in the relative
Appendix.
6. Mount the flange & as described in the
paragraph “Assembling the Blade Locking
Flange” on page 8 - 3.
7. Close the % and $KDWFKHV.
%
$
&
&