57
Assembly and Alarm Verification Tests
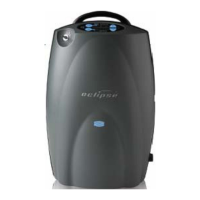
To ensure proper assembly and functionality of the Eclipse after it has been reassembled, the following
steps should be followed.
1. Install the Power Cartridge into the Power Cartridge compartment of the Eclipse. Plug the AC
Power Supply into the wall outlet and connect it to the External Power Connector of the Eclipse.
2. Press the ON button and set the Eclipse to 2 LPM. At initial start-up Eclipse units light the Green,
Yellow and Red LED’s accompanied by a beep. As concentration increases to ~70%, the Red
LED turns off and the Yellow and Green remain on. When the concentration reaches normal
operating range (above 85%), the Yellow LED will turn off. The Green LED will stay lit indicating
normal operation. Table 3 shows the normal start-up operating conditions for Eclipse Oxygen
Systems. If LED is not green within 7 minutes there may be a problem with the Eclipse.
Green
Indicator
Yellow
Indicator
Red
Indicator
Audible
Alarm
Alarm
code
Operating
Condition
Off Of Blinking Beeps 04 Purity < 70%
Off Blinking Off Off 08
Purity between 70%
and 85%
On Off Off Off 00
Normal Operating
Condition
Table 3: Eclipse Startup Sequence Indications
3. Verify that the Power Cartridge is charging as indicated by the Power Cartridge Status Gauge is
moving from low to high. If the Power Cartridge Status Gauge is not moving, verify that the Power
Cartridge is properly engaged.
4. Check the Control Panel by pressing each of the Increase/Decrease, Pulse Mode and No
Smoking button and observe that the Eclipse buttons function normally.
6. Turn ON the Eclipse. Press the Pulse Mode button and set the Eclipse to the patient’s normal
Pulse Mode setting. Confirm that without breathing from the unit, the Pulse Flow Mode Indicator
is illuminated and the Eclipse beeps, changes automatically to 2 LPM Continuous Mode within
approximately 60 seconds and the Pulse Flow Mode Indicator turns off.
7. Block the Cannula Fitting Outlet with your finger for 2 minutes and confirm that the visual and
audible alarm occurs. Unblock the Cannula Outlet Port and let it stabilize until the alarm stops.
8. Disconnect the AC Power Supply and allow the Eclipse to run for about one minute. Set the
Eclipse to the patient’s normal Continuous Mode setting. Confirm that the Power Cartridge
Status Gauge is illuminated and External Power Present Indicator is off.
9. Remove the Power Cartridge and verify that the Eclipse alarms and red Alarm Indicator is
flashing and the alarm sounds. After about 5 seconds, re-install the Power Cartridge and connect
the AC Adapter and observe that the Eclipse automatically restarts. Confirm that the External
Power Present Indicator is illuminated.
10. Turn off Eclipse and unplug the AC Power Supply.
11. Record results, initial and date the Service and Maintenance Record.