72
Remove and Replace the Product Tank Assembly
1. Remove the Unit Cover as described in the section Remove and Replace the Unit Cover.
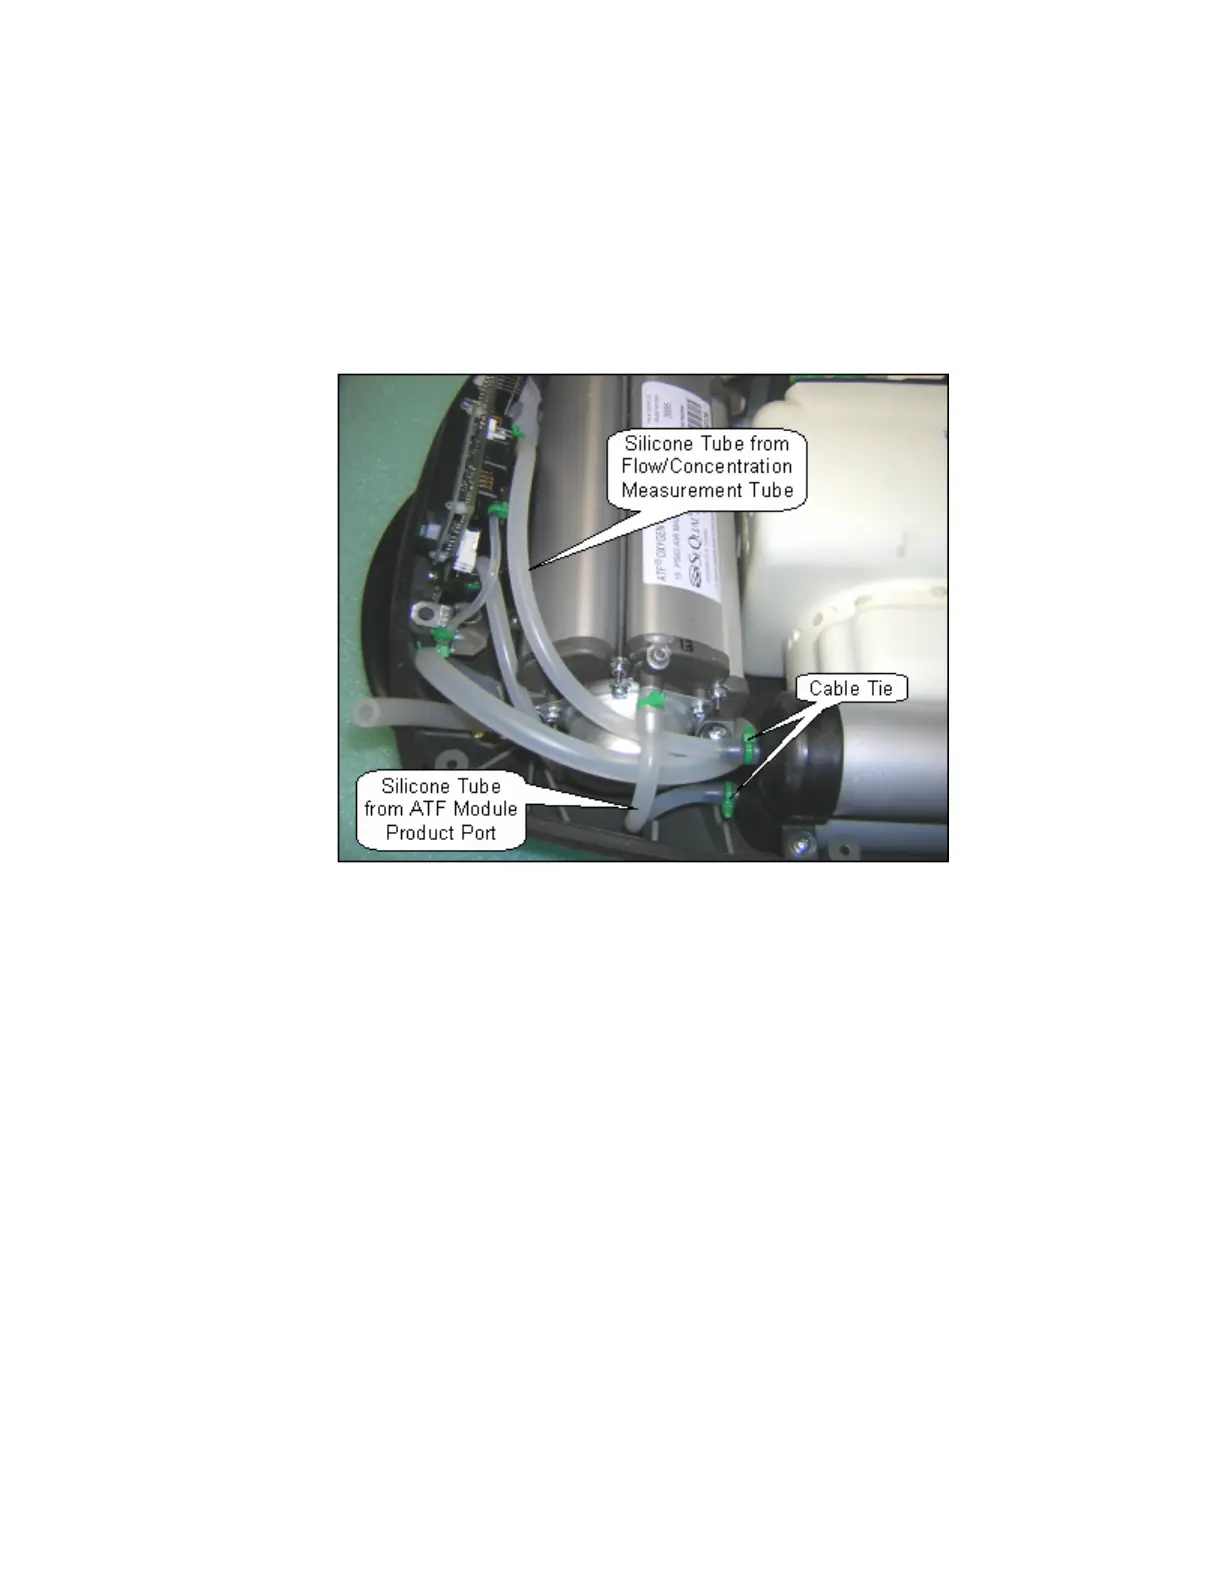
2. Cut the 2 green cable ties that secure the silicone tubes to the top of the Product Tank as shown
in Figure 35 below. Disconnect these two silicone tubes. Pinch the silicone tube coming from the
ATF product port and secure with a cable tie as shown on Figure 36 below.
Figure 35: Product Tank inlet and Outlet Connections.
3. Unscrew the 2 screws (M3x10 Plastite Screw, P/N 6950-310) and remove the screws and
washers (M3 Flat Washer, P/N 6950-03) as shown in Figure 36 shown below.