Manual – DFE32B Fieldbus Interface PROFINET IO
109
9
Communication SBus (CAN) via interface adapter
MOVITOOLS® MotionStudio – Operation
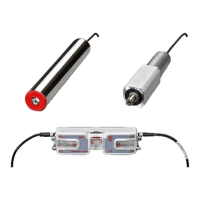
Proceed as follows to connect the USB-CAN interface with the PC and your unit:
1. Connect the 9-pin D-sub connector of the USB-CAN interface with the prefabricated
connection cable. Make sure that the cable end with the terminating resistor leads to
the USB-CAN interface.
2. Connect the second cable end (without terminating resistor) with the SBus interface
[3] of the unit [4].
• If MOVIDRIVE
®
is equipped with the DFC11B connection option, you can con-
nect the D-sub plug of the prefabricated cable directly with terminal X30.
• Without the connection option, connect the cores of the prefabricated cable to the
X12 terminal of MOVIDRIVE
®
as follows:
3. If the unit is operated within a CAN network, connect the terminating resistor at the
last unit.
4. Plug the USB-A connector of the USB cable into a free USB interface on your PC [1].
For detailed information about the startup of a USB-CAN interface in connection with a
MOVIAXIS
®
unit, refer to the "MOVIAXIS
®
MX Multi-Axis Servo Inverter" operating in-
structions.
9.8.3 Configuring the communication via SBus
You need an SBus connection between your PC and the units you want to configure.
You can use a USB-CAN interface for this purpose.
Proceed as follows to configure SBus communication:
1. Click on "Configure communication plugs" [1] in the toolbar.
Signal Terminal on
MOVIDRIVE
®
CAN pin assignment
(9-pin D-sub connector)
Core
(Deviations are pos-
sible)
CAN_H X12:2 PIN 7 Brown
CAN_L X12:3 PIN 2 White
CAN_GND X12:1 PIN 3 Shielding
68062AXX
[1] "Configure communication plugs" symbol
 Loading...