58
NETWORK SCANNER FUNCTION
BASIC SETTINGS FOR NETWORK SCANNING
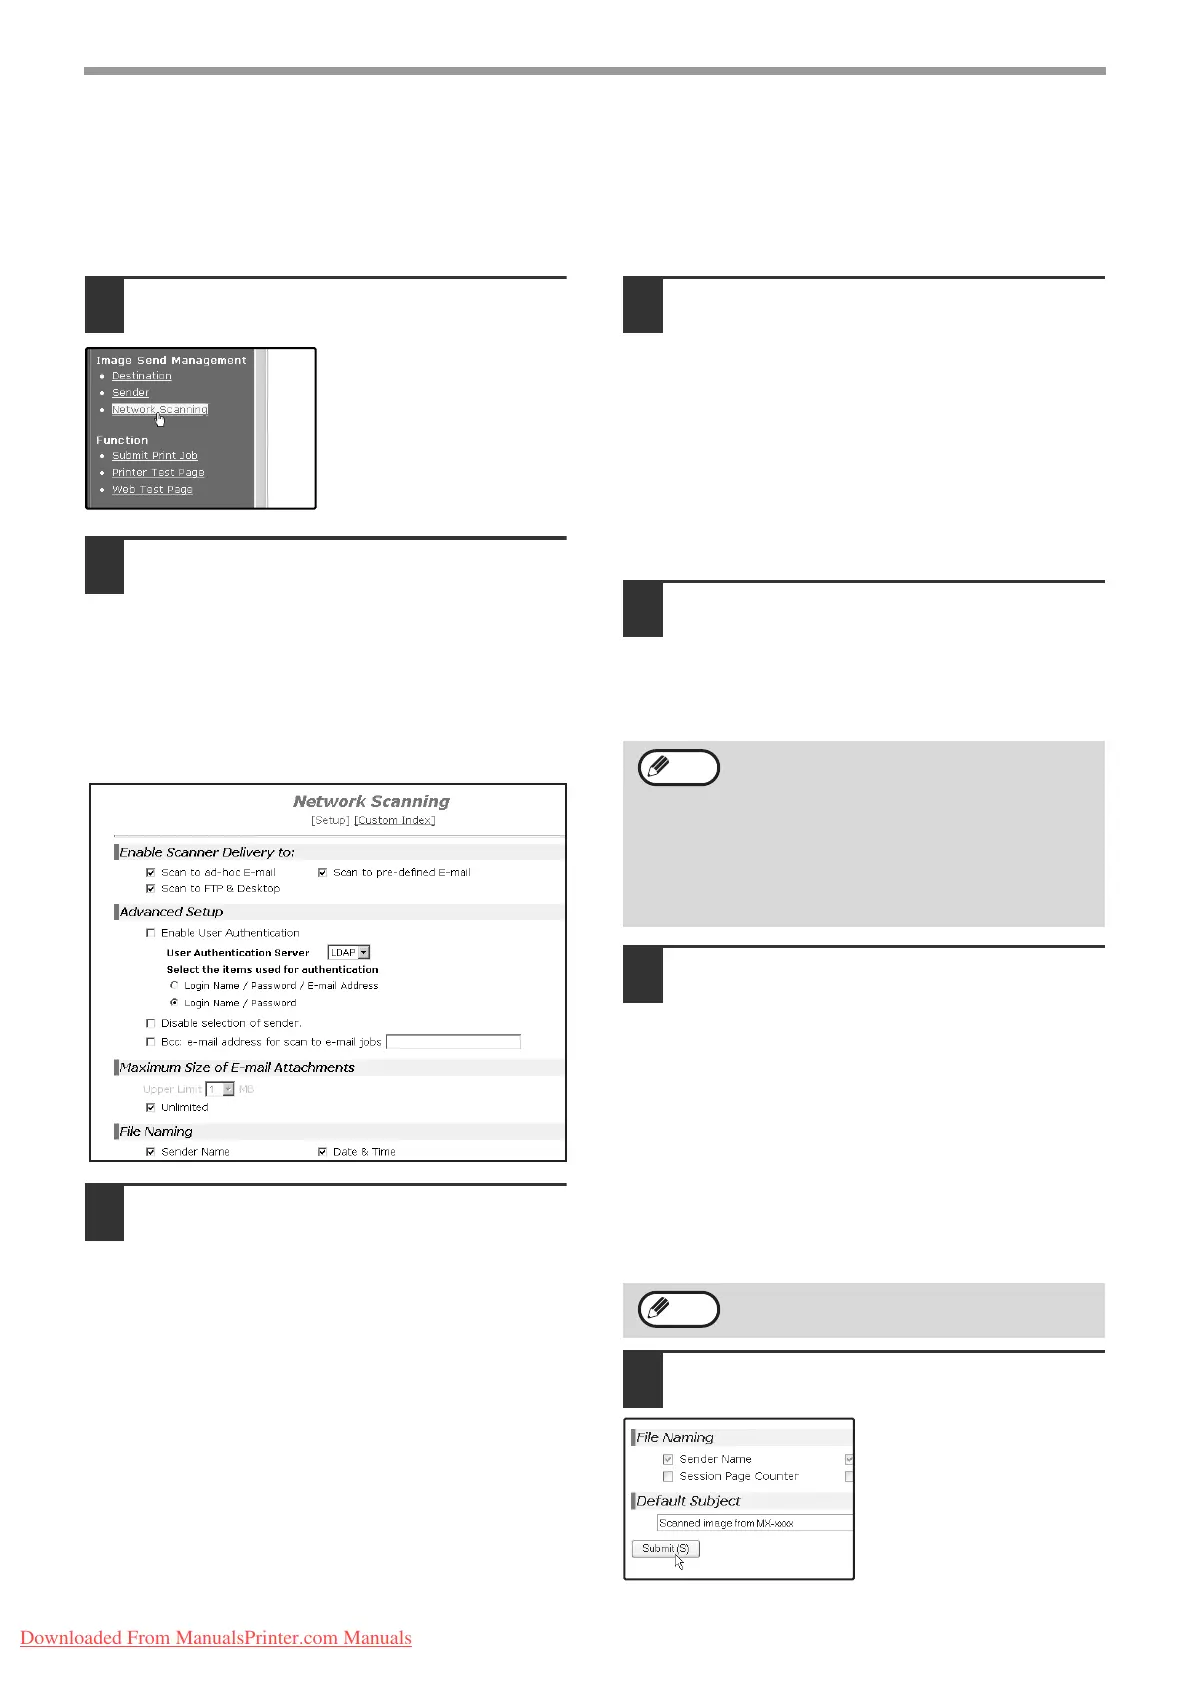
Click "Network Scanning" in the menu frame, and then establish the required settings. These settings should only be
established by the network administrator.
For detailed explanations of the procedures for establishing settings, click "Help" in the menu frame.
1
Click "Network Scanning" in the menu
frame.
The Network Scanning
Setup page appears.
2
Select the transmission methods that
you wish to use.
Select the scanner delivery methods that you
want to use. In the "Enable Scanner Delivery to:"
field, click the checkbox next to each method that
you want to use so that a checkmark appears in
the checkbox.
All transmission methods are initially selected
(factory default settings).
3
Configure the Advanced Setup settings.
Select advanced functions that can be used for
Scan to E-mail.
Select the checkboxes of the functions that you
wish to use.
• The "Enable User Authentication" checkbox
can be selected to restrict use of the network
scanner function to authorised users. (p.69)
• To allow a sender to be selected when sending
an image by Scan to E-mail, make sure that
"Disable selection of sender from Sender List"
is not selected. (p.82)
• If you wish to Bcc a copy of a Scan to E-mail
transmission to an e-mail address, select the
"Bcc:" checkbox and enter the e-mail address.
4
Set a limit for the size of image files.
A limit can be set for the size of image files sent
by Scan to E-mail to prevent excessively large
files from being sent.
If the image file created from the scanned image
is larger than the set limit, the image file is
discarded. The limit can be set from 1 MB to 10
MB in increments of 1 MB.
The factory default setting is "Unlimited". If you wish to
set a limit, remove the checkmark from the "Unlimited"
checkbox and enter the desired limit in "Upper Limit".
5
Select the method for assigning a file
name to a scanned image.
Select the method for assigning a file name to a
scanned image. In "File Naming", click the items
that you wish to use in the file name. "Destination
Name" and "Date & Time" are initially selected.
6
Selecting an e-mail subject (only used
for Scan to E-mail).
The setting is used to enter the subject that
appears in the recipient's e-mail program when
you perform Scan to E-mail. (This setting is not
necessary if you will not be using Scan to E-mail.)
The subject can be up to 80 characters long. Only
one subject can be entered. If nothing is entered,
"Scanned image from <Device Name>" will appear.
* The name that appears in <Device Name> is
the name stored in "Name" in the screen that
appears when you click "System Information" in
the menu frame. If a name has not been stored,
the product name will appear.
7
Click "Submit".
After entering the
settings, be sure to click
"Submit" to store them.
•
If you are going to send images to the same
recipient more than once, we recommend that
you also select "Session Page Counter" or
"Unique Identifier" to prevent sending multiple
files with the same name, which would result in
each successive file overwriting the previous file.
• If a file name is entered at the time of
transmission, the file name entered here
will be disregarded.
If a subject is entered at the time of transmission,
the subject entered here will be disregarded.
Note
Note
Downloaded From ManualsPrinter.com Manuals