71
NETWORK SCANNER FUNCTION
4
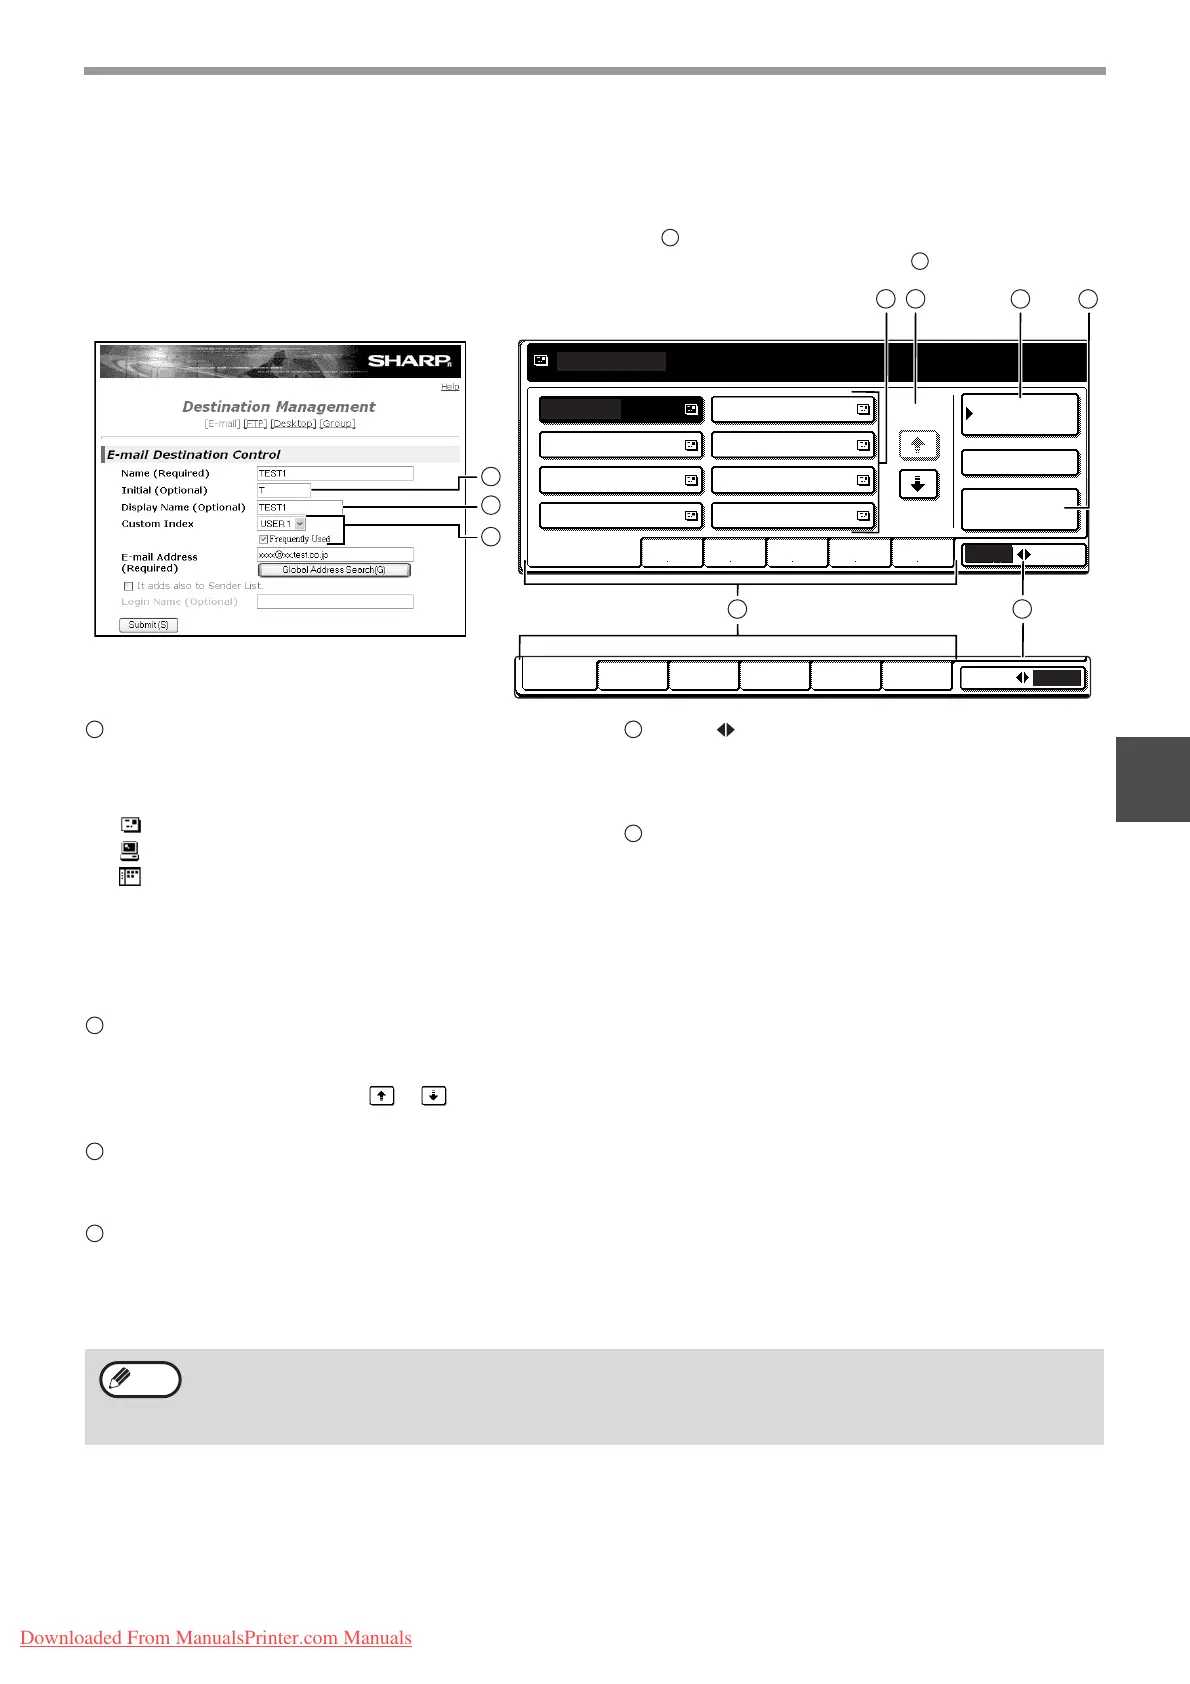
Address book screen
Touch the [ADDRESS BOOK] key in the condition setting screen (previous page) to display the screen shown below
at right.
Destinations stored using the Web page are grouped in indexes ( ) according to the letter entered in "Initial" for
each destination, and the name entered in "Display Name" is displayed in the one-touch key ( ).
One-touch key display
This shows the one-touch keys that have been
stored on the selected "index card". The key type is
indicated by the icon at the right.
:Scan to E-mail
:Scan to FTP
:Scan to Desktop
The number of one-touch keys that appear in one
screen can be changed to 6, 8, or 12 using "THE
NUMBER OF DIRECT ADDRESS / SENDER
KEYS DISPLAYED SETTING" in the administrator
settings.
Display switching keys
In cases where the one-touch keys cannot all be
displayed on one screen, this shows how many
screens are left. Touch the " " " " keys to
move through the screens.
[CONDITION SETTINGS] key
This displays the condition setting screen (p.70),
which is used to set various conditions.
[GLOBAL ADDRESS SEARCH] key (p.75)
If an LDAP server is used, touch this key to select
a Scan to E-mail destination in the LDAP server. If
an LDAP server is not used, the key is greyed out
and cannot be selected.
[ABC GROUP] key
Touch this key to switch between the alphabetical
index and the group index. The selected index type
is displayed.
Index keys
One-touch key destinations are stored on each of
these index cards (alphabetical index or group
index). Touch an index key to display the card.
Group indexes make it possible to store one-touch
keys by group with an assigned name for easy
reference. This is done with the system settings
(p.61). Frequently used one-touch key destinations
can be stored on the [FREQUENT USE] card for
convenient access.
6
1
USER 1 USER 2 USER 3 USER 4 USER 5 USER 6
ABC
GROUP
ABC GROUP
FREQUENT USE ABCD EFGHI JKLMN OPQRST UVWXYZ
TEST5 TEST6
TEST7 TEST8
TEST3
TEST1 TEST2
CONDITION
SETTINGS
1/2
ADDRESS REVIEW
READY TO SEND.
GLOBAL
ADDRESS SEARCH
TEST4
E-mail Destination Management page
6
6
1
1 2
3
4
5
6
1
2
3
4
5
6
• If the initial screen has been set to the address book screen in the administrator settings, the above screen will
be the initial screen.
• If desired, you can use the administrator settings, "DEFAULT DISPLAY SETTINGS", to set the default screen
to the group index. (See "6. SYSTEM SETTINGS (ADMINISTRATOR)".)
Note
Downloaded From ManualsPrinter.com Manuals