64
NETWORK SCANNER FUNCTION
Storing destinations for Scan to Desktop
The destination for Scan to Desktop is stored by the Sharp Network Scanner Tool Setup Wizard when "Network
Scanner Tool" is installed in your computer. For this reason, there is no need to store the Scan to Desktop
destination in the Web page. (The Network Scanner Tool is on the CD-ROM that accompanied the Network Scanner
Expansion Kit .)
For information on Scan to Desktop system requirements, installing the Network Scanner Tool, and storing the
destination, see the Users Guide for the Network Scanner Tool on the CD-ROM that accompanies the network
scanner expansion kit.
Normally your computer is stored as the destination by the method indicated above.
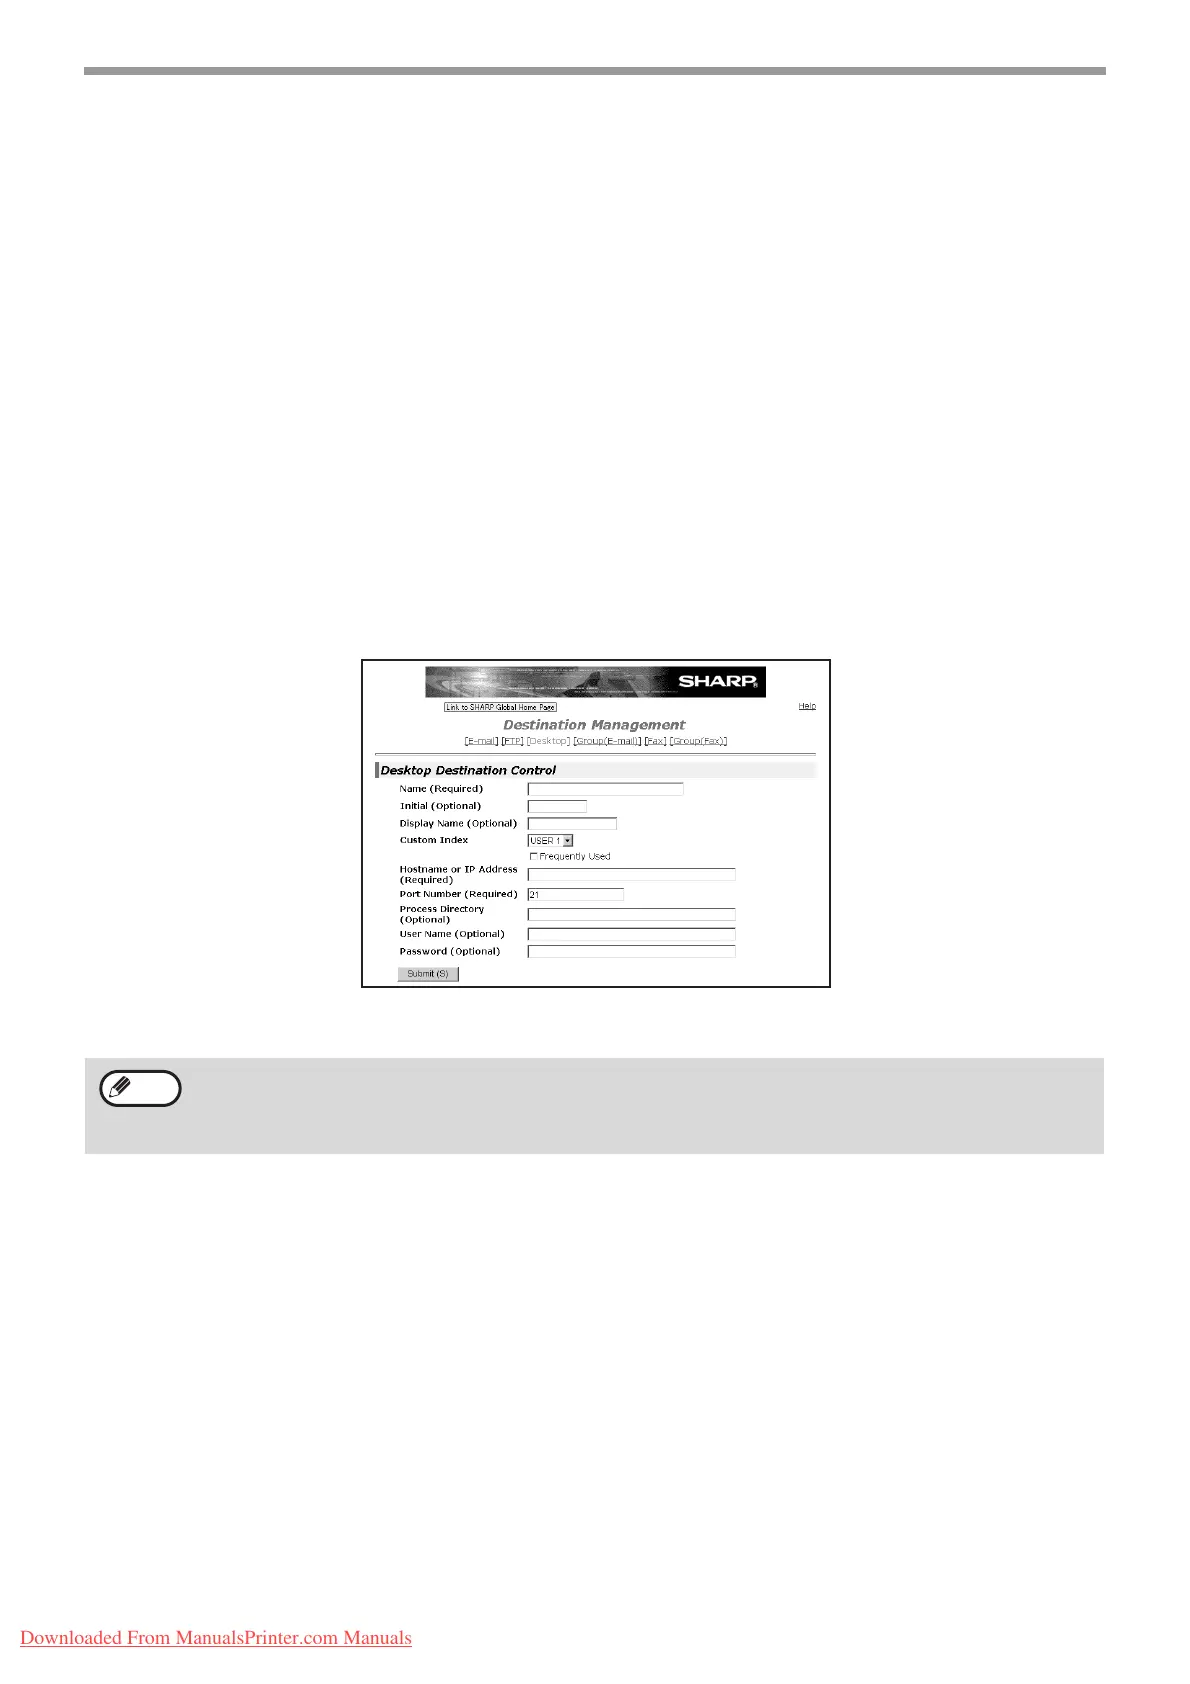
The following page for storing Scan to Desktop destination information appears when "Destination" is selected in the
menu frame, followed by "Desktop". This page is used by mainly by the system administrator in the following
circumstance.
• When another machine with the network scanner function has been added to the same network, and you wish to
perform Scan to Desktop from the added machine to a destination programmed in the previously existing machine.
Refer to "Editing and deleting programmed transmission destinations" (p.66), and select the Scan to Desktop
destination information that you wish to transfer to the new machine. Enter the displayed information in the same
setting screen of the new machine. (When all information has been entered, click "Submit".)
If there are additional destinations that you want to transfer to the new machine, repeat this procedure for each
destination.
Note that if there are any discrepancies between the newly programmed information and the information in the host
computer, transmission and reception may not be possible.
• For detailed explanations of the procedures for establishing settings, click "Help" in the menu frame.
• If you entered a host name in "Hostname or IP Address", you will need to enter the DNS server or WINS server
settings. Click "Application" in the menu frame and then click "DNS" or "WINS" in the page that appears to
configure the corresponding settings.
Note
Downloaded From ManualsPrinter.com Manuals