75
NETWORK SCANNER FUNCTION
4
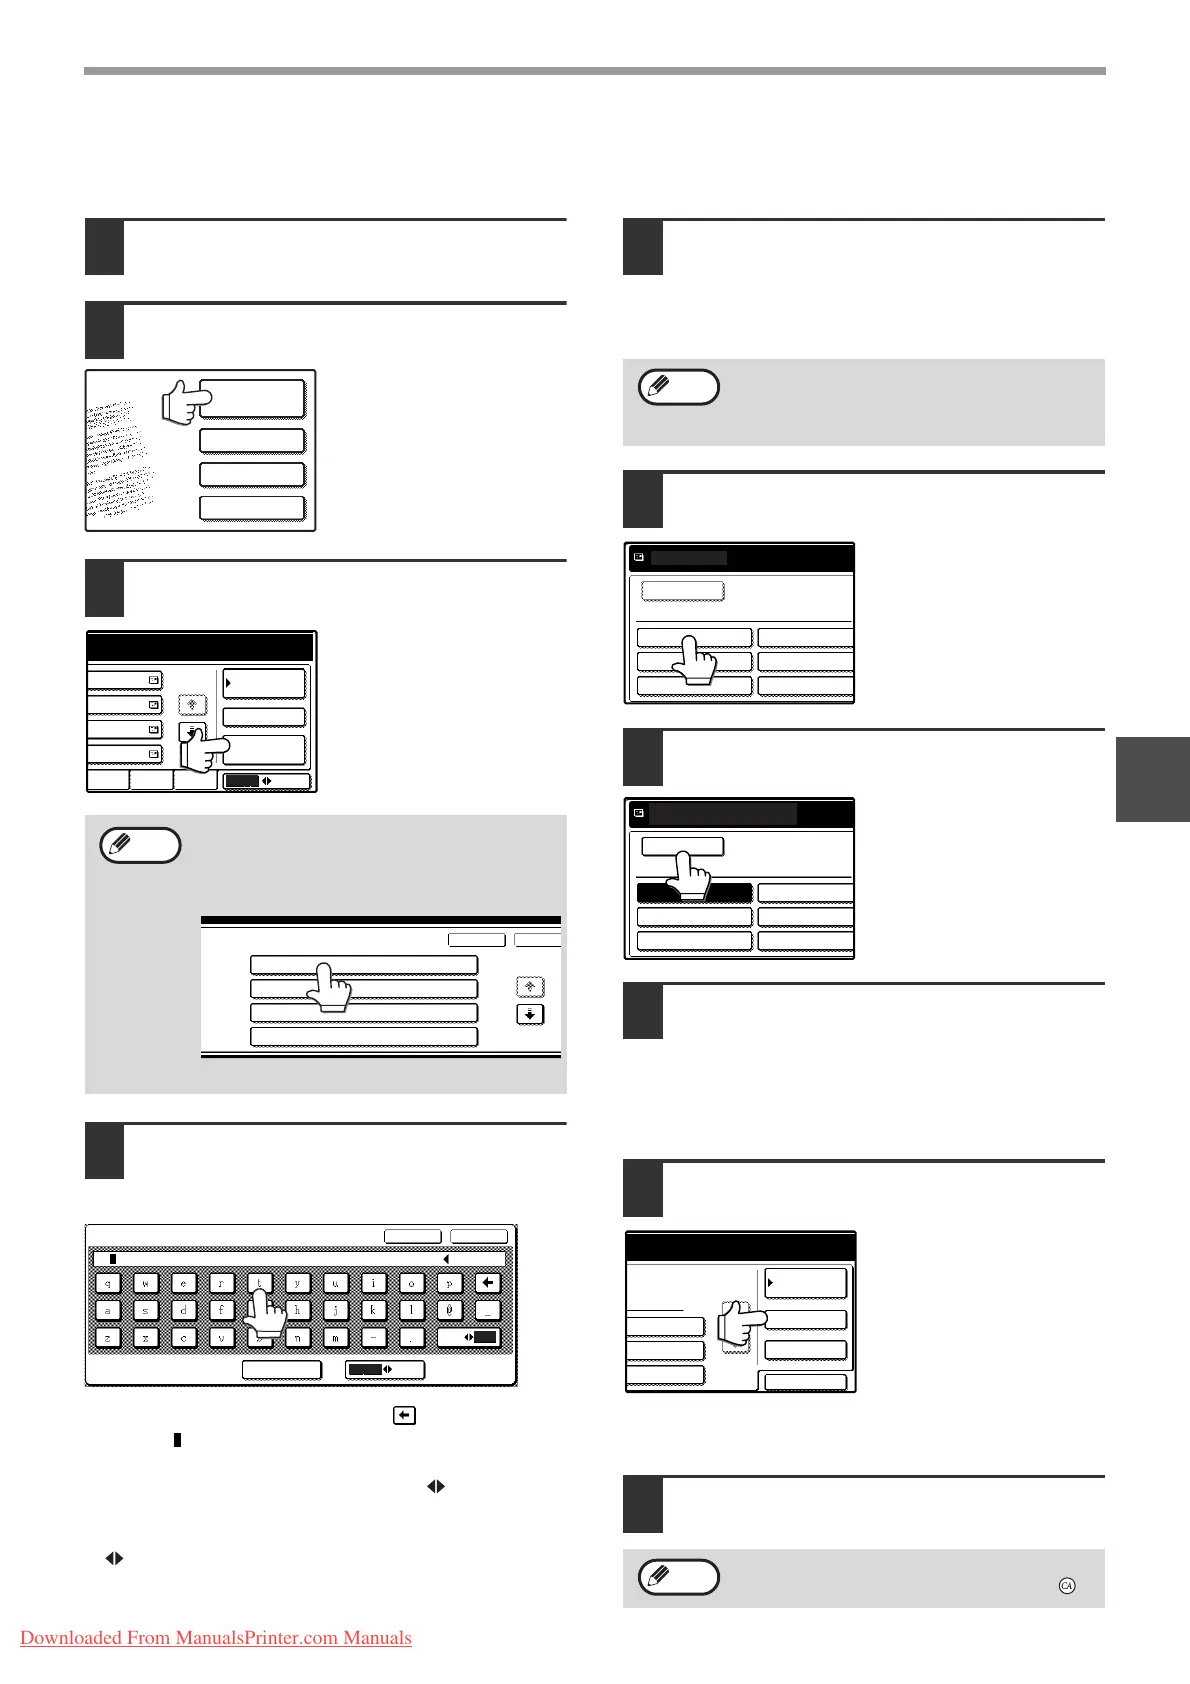
Sending an image by selecting an e-mail address in an LDAP server
To use an LDAP server, the LDAP server settings must be configured in the Web page.
1
Perform steps 1 through 6 of "BASIC
TRANSMISSION METHOD". (
p.72
)
2
Touch the [ADDRESS BOOK] key.
The address book screen
appears.
3
Touch the [GLOBAL ADDRESS
SEARCH] key.
The global address
search screen appears.
4
Touch the key of the server that you
wish to search and then touch the
[OK] key.
• If you make a mistake, touch the key to move the
cursor ( ) back to the mistake and then enter the
correct character.
• To enter a number, touch the [AB/ab 12#$%] key.
The screen will change to the number entry screen.
To return to the text entry screen, touch the [AB/ab
12#$%] key again.
5
Touch the [OK] key.
The server begins searching.
When the search is finished, a list of the matching
e-mail addresses appears.
6
Touch the one-touch key of the
desired destination.
If you touch the wrong
key, touch the correct key.
7
Touch the [ADD SELECTED] key.
The destination selected
in step 6 is entered as a
destination of the
transmission.
8
If you wish to enter another e-mail
address, repeat steps 6 through 7.
If multiple LDAP servers have been configured and
you wish to select a different server, touch the
[ADDRESS BOOK] key and then touch the
[GLOBAL ADDRESS SEARCH] key.
9
Touch the [ADDRESS REVIEW] key
and check the destinations.
When the [ADDRESS
REVIEW] key is touched,
only the entered
destinations are displayed.
To delete a destination,
touch the key of the
destination that you wish
to delete.
Touch the [OK] key to
return to the initial screen.
10
Continue from step 9 of "BASIC
TRANSMISSION METHOD" (p.73).
If multiple LDAP servers have been
configured, the server select screen appears.
Touch the key of the server that you wish to
search and then touch the [OK] key.
The selected server key is highlighted.
ADDRESS
BOOK
ADDRESS ENTRY
ADDRESS REVIEW
SEND SETTINGS
ABC GROUP
JKLMN OPQRST UVWXYZ
CONDITION
SETTINGS
1/2
ADDRESS REVIEW
GLOBAL
ADDRESS SEARCH
Note
1/2
CANCEL OK
SERVER SELECT
SERVER 1
SERVER 2
SERVER 3
SERVER 4
SPACE
12#$%
abc
ABC
AB/ab
CANCEL OK
GLOBAL ADDRESS SEARCH
test
If there are no matches, touch the [OK] key
in the message screen that appears. Touch
the [SEARCH AGAIN] key and repeat the
procedure from step 4.
To cancel the operation when selecting
destinations, press the [CLEAR ALL] key ( ).
Note
test5 test6
test3
test1
ADD SELECTED
tes
test2
READY TO SEND.
test5 test6
test3
test1
ADD SELECTED
tes
test2
No.001:test1
xxxx@xxx.xx.xx
CONDITION
SETTINGS
ADDRESS REVIEW
SEARCH AGAIN
ADDRESS BOOK
Note
Downloaded From ManualsPrinter.com Manuals