ShopBot PRS Assembly Manual Page -44
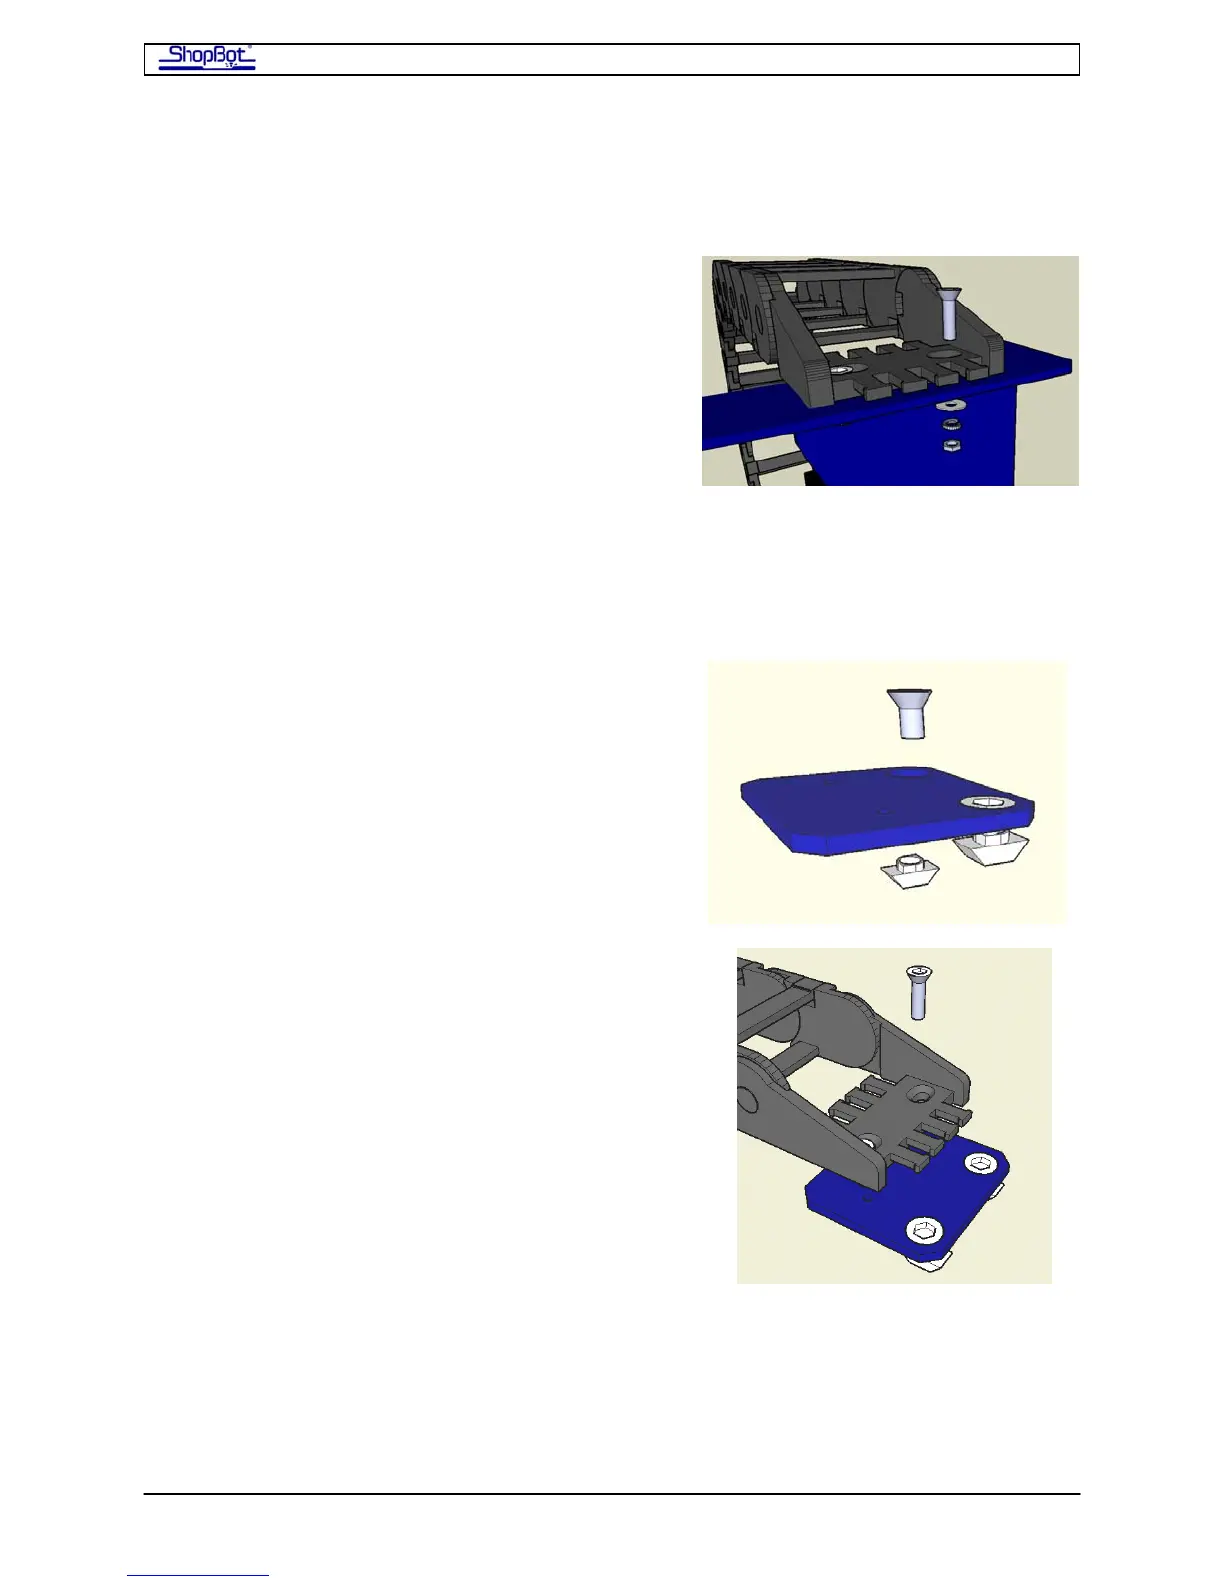
Step 2: Mounting the Echain to Y-upper bracket
• (1) Echain
• (2) 10-32 flat head screws
• (2) #10 flat washers
• (2) #10 lock washers
• (2) 10-32 hex nuts
Position the Echain so that it loops towards the right
when you are facing the front of the YZ car. Align
the counter sunk holes in the Echain with the holes
in the top tab of the Y-upper bracket. Use the
screws, flat washers, lock washers, and hex nut to
tighten the Echain to the Y-upper bracket.
Step 3: Mounting the Y-lower Echain bracket
• (1) Y-lower Echain bracket (002161-01)
• (2) 5/16-18 Twist in T-Nut (002240-01)
• (2) 5/16-18 x 5/8 flat head screws
• (2) 10-32 x ¾ flat head screws
Place the 5/16 flat head screws into the Y-lower
Echain bracket. Start a few of the threads of the
twist in T-nut onto the screws.
Align the counter sunk holes in the Echain with the
holes in the top of the Y-lower bracket. Loosely
start the 10-32 x ¾ screws into the Y-lower Echain
bracket. Position the Y-lower bracket the correct
distance from the back side end plate on the PRS
ShopBot from the chart below.
Note: Distances are measured from the edge
closest to the counter sunk holes of the Y-
lower bracket to the inside edge of the back
side end plate.
Tighten the 5/16-18 flat heads and Twist in T-nuts
into the slots of the gantry extrusion and then
tighten the 10-32 screws fully.
PRSAssembly080922.doc Copyright 2007,2008 ShopBot Tools, Inc