Programming and Operating Manual (Milling)
58 6FC5398-4DP10-0BA6, 09/2017
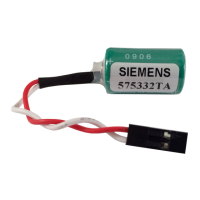
Select the offset plane to save in and the measuring direction (for example, "G54" and "
-").
Enter the distance (for example, "0") in the following window.
Press this key or move the cursor to co
nfirm your input.
Press this vertical softkey. The workpiece offset of the X axis is calculated aut
om
atically and
displayed in the offset field.
Repeat the above operations to measure and set the workpiece offsets in axes Y and Z
respectively.
Rectangular workpiece measurement
Select the machining operating area.
-level menu for workpiece measurement.
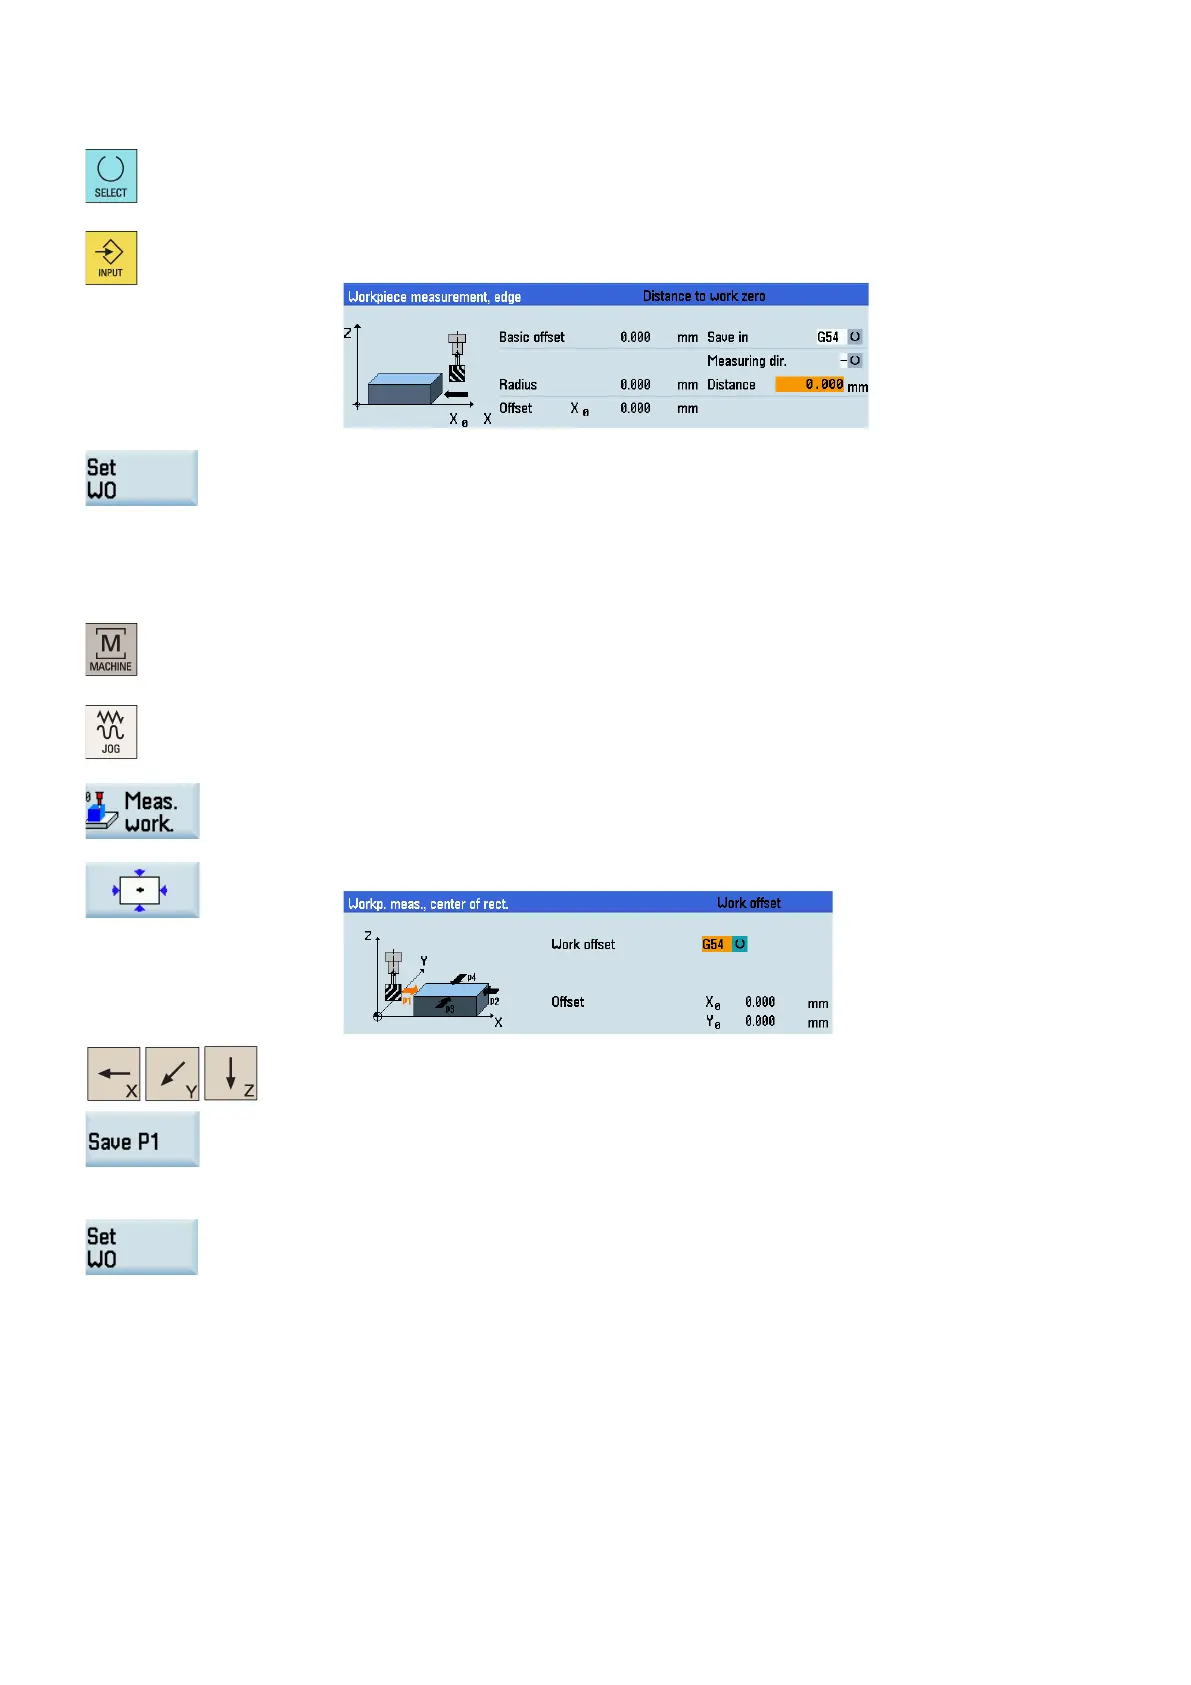
Open the window for measurement of a rectangular workpiece.
Traverse the tool, which has been measured previously, in the direction of the orange arrow
P1 shown in the measuring window, in order to scratch the wor
kpiece edge with the tool tip.
Press this softkey to save the tool position P1 in the coordinate system. To cancel the re
c-
ord, press the softkey again.
Repeat Steps 5 and 6 to save the other three positions: P2, P3 and P4.
ts in axes X and Y after measuring all four positions.