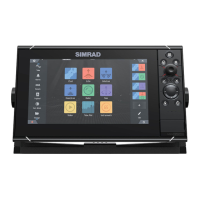
19-3 Installation: The display unit
Start by selecting a suitable mounting position for the
NX40/45 display unit:
Consider the best possible position for viewing and •
operating the NX40/45. This will generally be a
relatively shaded area free from obstructions.
At least 100 mm (4”) away from the compass, at •
least 300 mm (12”) away from any radio transmitter
and at least 1.2 m (4 ft) away from any antenna.
For optimum performance and reliability consider •
mounting the unit where it will not be unnecessarily
exposed to direct sunlight, water and protected from
other physical damage which could occur during
rough sea passages.
If bracket mounting chose a at area where the •
display will not be subjected excessive vibration.
Select an area with adequate clearance for cabling •
and access to the power source.
Before drilling any holes ensure that the drill area is •
free from cables or other obstructions.
There are two mounting arrangements:
Flush Mounting the NX40/45
Attach the ush mounting template to the selected •
mounting position using adhesive tape.
Drill a pilot hole for each of the hole saw cuts shown •
on the template before cutting the larger hole with
the hole saw.
Next cut all the way around the inside of the cut-out •
line with a saw to remove the waste material shown
on the template.
Check that the unit ts correctly in the cut out area. •
Adjust the t with a le if required.
Select a 2-3.5 mm 1/8” drill bit depending on •
hardness of material to drill. Smaller diameter holes
will be needed for soft woods and larger diameter
pilot holes will be required if mounting to hard
materials such as berglass (we recommend 3.5
mm (1/8”) for berglass and Aluminum).
With the selected drill bit drill the 4 pilot holes for the •
8 gauge screws used to attach the unit. These are
indicated on the corners of the mounting template.
Connect all cables to the rear of the unit before •
placing the unit into the console.
Firmly secure the unit in place with the 4 x 8 gauge •
self tapping screws.