42
Replacement Procedures
Service Manual
SKOPE BME-N ActiveCore
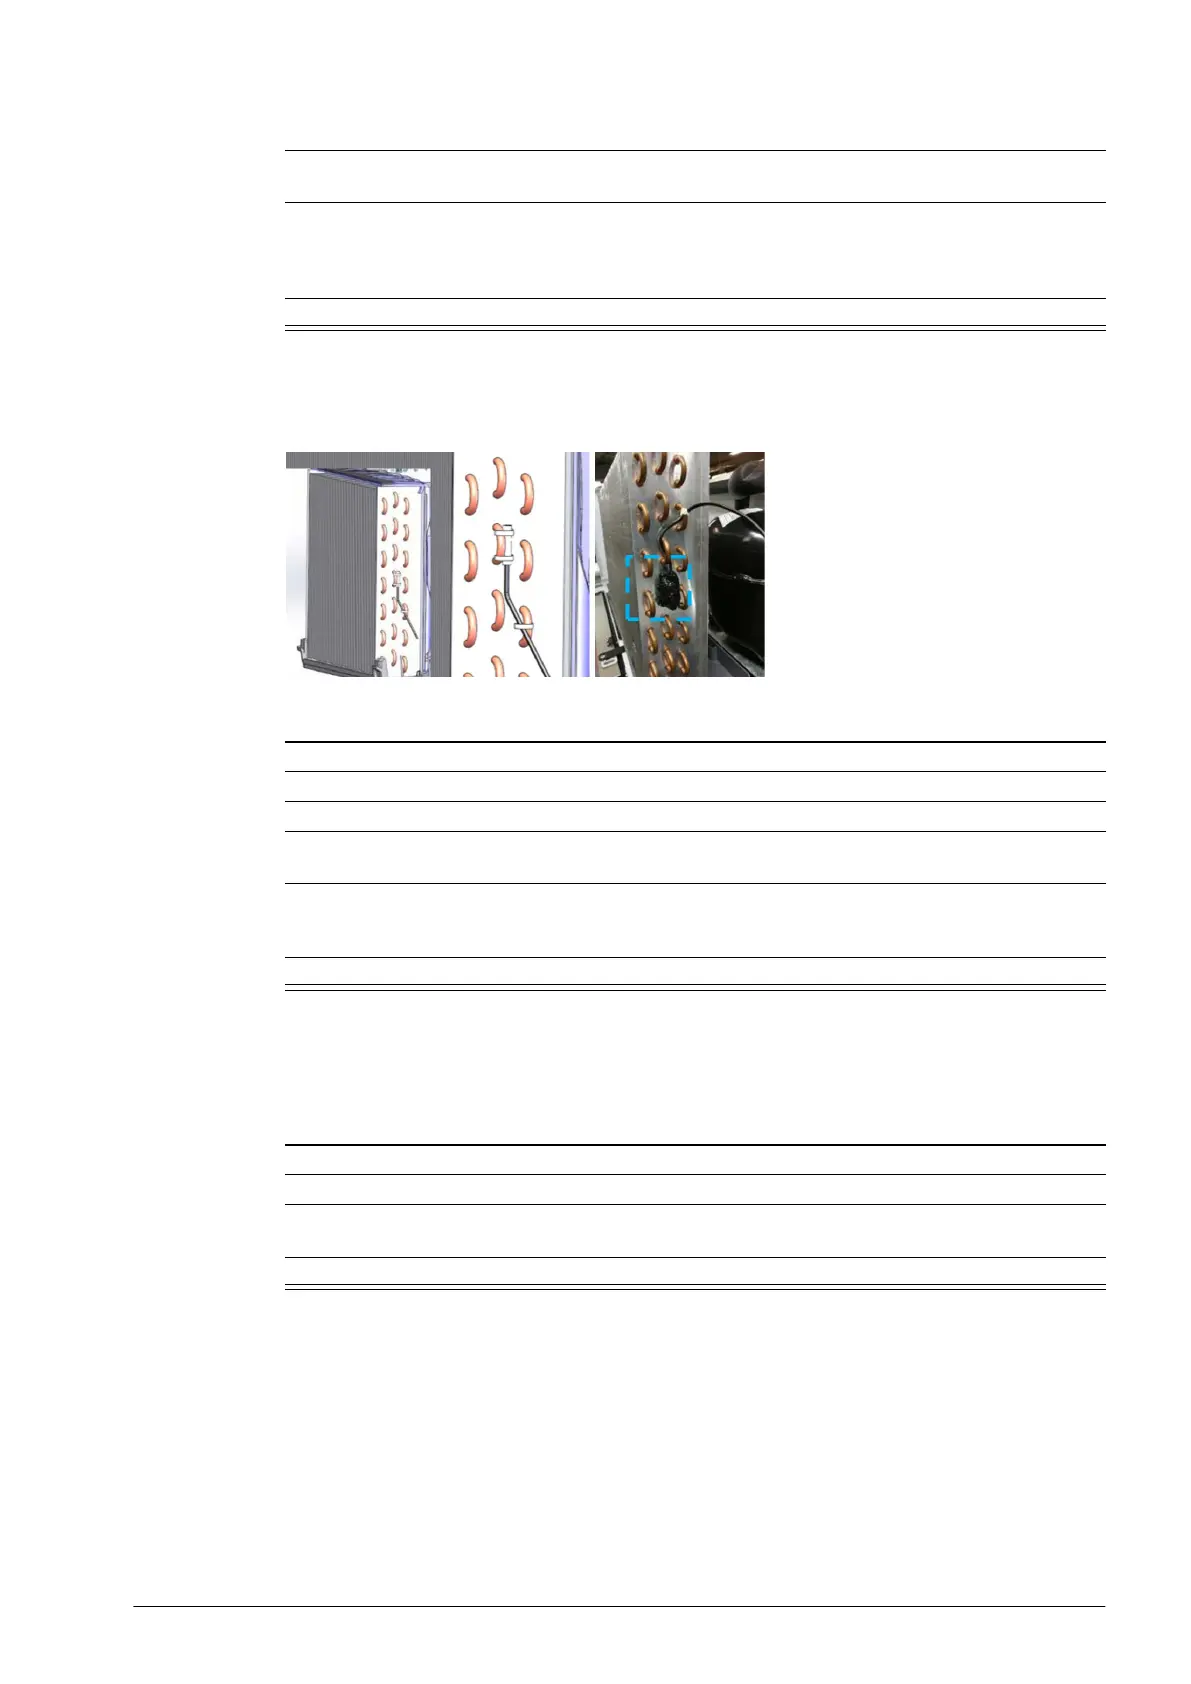
Condenser
Probe
The condenser probe is located on the side of the condenser coil. It monitors condenser
temperature.
Ambient Probe The ambient probe is located on the back of the front kick panel, in front of the condenser coil.
7. Detach the probe from the side of the evaporator coil, and trace the probe cable back to the
cartridge electrics box, cutting cable ties as required, and unplug (see page 33).
8. Following the same path as the original probe, run the new probe to the evaporator coil and
secure with cable ties. Locate the probe in the same location as the original probe (against the
side of the coil above the bottom pipe as pictured above). Plug the probe cable securely into the
electrics box.
9. Reassemble the cartridge and test for correct operation.
Procedure 39: To replace the evaporator probe (continued)
Procedure 40: To replace the condenser probe
1. Disconnect the cabinet from the mains power supply (see page 22).
2. Remove the refrigeration cartridge.
3. Remove the cartridge cover (see page 34).
4. Detach the probe from the side of the condenser coil, and trace the probe cable back to the
cartridge electrics box, cutting cable ties as required, and unplug (see page 33).
5. Following the same path as the original probe, run the new probe to the condenser coil and
secure with cable ties. Place the probe in the same location as the original probe (as pictured
above) and insulate with cork tape. Plug the probe cable securely into the electrics box.
6. Reassemble the cartridge and test for correct operation.
Procedure 41: To replace the ambient probe
1. Disconnect the cabinet from the mains power supply (see page 22).
2. Remove the front kick panel to access the probe.
3. Unplug and replace probe. Ensure the probe is located in the same location as the original probe
and secured in place with a cable tie.
4. Reassemble and test for correct operation.