EasyManua.ls Logo

Sky-Drones SMARTAP PRO - SmartAP PRO Installation; Mounting the Board; Connections

Sky-Drones SMARTAP PRO
152 pages
Print Icon
To Next Page IconTo Next Page
To Previous Page IconTo Previous Page
Loading...
Specifications
Installation
Mounting the board
Connections
External GNSS / MAG
GPS Receiver
RC Receiver
RSSI Monitoring
Motors ESC
Telemetry module
OSD Video
Electromagnetic sounder
Power supply
LED & Buzzer
Pressure sensor foam
Dimensions
SmartAP PRO v .2 pinout
SmartAP PRO v .1 pinout
SmartAP PRO v .0 pinout
Installation
WARNING!
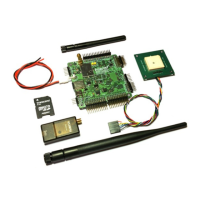
1. Do not power on the board without gps and wireless telemetry modules’ antennas connected!
2. Do not disconnect antennas when the board is powered on!
Mounting the board
Mount your board on your copter airframe. It's highly recommended to mount the board as close to the geometrical center of the copter as
possible. Mounting should be done with four 3 mm nylon screws. Add rubber spacers to reduce motors’ vibration noise.
Note the "FWD" arrow to install the board properly (`FWD` = Forward).
Connections
Connect the general peripherals as shown on the diagram below:
Introduction
SmartAP PRO
SmartAP MAX
SmartAP PDB
SmartAP GNSS
SmartLink
Autopilot configuration
Flying
Support
Revision history
SmartAP AutoPilot User’s Guide Installation
Sky-Drones - SmartAP Flight Control Systems 17 / 151

Table of Contents

Related product manuals