31
Skydio X2D INTL - Operator Manual © 2023 Skydio, Inc. All rights reserved.
Android Team Awareness Kit (ATAK)
Pre-flight
The integration of the Skydio Enterprise Controller (model-S) and the Android Team Awareness Kit (ATAK) app allows
you to seamlessly monitor your Skydio fleet. ATAK provides geospatial information about your drones and controllers
for increased situational awareness in the field. To access the Skydio ATAK oine integration, ensure that you are
using the correct Enterprise Controller model. Locate the model on the back of the Enterprise Controller. Compatible
units will include SBR or S at the end of the model number.
Radios that have been tested with Skydio ATAK oine integration include:
• Silvus
• TrellisWare
• Persistent Systems
NOTE: You must connect to your network using a USB-C Ethernet cable. WiFi connections are not available. Your radio
must include Dynamic Host Configuration Protocol (DHCP)
NOTE: When switching between the color and thermal camera feed, viewers of the stream must restart streaming.
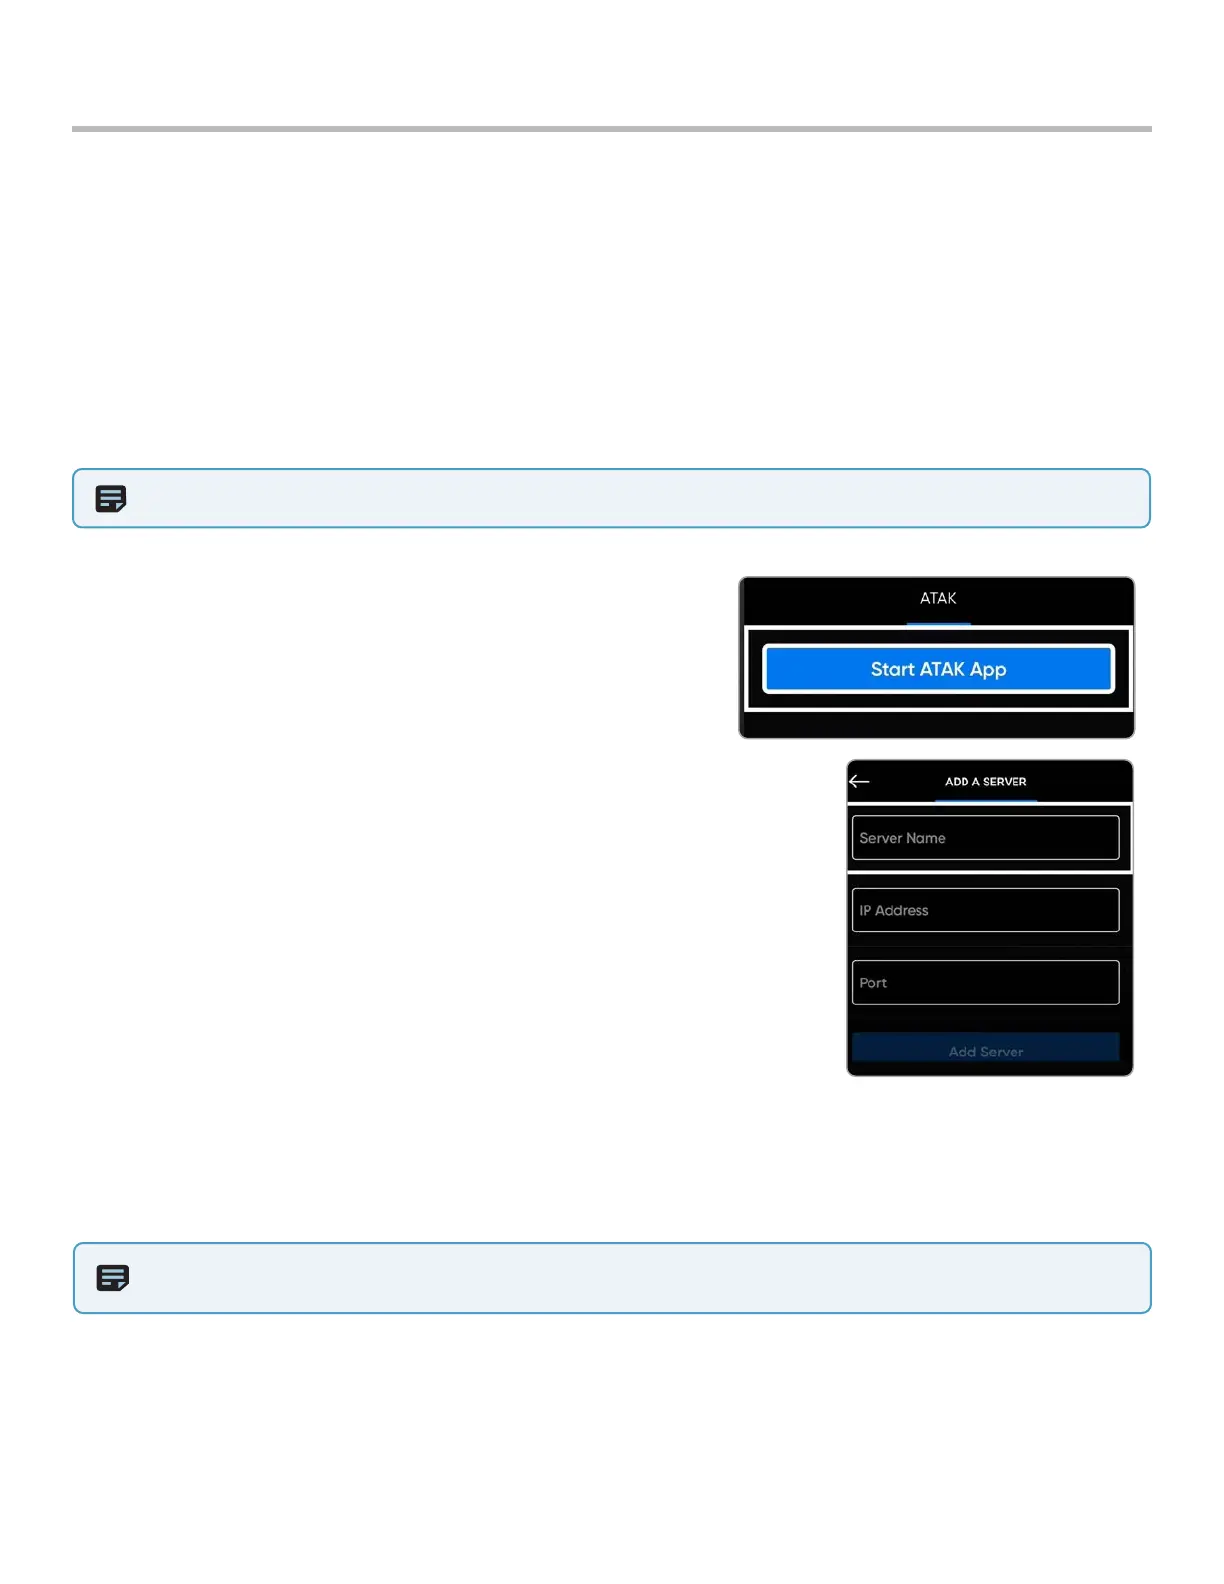
Step 1 - Select the Device settings menu to add the ATAK server
Step 2 - Navigate to the ATAK menu tab and select Start ATAK App
Step 3 - Select Network Connections
Step 4 - Select Add A Server
Step 5 - Enter the required fields
• Server name
• IP address
• Port
• TCP/SSL certificates
Step 6 - Once connected, the server will appear under Known ATAK Servers
• Select the Connection Status icon to view the connected servers
Step 7 - Select the RTSP tab
Step 8 - Toggle on Stream Enabled and complete the required fields
• Stream Name
• IP Address
• Port
Step 9 - Select the Device settings menu
Step 10 - Select the ATAK tab
Step 11 - Select Network Connections
Step 12 - Select the name of the server to connect